|
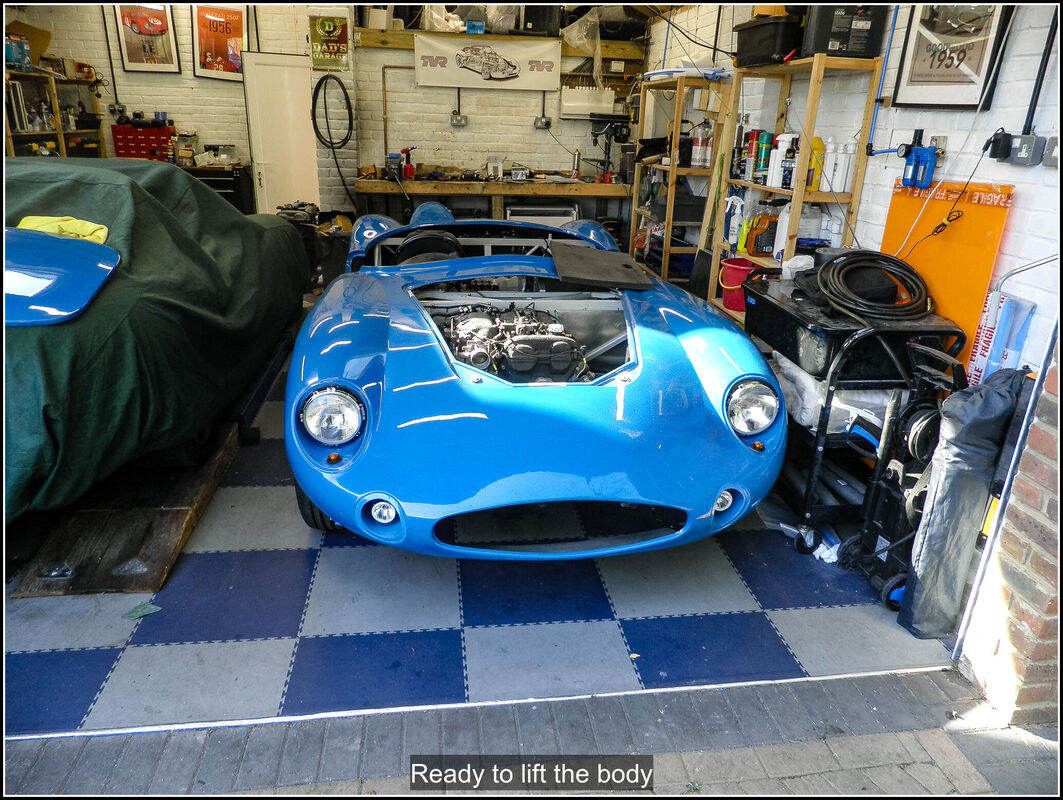
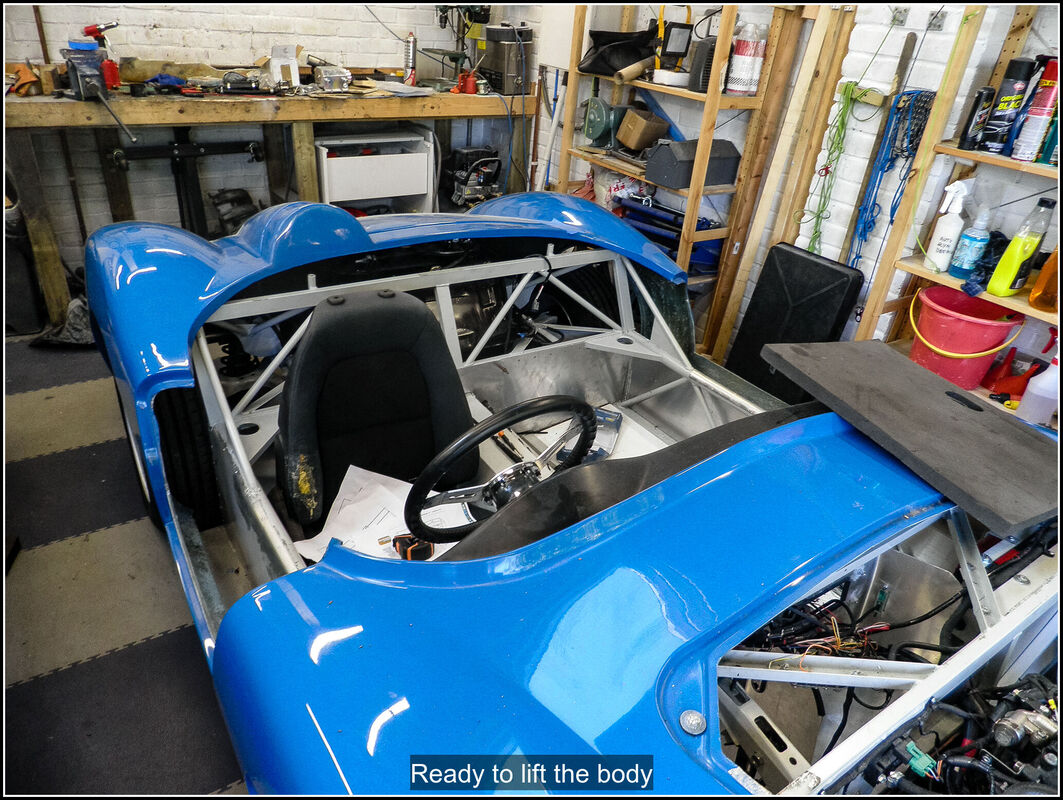
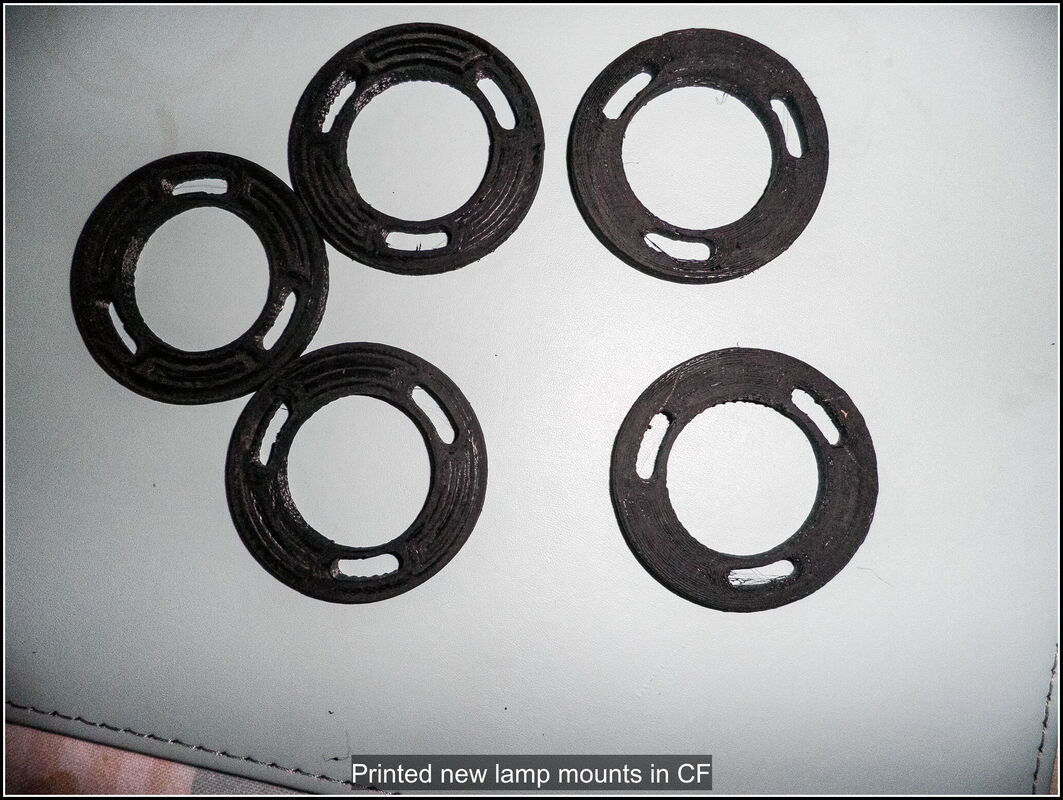
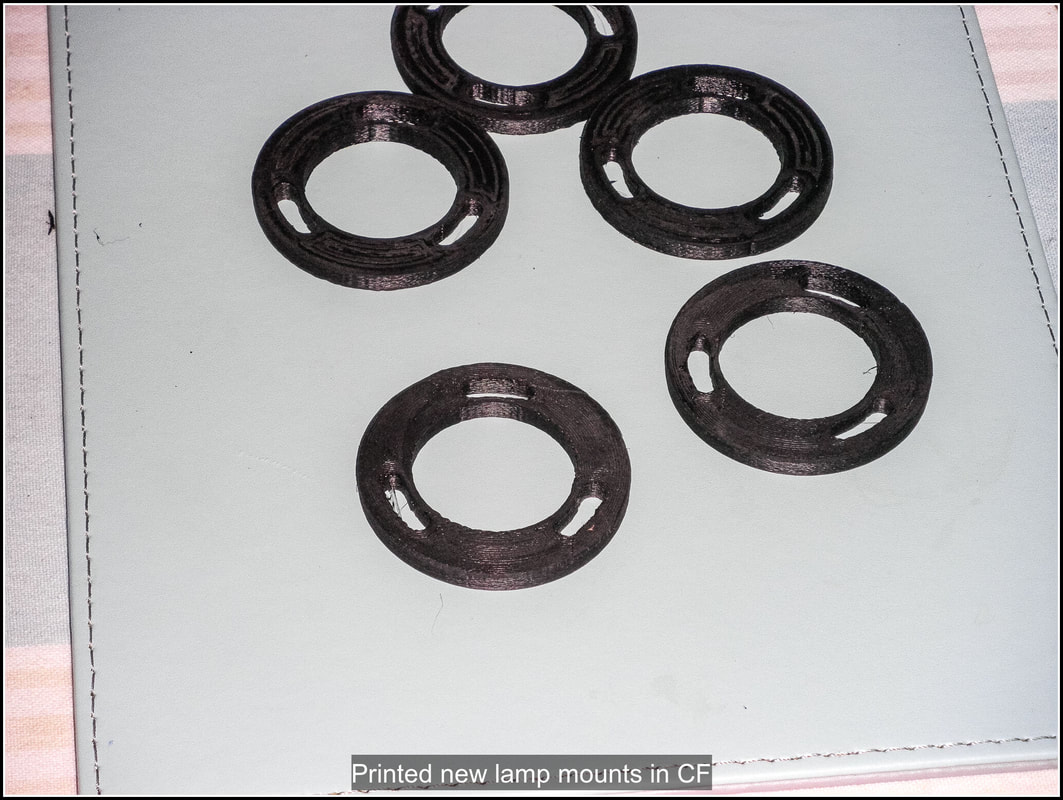
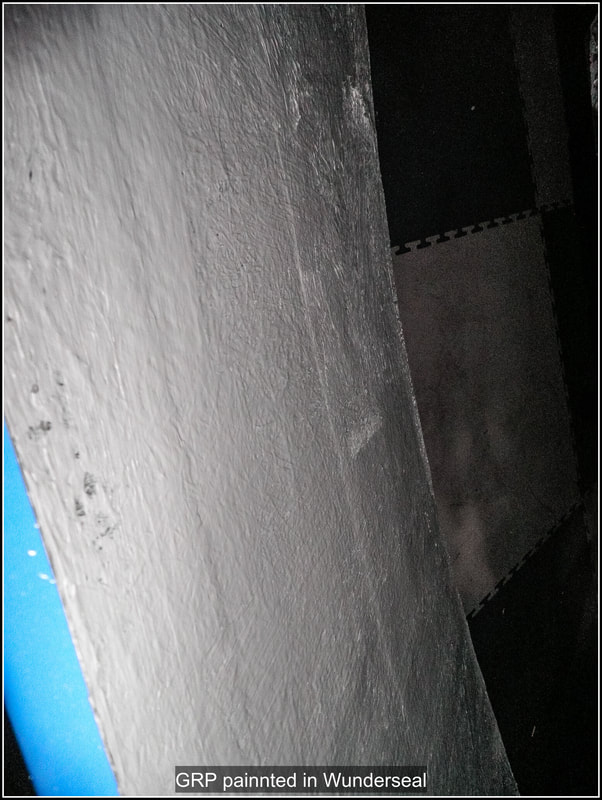
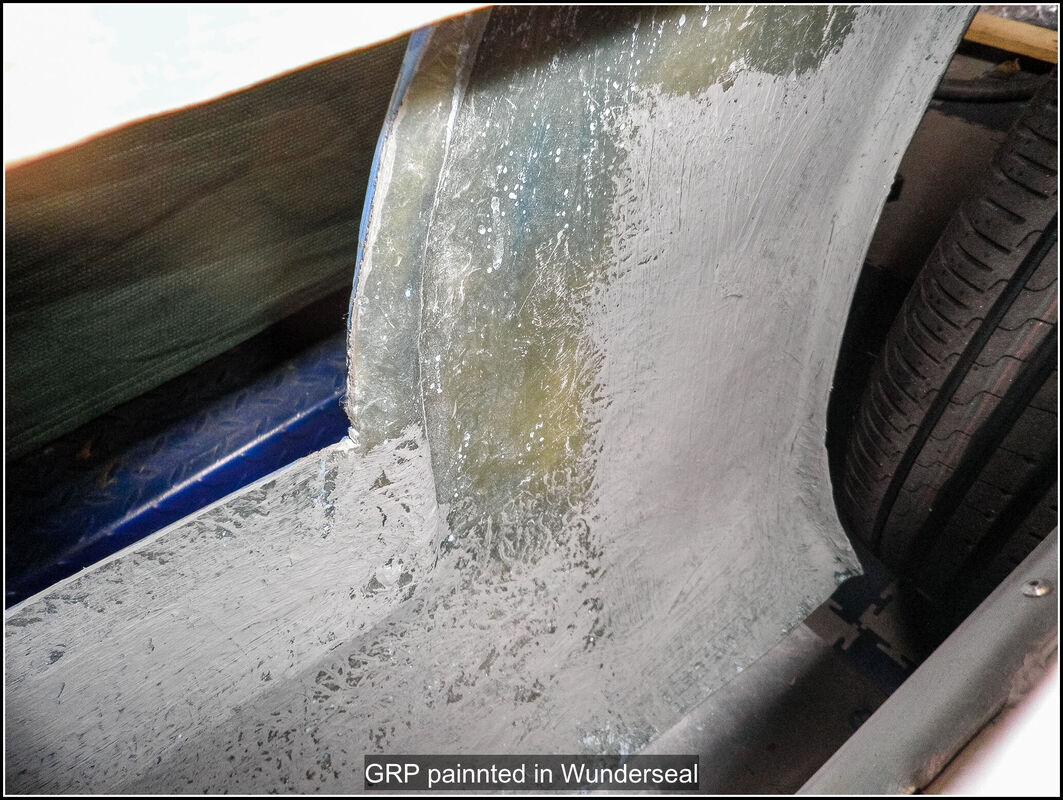
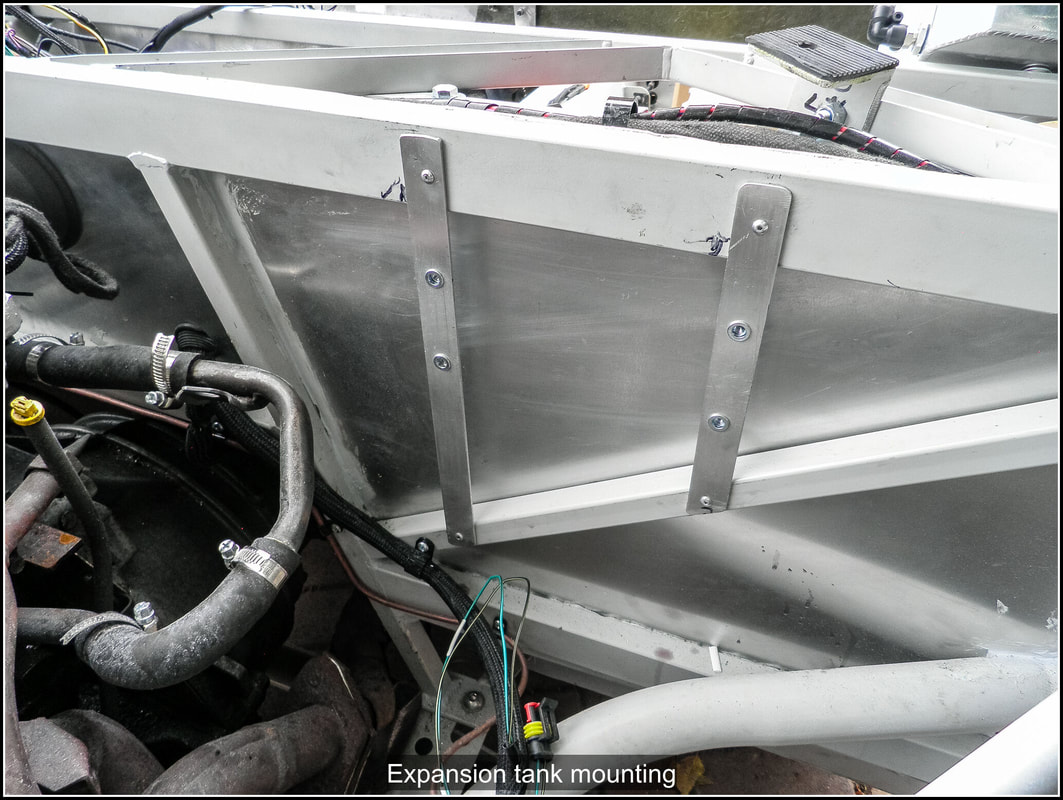
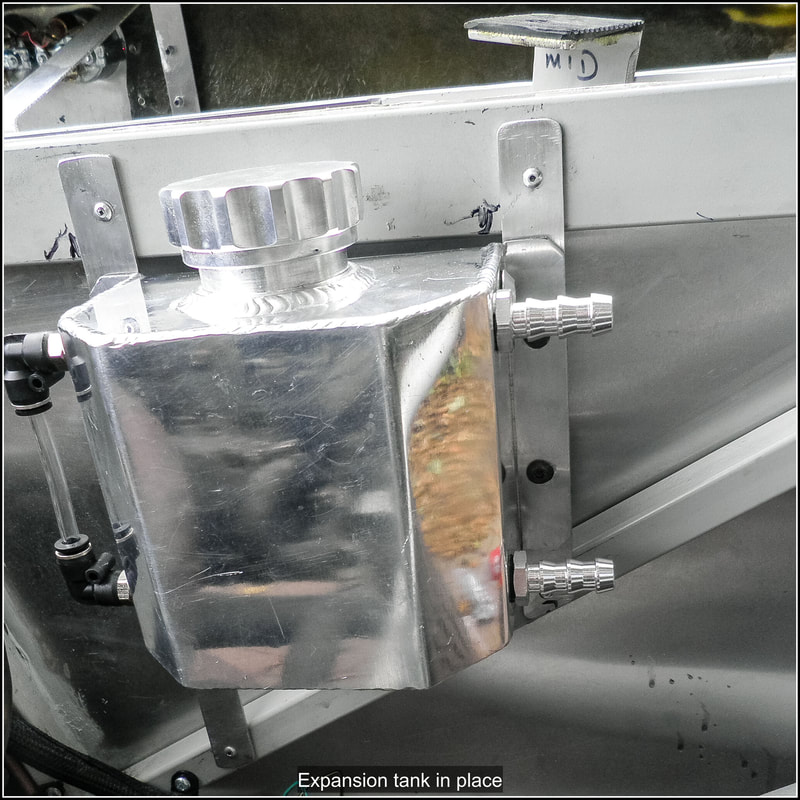
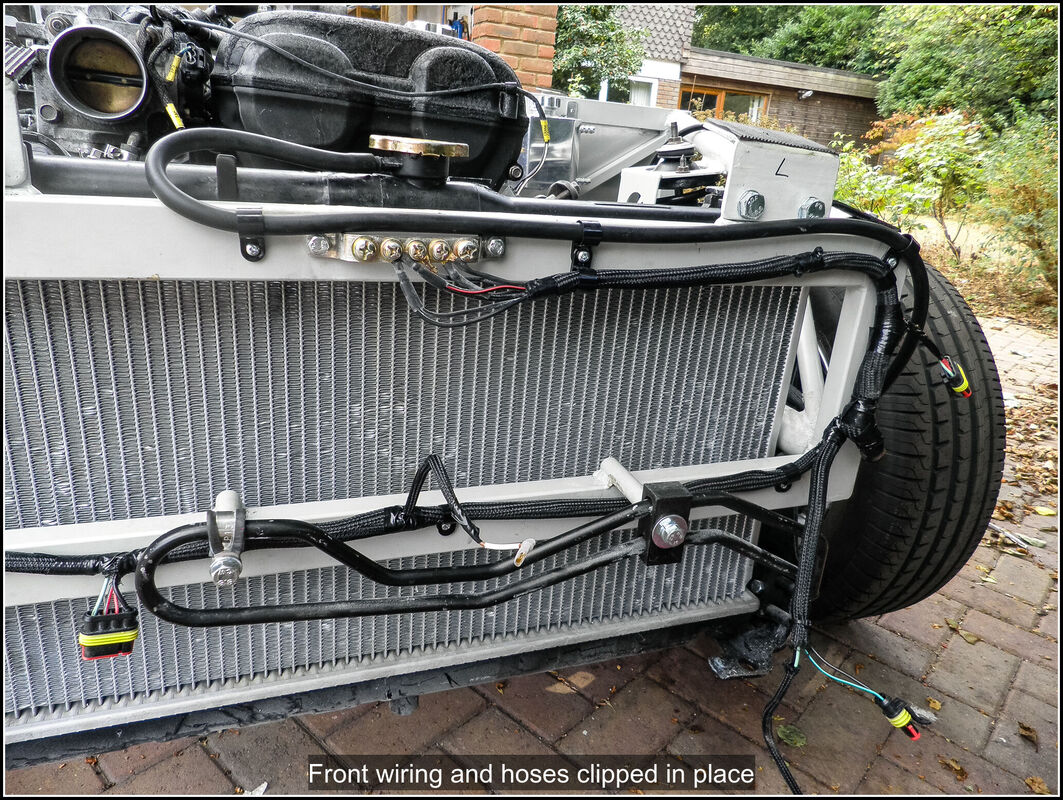
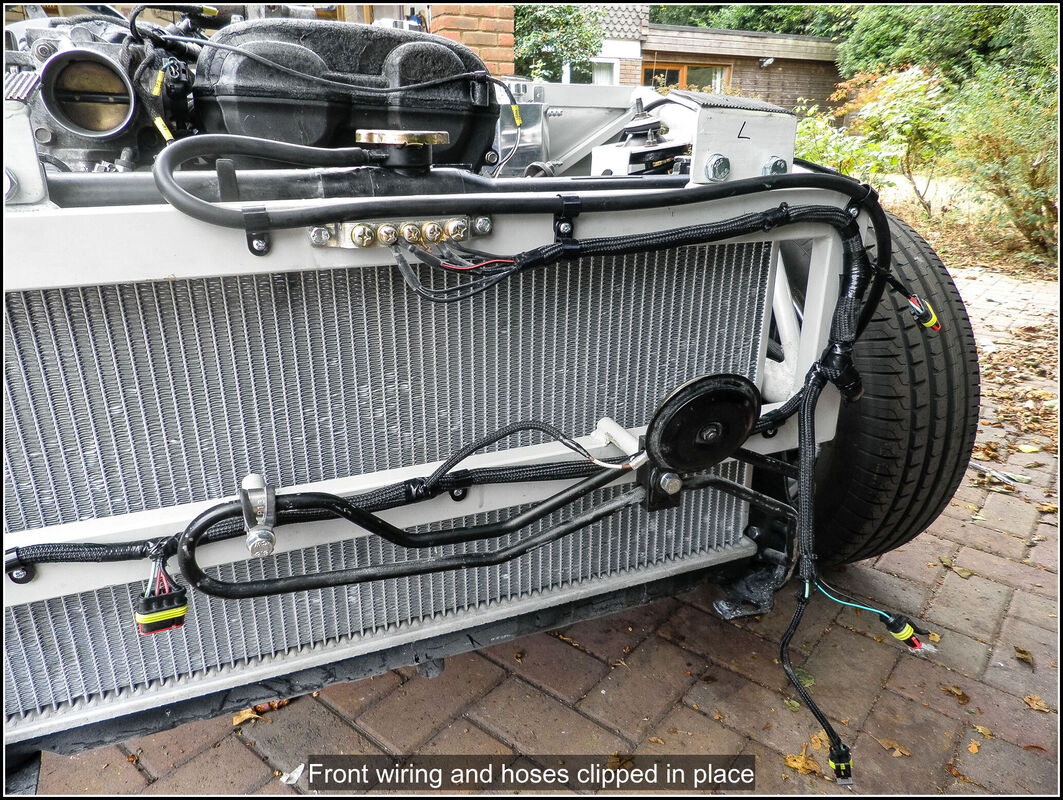
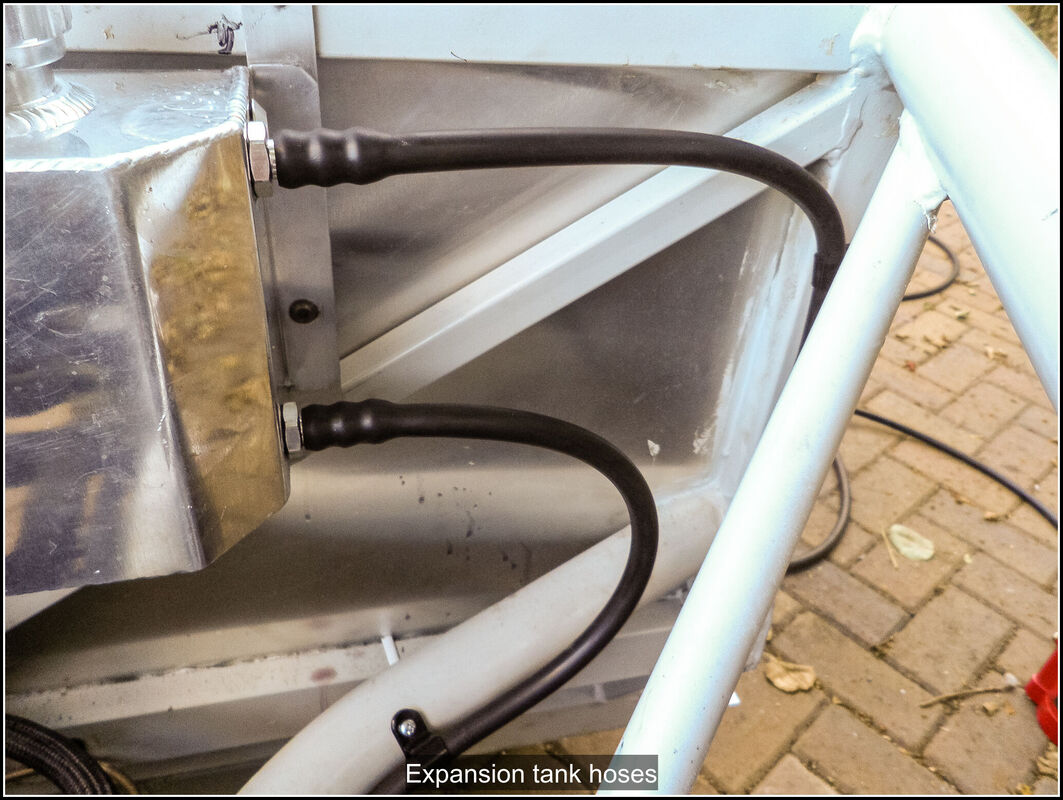
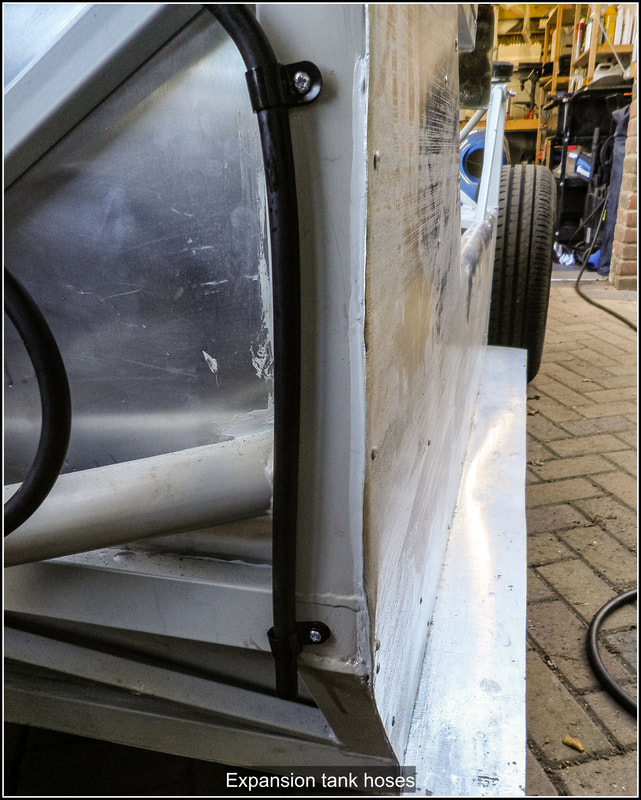
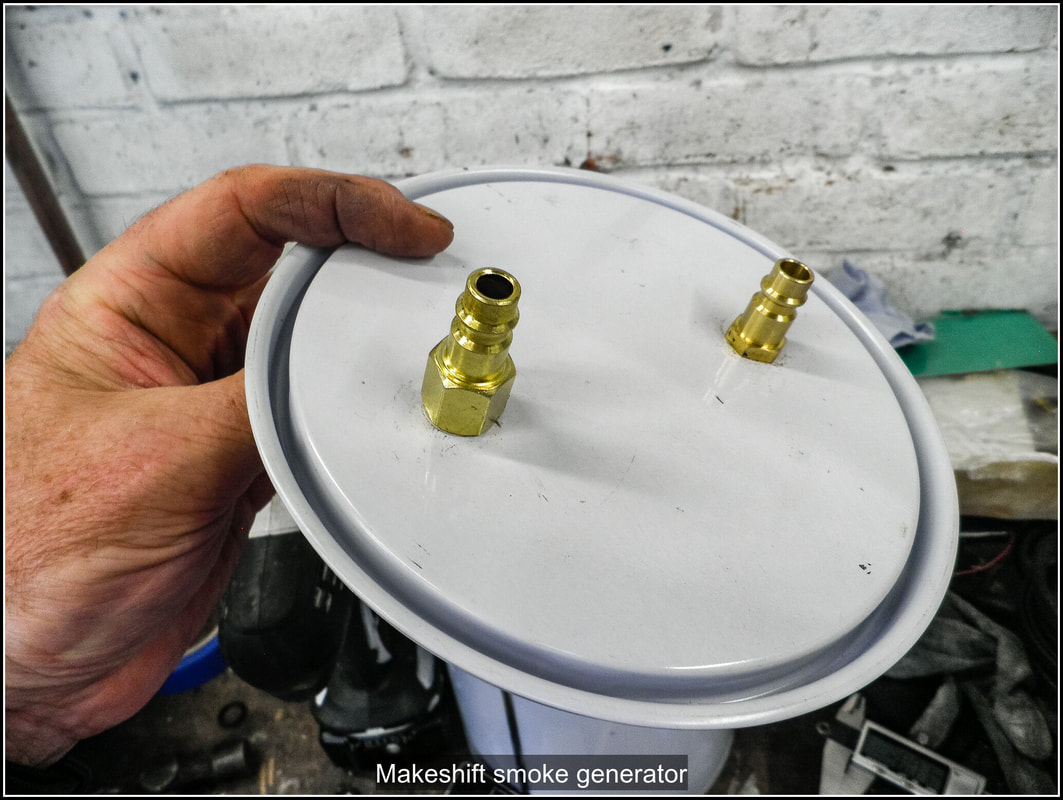
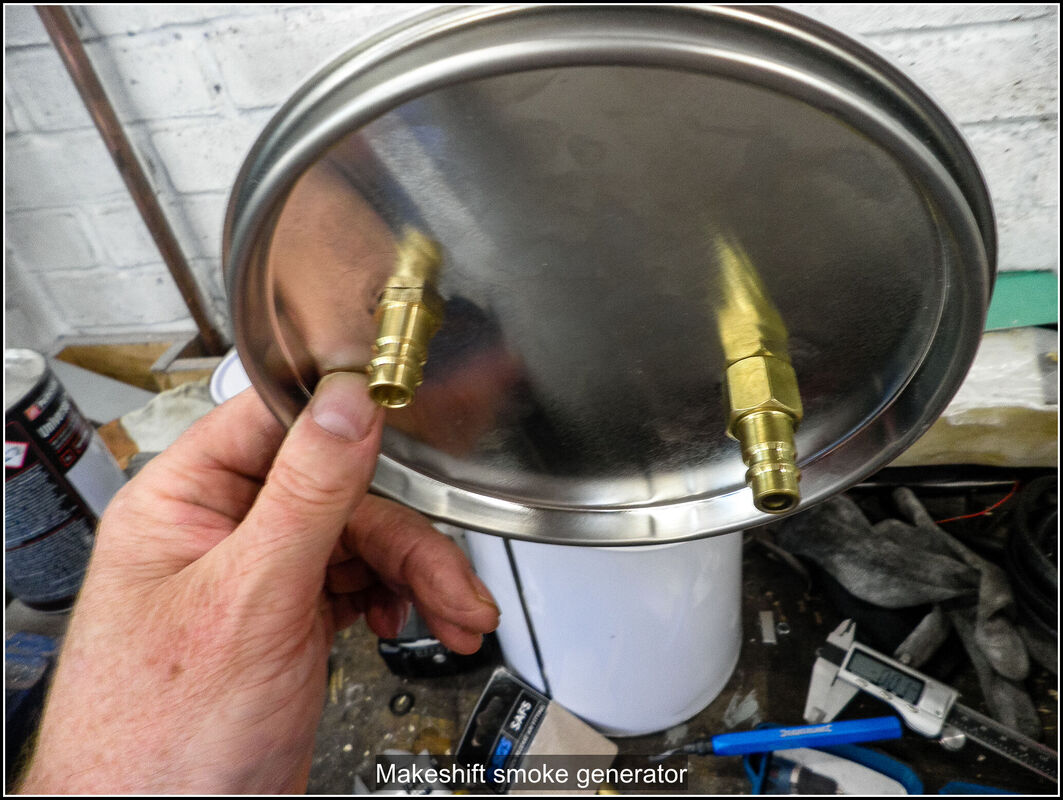
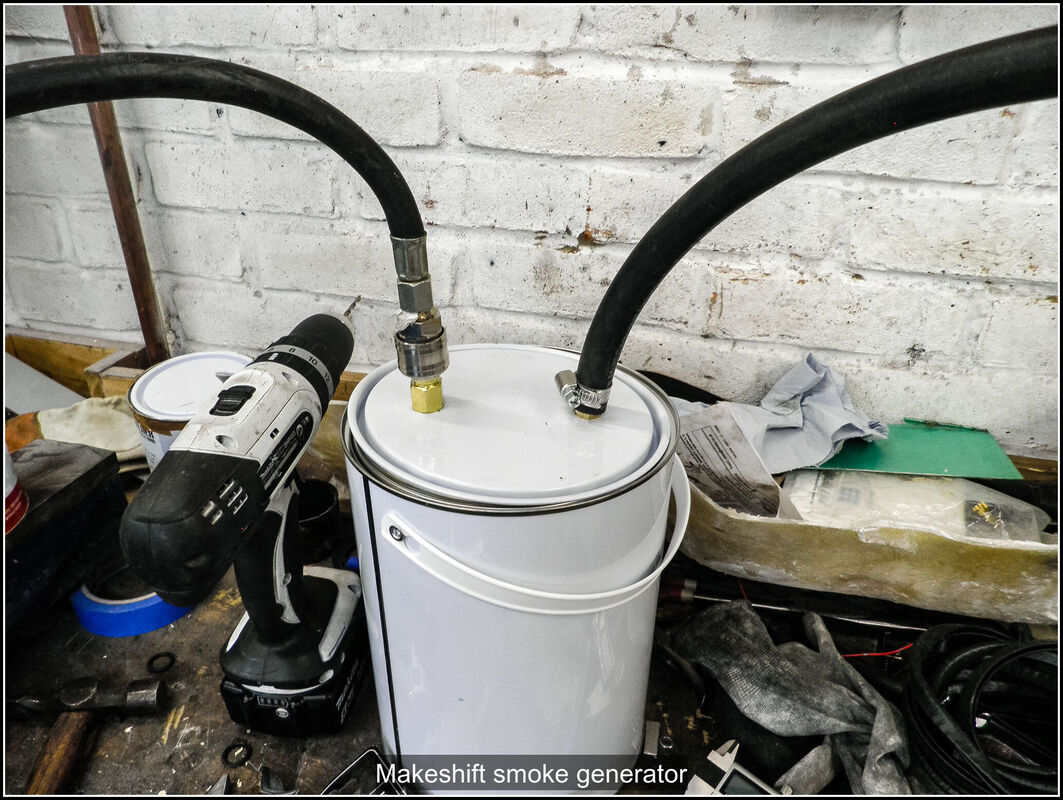
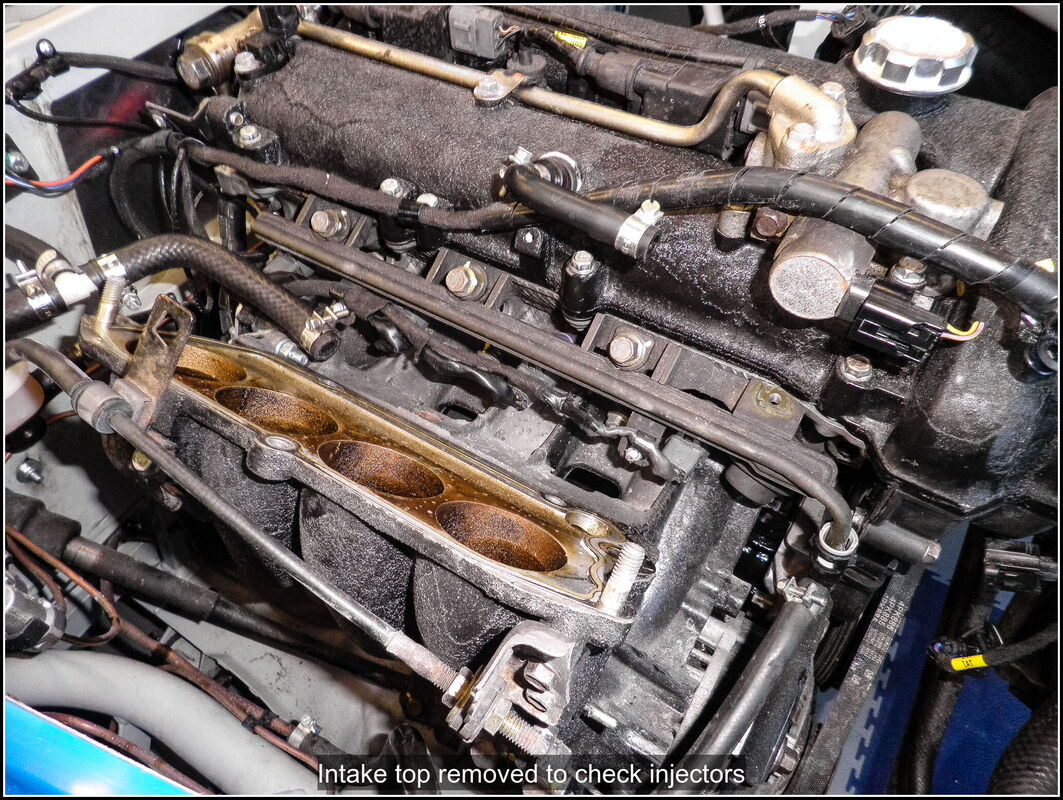
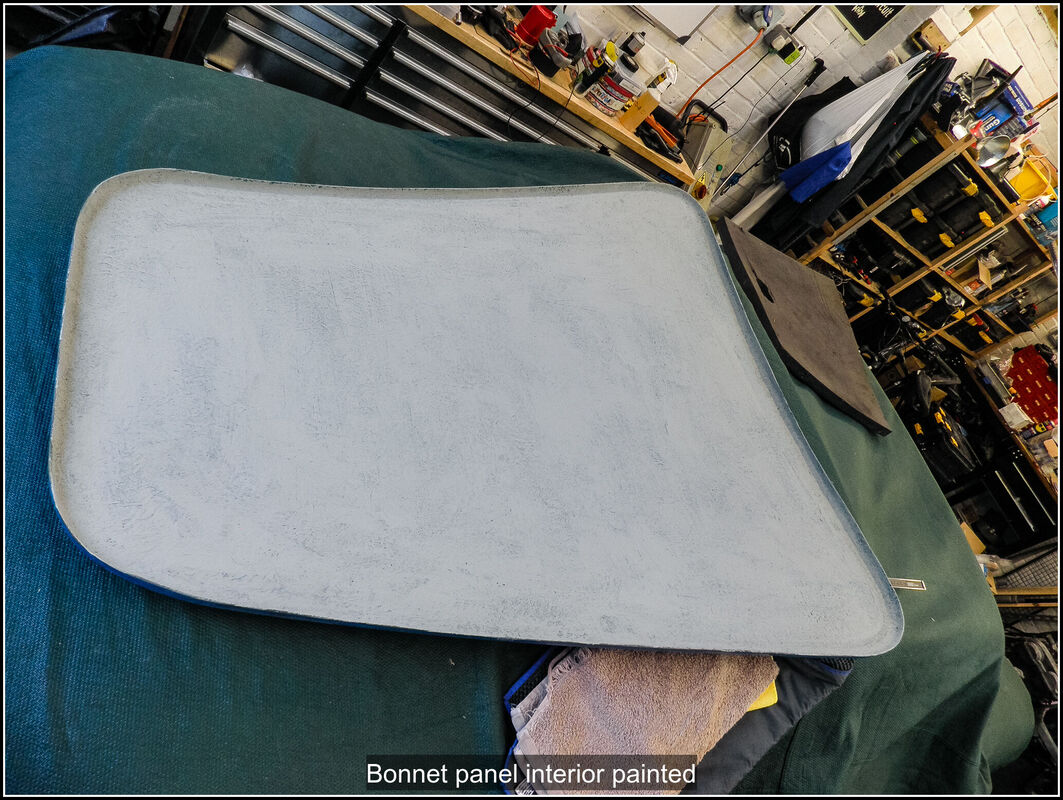
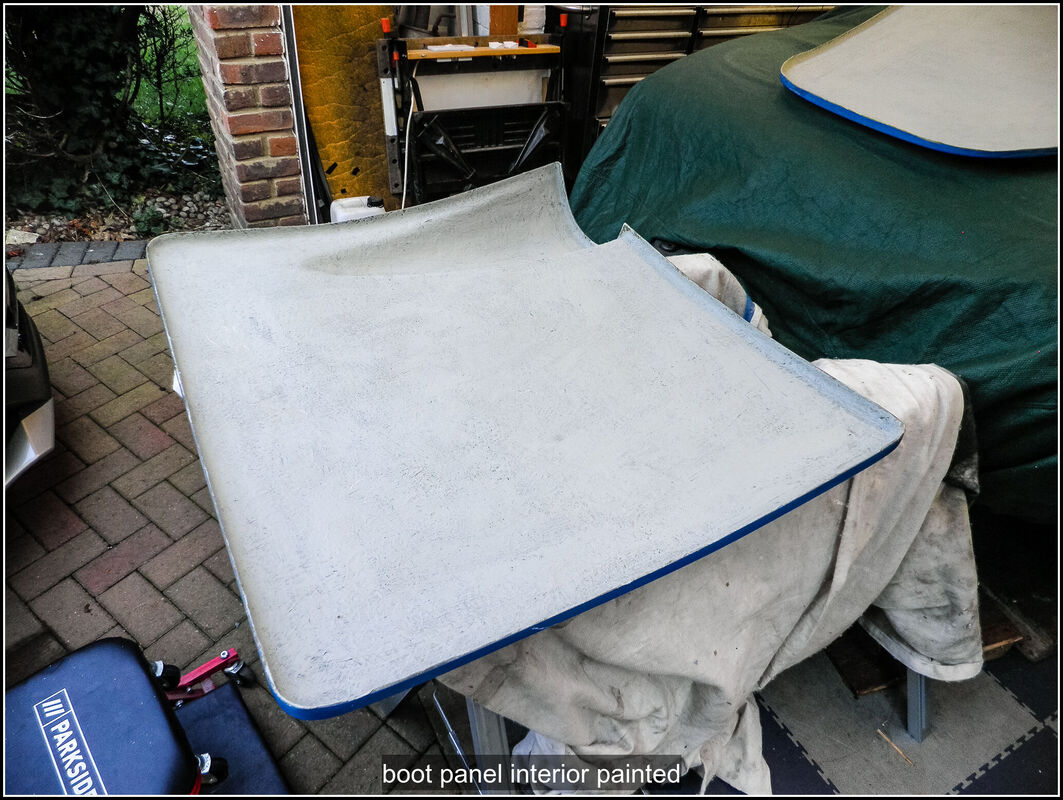
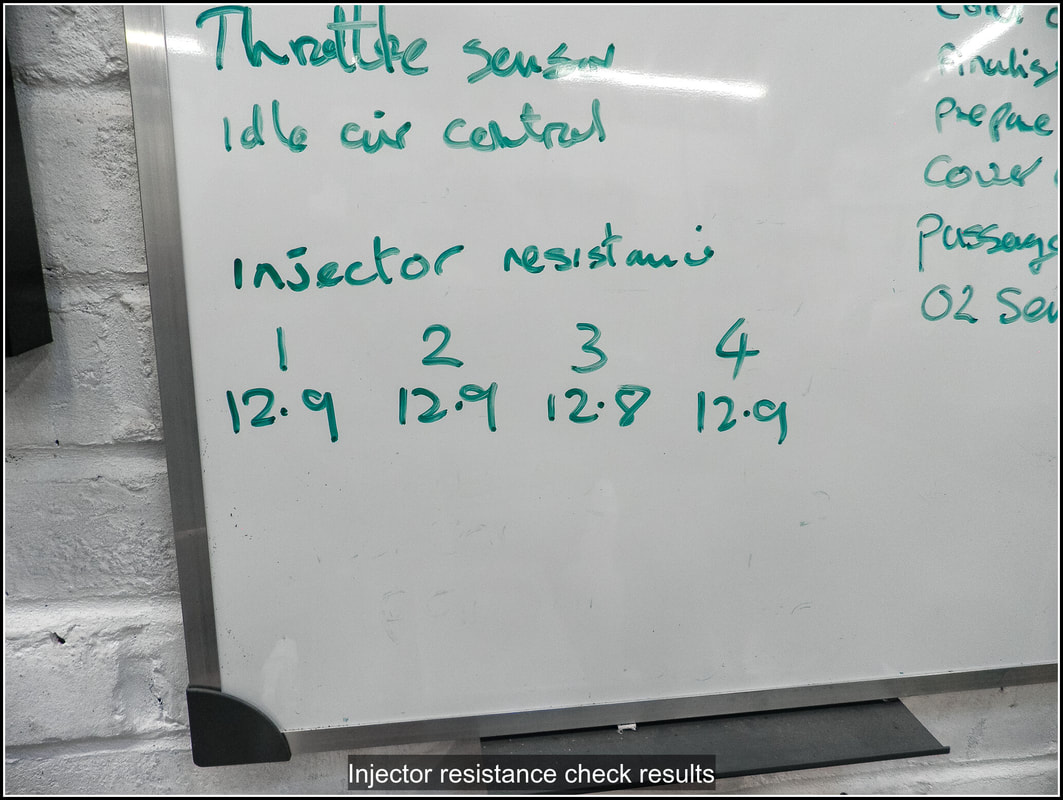
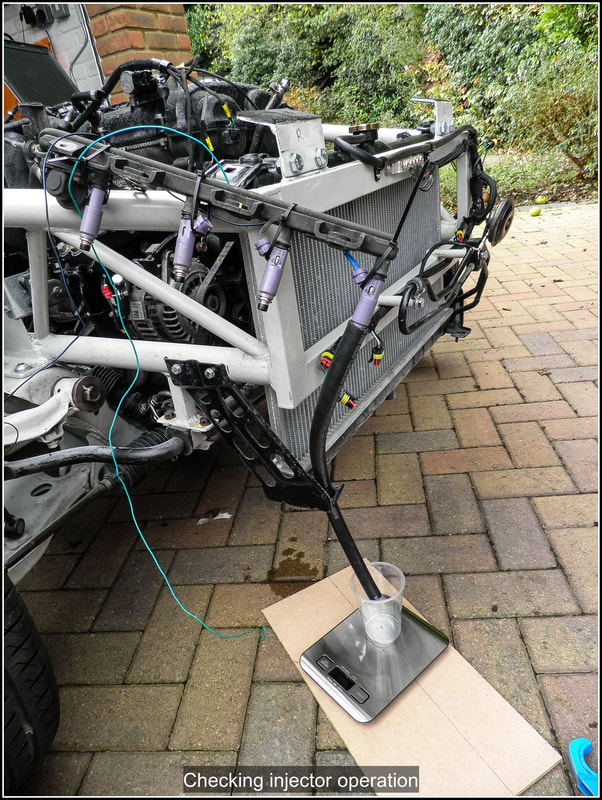
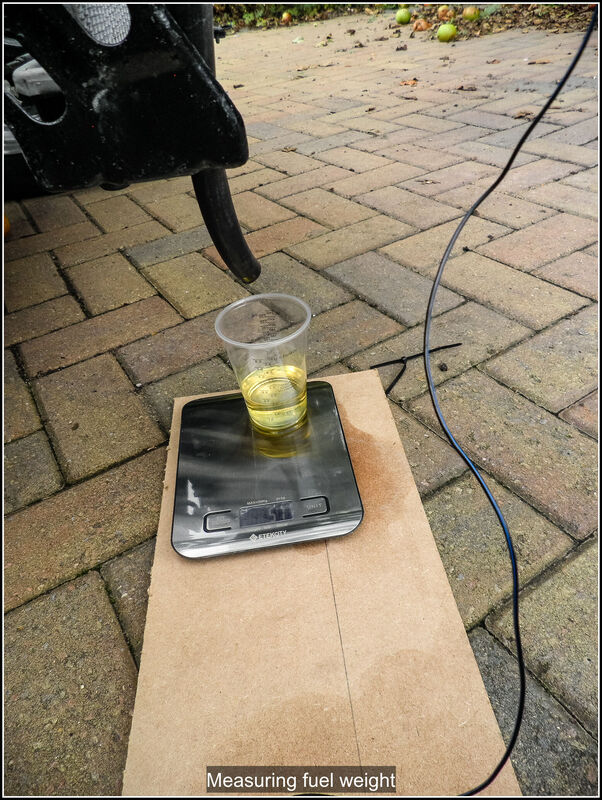
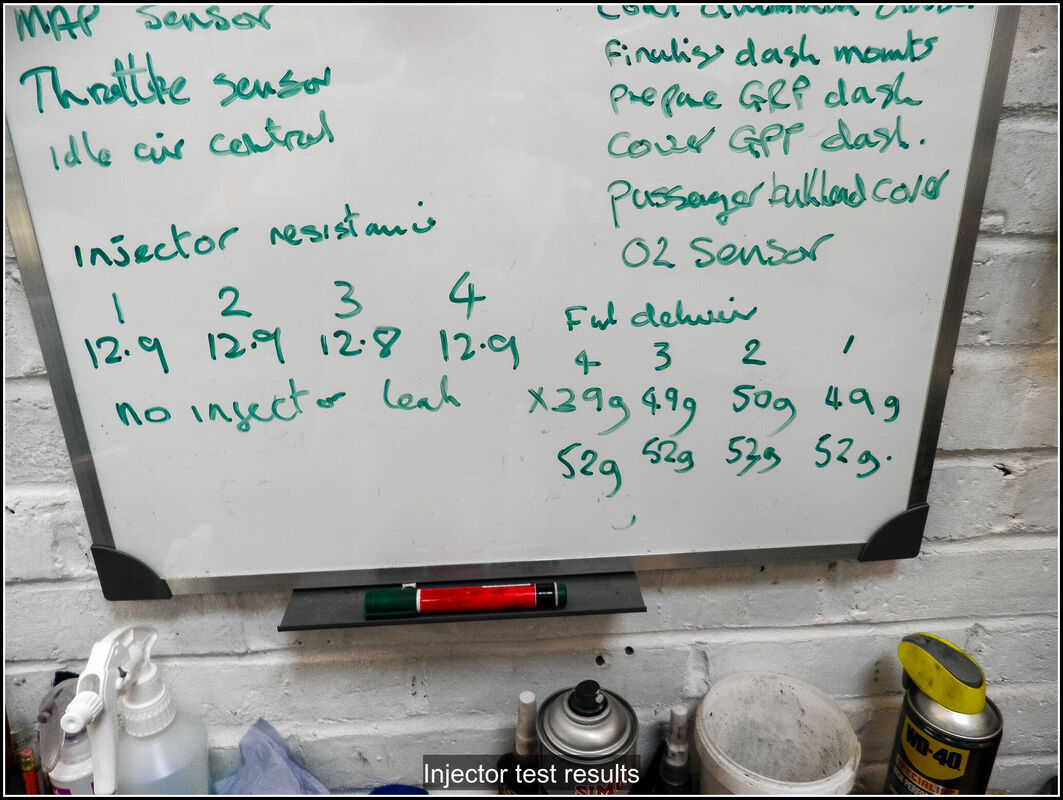
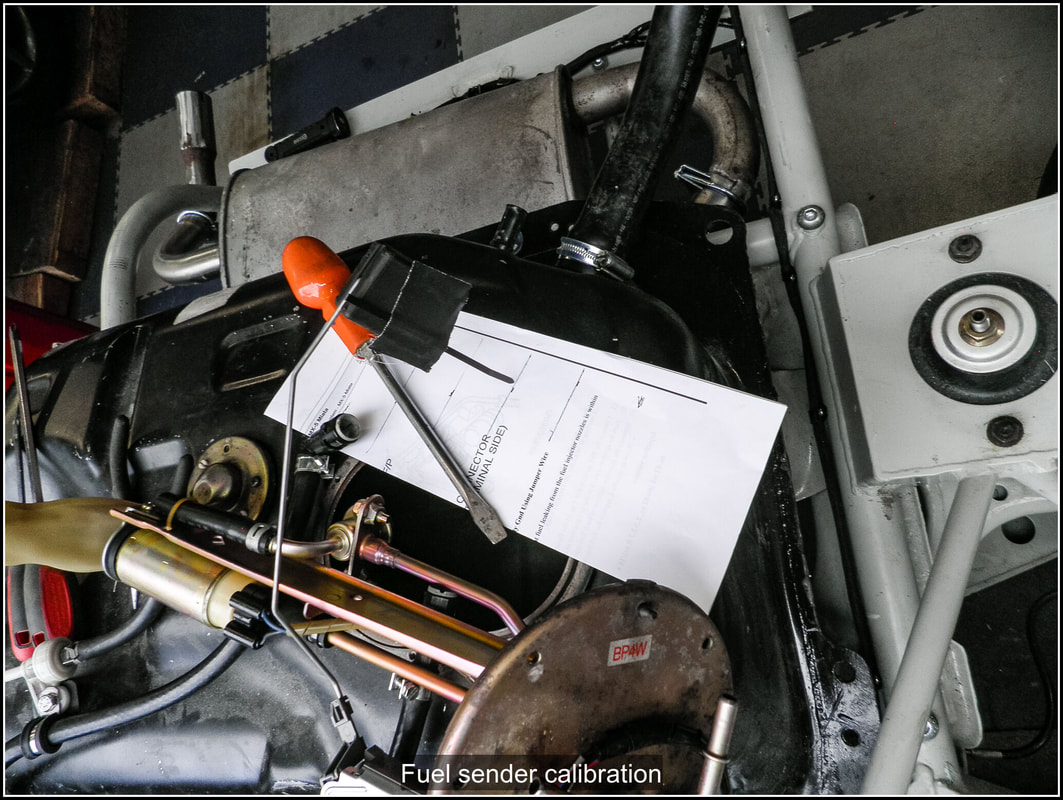
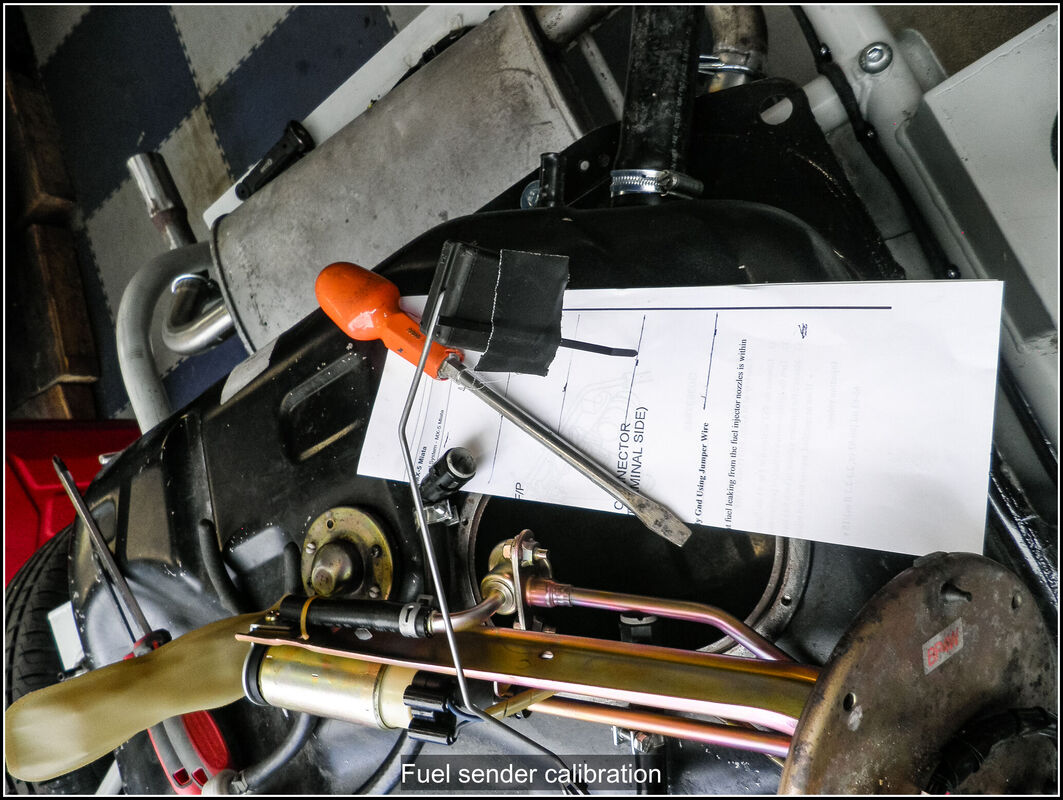
It's over a month since my last update. Free weekends seem to be in short supply at the moment! 10 August 2022 Ordered new spark plugs and an O2 sensor. I also ordered some bits to make a smoke generator to check if there is an air leak on the intake of the engine. I ordered some plumbers smoke pellets and an empty paint tin. I've got a airline connector I can use to pressurise the tin, just need a bit of hosing to connect to the intake. I'll 3D print something to connect the hose to the tin lid. 13 August 2022 A few weekends off with TVR related activities, it is currently about 32C in the UK, which we are not used to. Back in the garage and the first job was to reassemble my lifting frame and get the body off. It took a few attempts to get the balance point right but it came off, I wheeled the chassis outside and lowered the body down on to my saw horses with some wood to take the weight. Broke open my tin of sealant to paint the inside of the fibreglass. I'm using a product from Car builder Solutions called Wunderseal. It's a very thick rubber like paint. I got to it and slapped it on. I got through the 2 tins I have and there was still more to do, I think another 2 tins will do it. It covers well and leaves a nice grey finish. I got on with what I should have done at the start and removed my lights so I could paint around those areas too. I found that a couple of the rings I'd printed for the rear lights had cracked which was a bit disappointing. I've been playing with a new filament recently impregnated with carbon fibre which makes for very sting prints so I will give that a go. Ordered some more Wunderseal and pipe for my expansion tank. 14 August 2022 Too hot to work in the garage today so spent a few hours printing off new rear lamp mountings. I used a carbon fibre impregnated filament called Apollox. It needs quite high temperatures which is pushing my printer to the top of it's limits. Happy with how they've come out, I've done a bit of clean up on them to remove some sharp edges. I am going to sand down the rear of the car where the lamps mount to remove any unevenness as the way the originals cracked looks like the inside is not very flat. I might add a thin layer of rubber or foam to cushion them a bit. 21 Aug 2022 Took the bodyshell off this afternoon, sanded the backs of the lights to make them smooth and flat. Applied more Wunderseal, found it was easier with the body shell hanging from the winch, dropped it down on to the sawhorses so I could get to the bits where the frame was lifting the shell. Got through another pot of Wunderseal and just started a second, so in total that's just over 3 pots. I've still got the boot and bonnet to do though so it should be enough. While I was waiting for the Wunderseal to dry I got on and fixed the coolant overflow bottle in place. I'd already made up some mounting strips from aluminium. I trimmed them to the final length and cleaned them up before drilling mounting holes. I marked the chassis and drilled holes there and used pop-rivet to secure them in place. I could then bolt the tank in place. I ran some 8mm id rubber hose from the tank then around to the tank. I clipped it in place with some p-clips. While I was there I also added the last few clips for the wiring harness and sealed up some of the joints with tape just to neaten things up. After putting everything away I rolled the chassis back in the garage and rested the bodyshell back in place. 29 August 2022 Made start on checking the engine prior to starting it up again. Previously when I had run it it was running very rich. I wanted to make some checks to see if I could fix that before firing it up. First up was to check if there was an air leak in the intake. I made up a smoke generator to test it. I got an empty paint time and drilled a couple of holes in the lid to screw in a pair of air line connectors. One went to my compressor, the other I slipped some rubber hose over and taped it into the intake with gaffer tape. I ran a test by connecting everything up and running some air through at very low pressure and sealing up any leaks on the pipe into the intake.Next I dropped a plumbers smoke tablet in the tin and lit it. I placed the lid on the tin and applied a very low pressure to it and checked for leaks. I could not see any smoke and I could tell there was pressure being held when the lid blew off the tin. So test number one passed, no air leaks. I won't be able to work on the car for a while as I am away on holiday until after the 13th September. 14 September 2022 I painted the underside of the bonnet and boot panels with Wunderseal and left them to dry. Next up on my engine checks were the injectors. I removed the intake top so I could get to the injectors and pulled them out and checked the resistance on each. The required resistance according to the Mazda manual is 12-13 ohms. All of them were 12.9-13.0 ohms so all good there. One of the injector connector plugs had a broken tab making it awkward to remove so I released the pins and replaced it with one from my spare engine. I also gave the injectors a quick spray of brake cleaner to clean them up. I bolted the fuel tank and filter back in and connected up the fuel lines. I made up some leads to allow me to connect to the injector and trigger them manually as per the Mazda test procedure but I had to leave it there until next time. There are a couple more checks I can easily do, one is to check for leaks with the fuel system pressurised and the other is to measure the volume of fuel ejected in 15s. 15 September 2022 I positioned the fuel rail so it wouldn't spray fuel all over the engine, I had to unclip the injector wiring to do this. Then I used some tie wraps to hold the injectors in the fuel rail. I hooked up the battery and put some fuel in the tank. Then I turned on the ignition and let the fuel pump run to pressurise the rail and watched the injectors to see if there were any drips or leaks. According to the Mazda manual less than 1 or 2 drips per minute is the limit. I could not see any drips so that was a pass. Next I rigged up some wires that I could plug into an injector and put some tubing over the end of the injector and ran that down to a cup on top of some scales. The test described by Mazda requires the injector to be opened for 15s while the fuel pump is running. On my aftermarket ECU there's no option to run the pump continuously so I changed the time the pump runs when the ECU is turned on to 20s. I ran my injector wires down to a spare battery and the by turning on the ingnition and touching the wires on the battery I could get the injector to open and collect the fuel in the cup and measure the weight of fuel. I used the timer on my phone to measure 15s. Then I went through each injector in turn and recording the weight of fuel delivered. I did a couple of tests on each injector to get an average but they were all pretty close to each other at 50-52g of fuel. It's by no means a definitive test but was good enough for my purposes to check they were delivering approximately the right amount of fuel and weren't leaking. Later I used some values on the internet and converted these weights to volumes. Fuel density varies so the values given had a range of values but 50-52g fell within the range stated by Mazda (66-82ml). I reassembled the fuel rail and connected up the loom and other connectors. I then spent some time programming my fuel gauge with the Fuel Gauge Wizard adapter. The process is to set the dial positions (empty, quarter, half, three quarters and full) with the Wizard. I found this quite tricky as the gauge is heavily damped so I had to wait quite a while to see if the needle had stopped moving. Then set the sender to each position and record the resistance, I did this by pulling the pump/sender unit out of the tank, laying it on it's side so I could move the float to each position. I used a piece of paper and marked the position for empty and full then divided it up for the other positions. Then it was a case of moving the float to the correct position and saving that value in the gauge wizard. It doesn't need to be precise as long as it the most important value is empty! I can always adjust it later on when I actually fill the tank. I think I've tested and checked everything I can so I need to have another try at running the engine. I have a new O2 sensor and spark plug to fit so I'm hoping that should be enough.
0 Comments
|
AuthorThis is my first kit car although I've messed about with cars all my life. Archives
November 2023
Categories |

 RSS Feed
