|
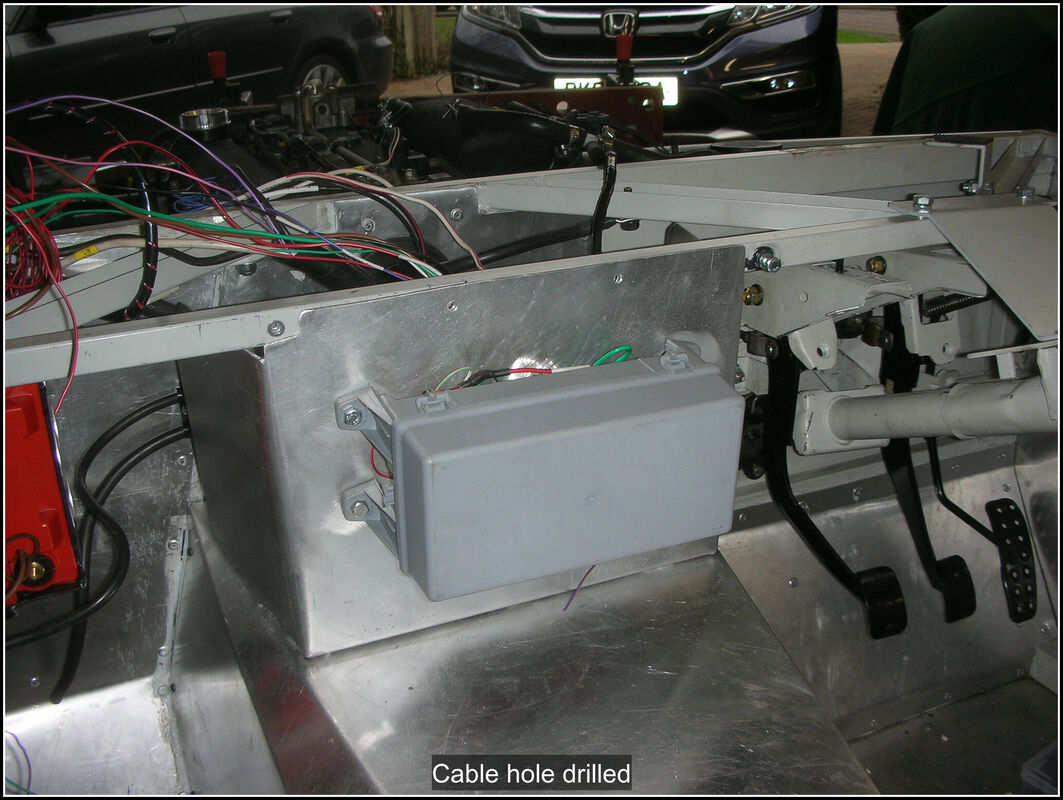
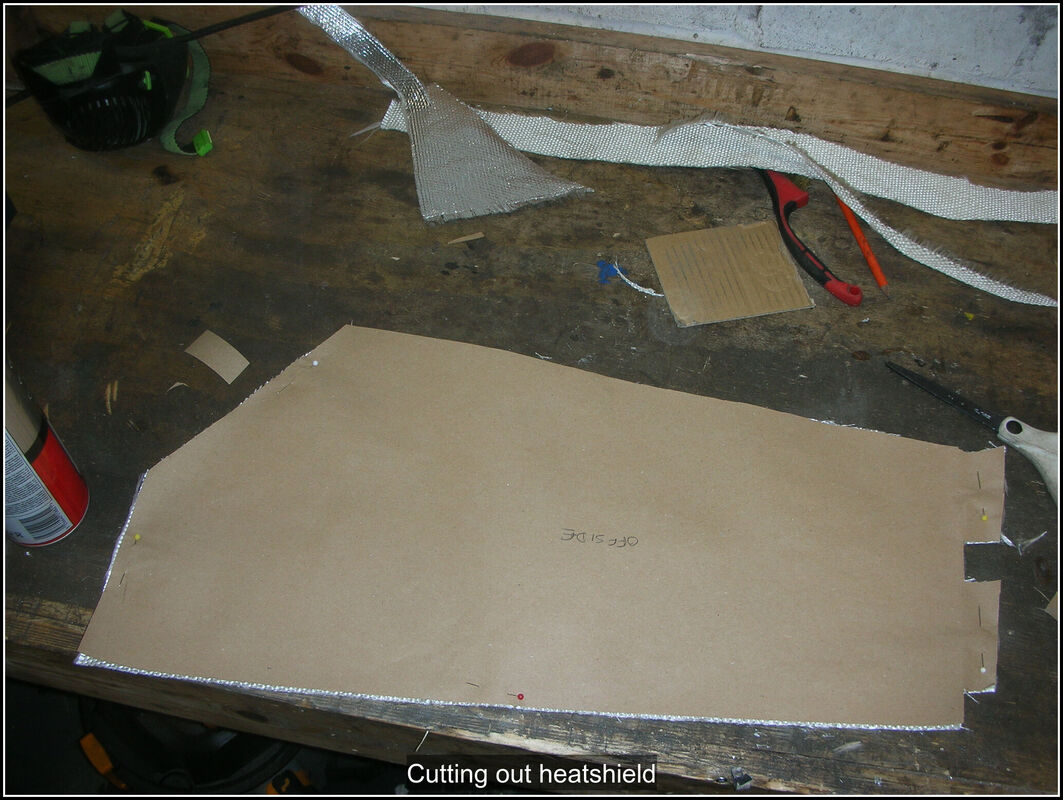
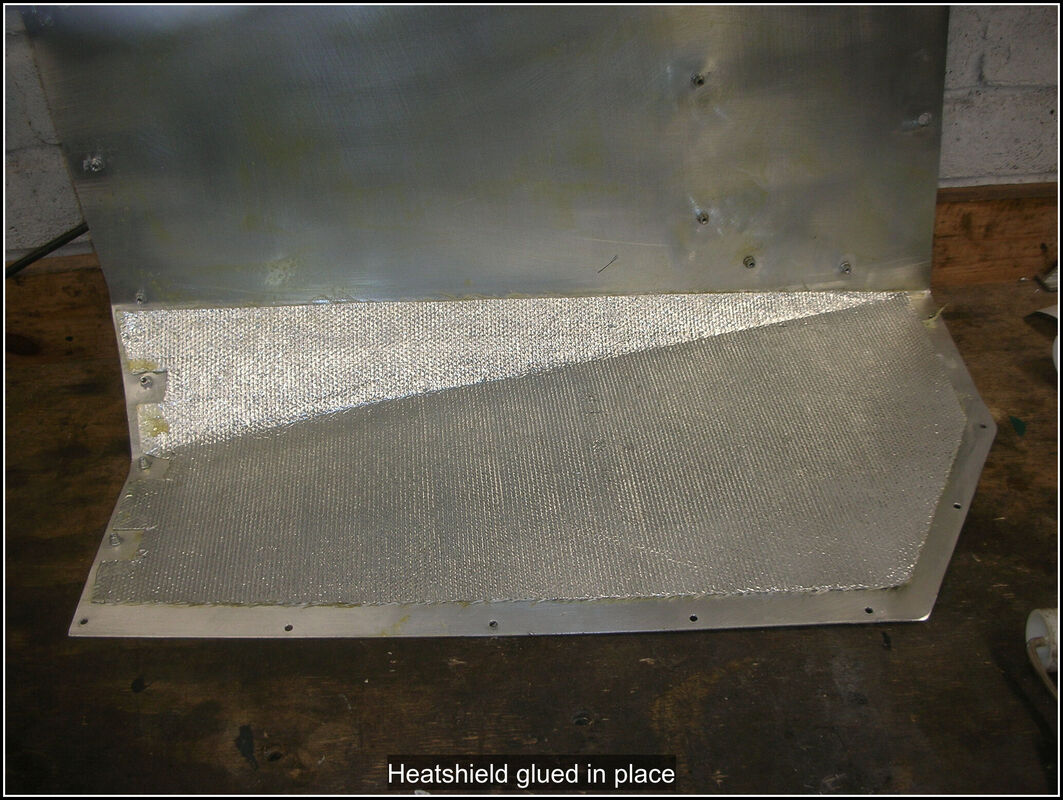
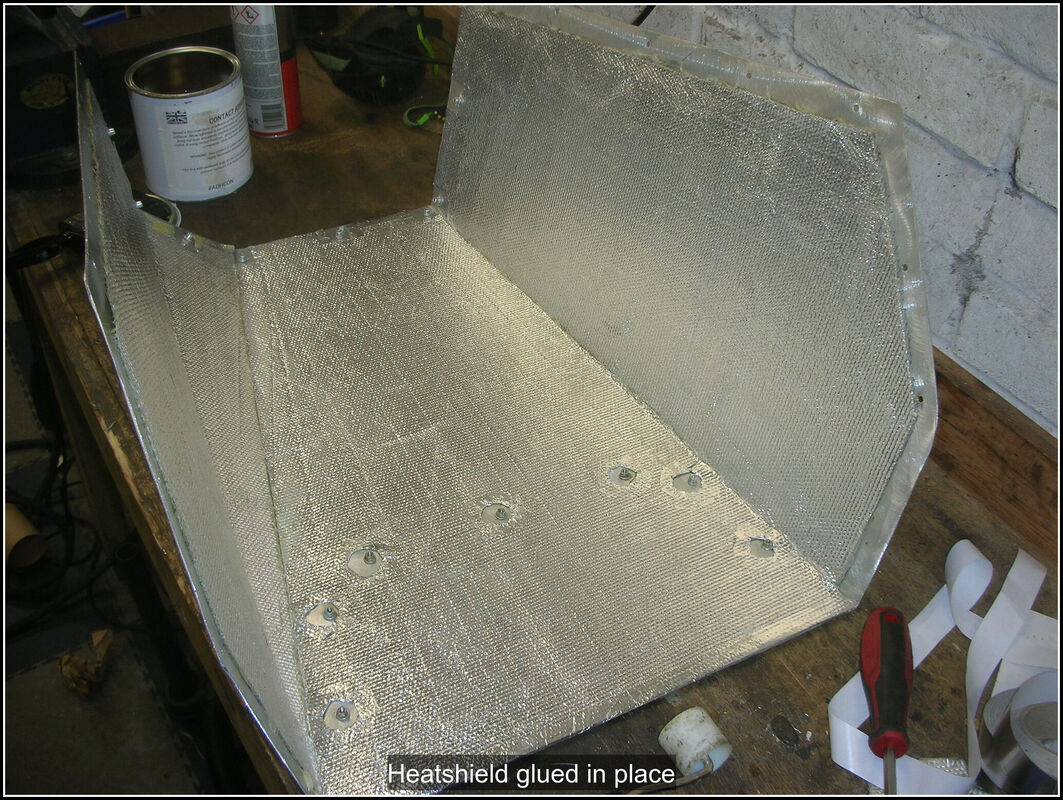
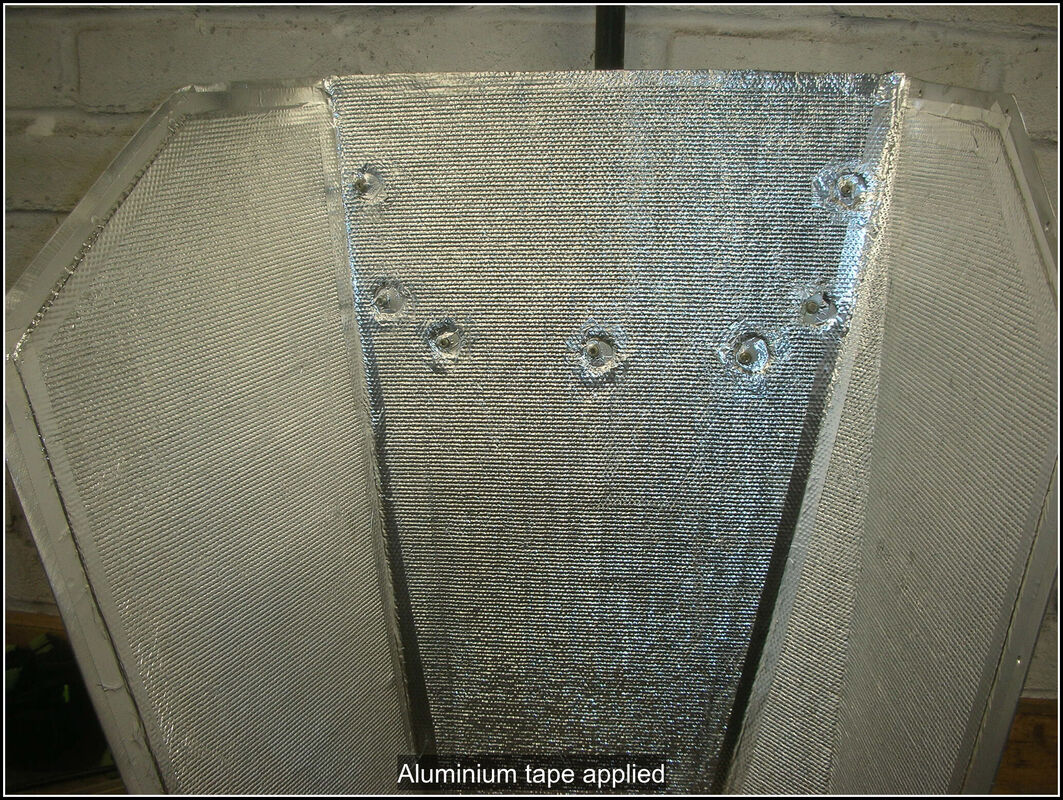
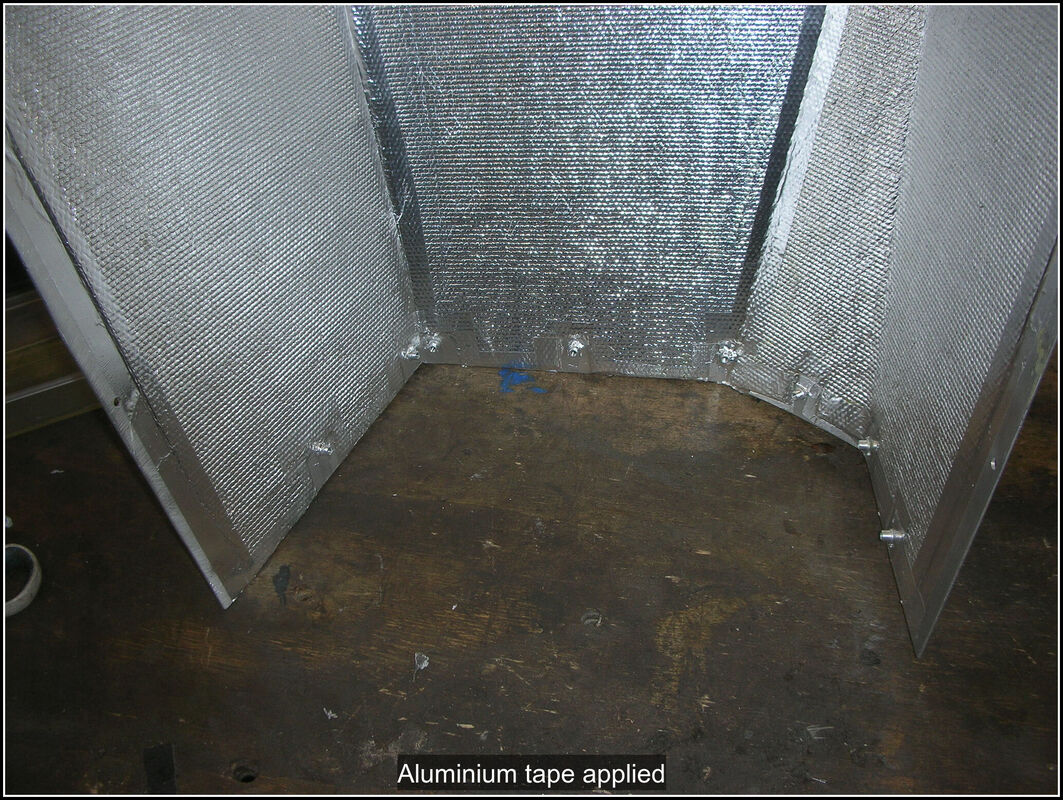
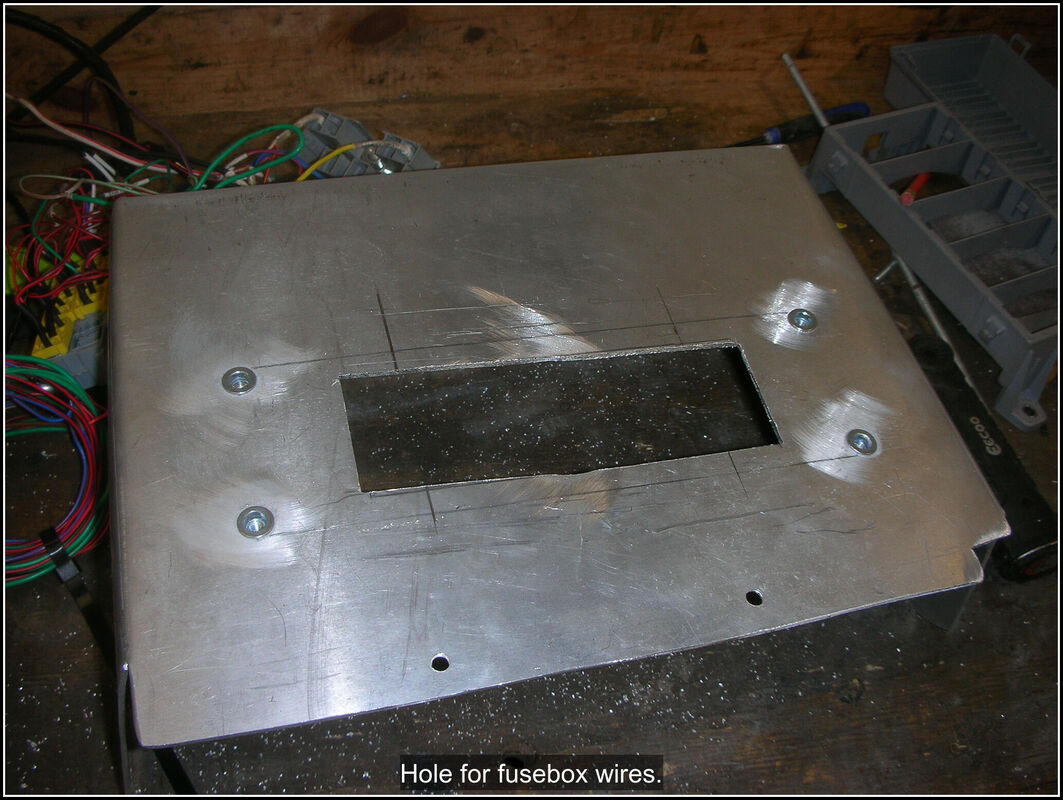
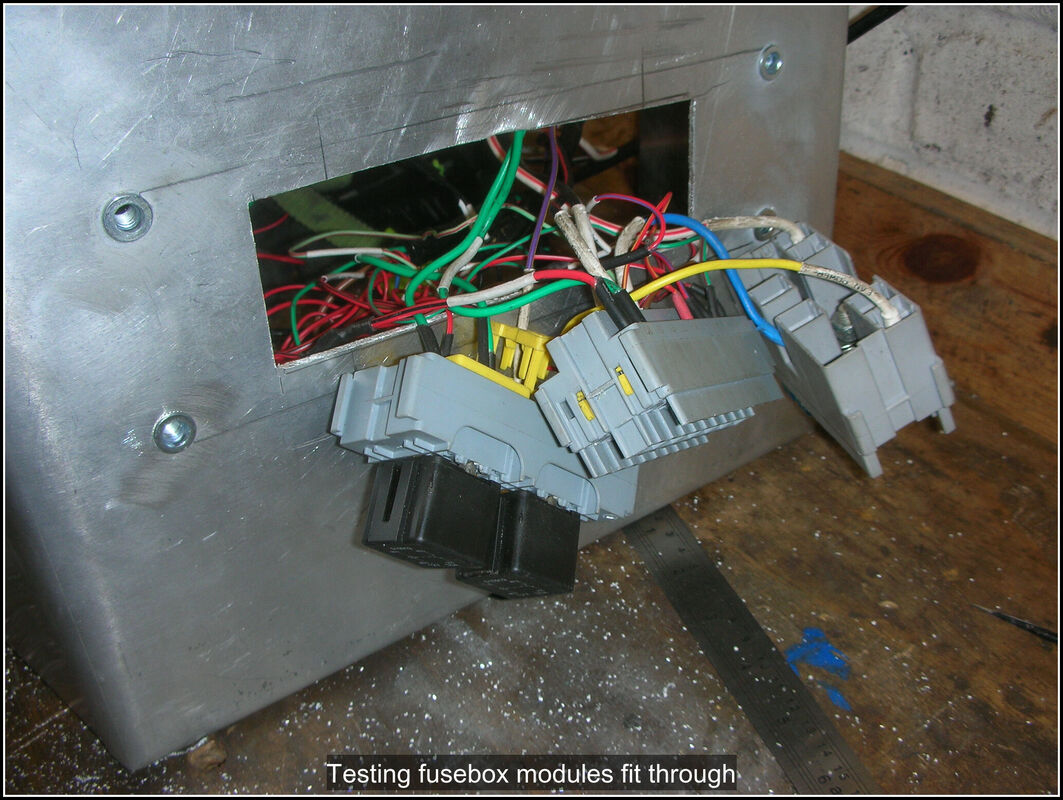
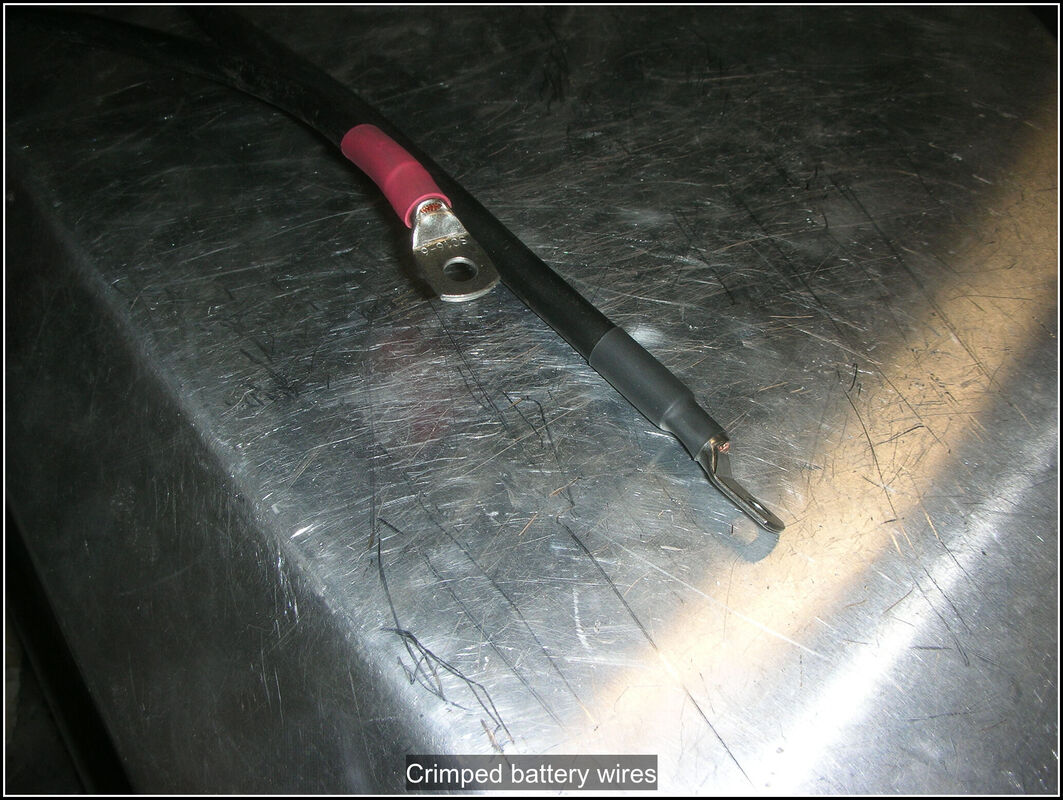
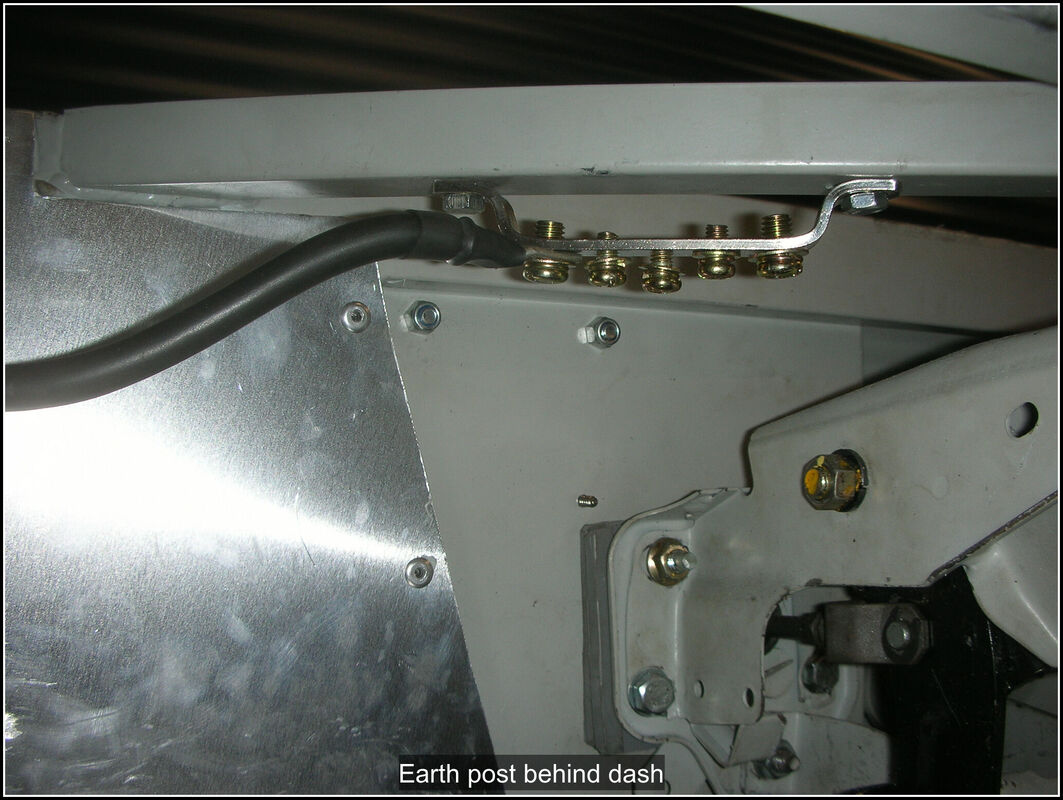
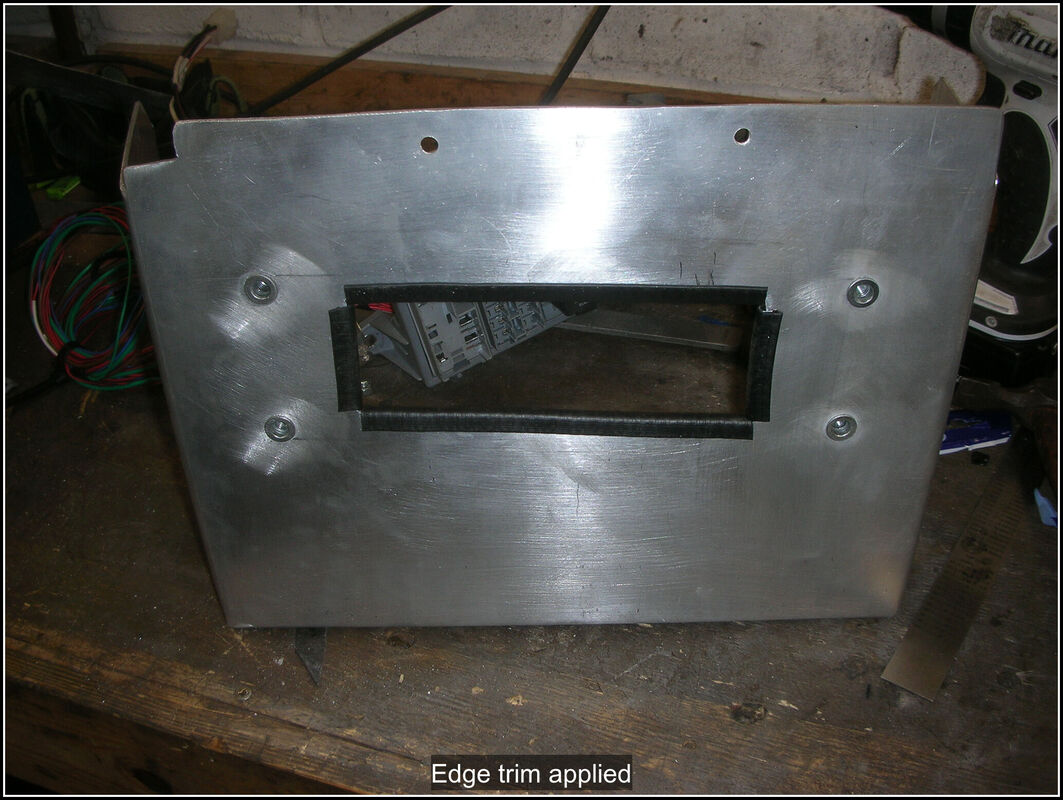
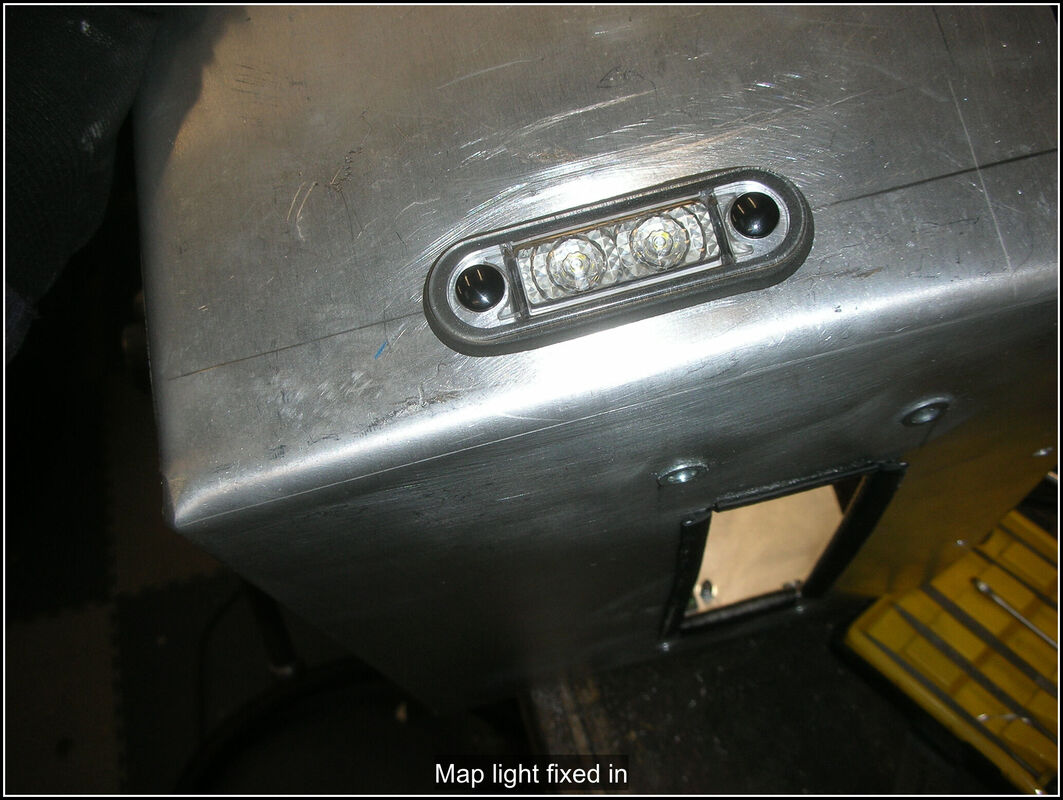
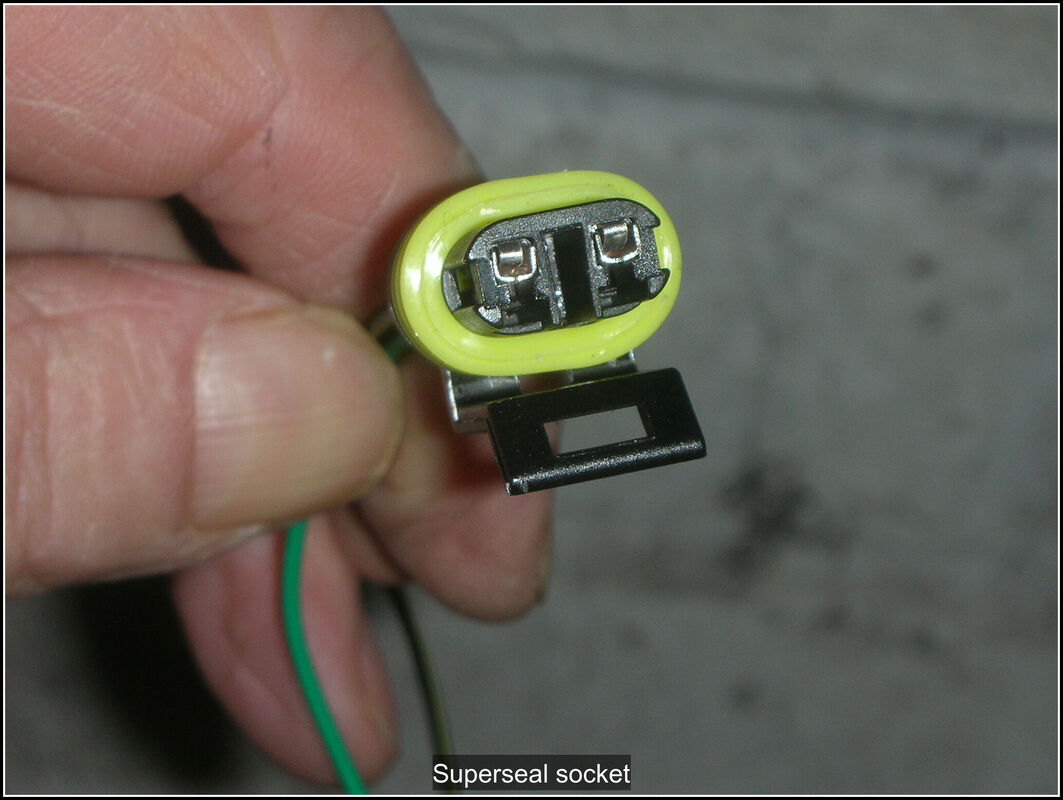
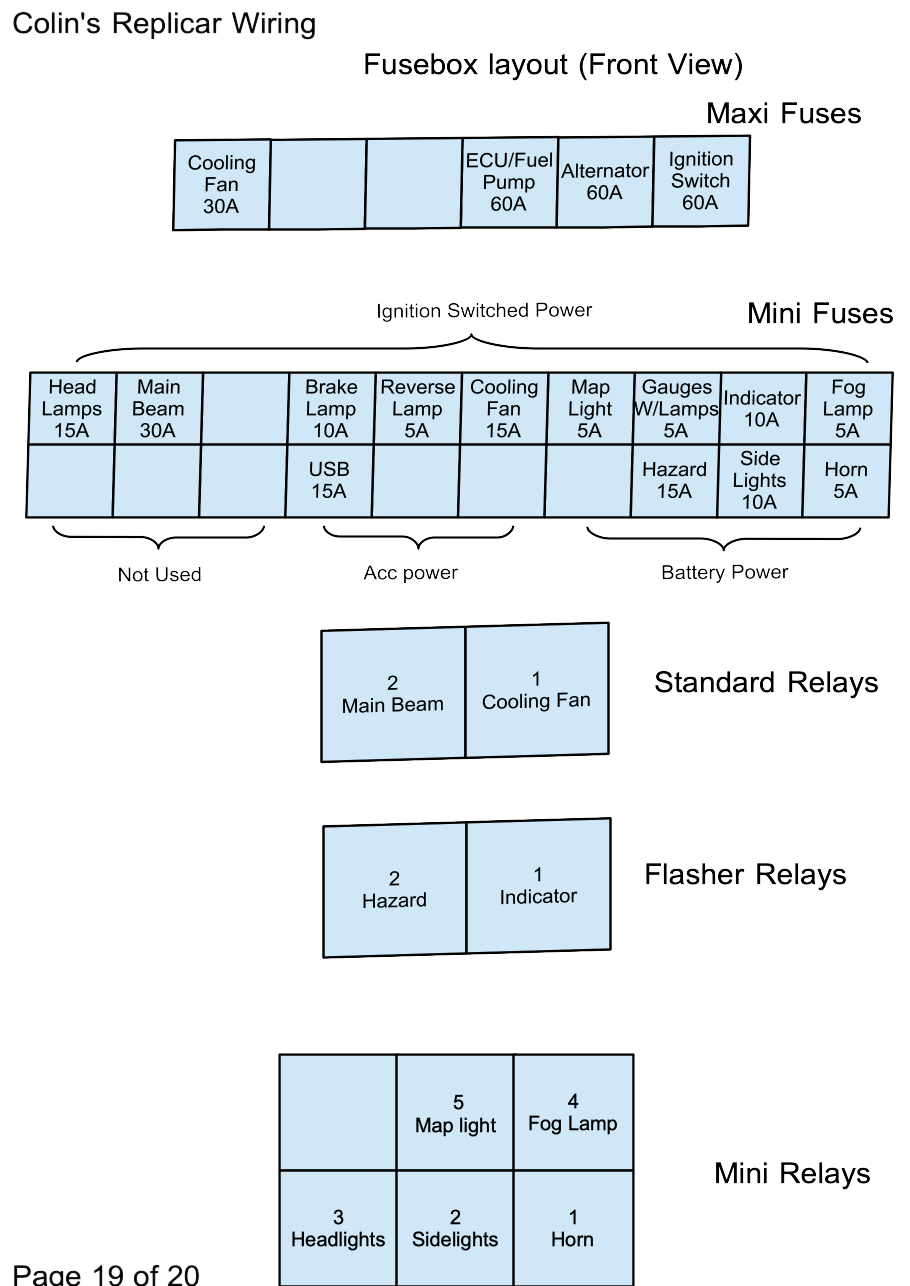
1 January 2022 First day of the New Year. I added some Tiger seal between the horizontal tubes and the metal panels on the side of the cockpit to reduce panel rattles. I removed the fusebox panel and cut a hole for the wires to pass through and started mocking up where the cables would run. Then realised that once I started making these final connections that removing the fusebox would be difficult so decided that I needed to finish off the gearbox tunnel and the fusebox panel properly, including trimming them so that they could be put back in and not have to come out again. I know the vinyl I want to use but I haven't ordered it yet so that needs to be done. One thing I could get on with is adding some heat protection to the underside of the gearbox tunnel. The exhaust runs on the inside of the gearbox tunnel so I wanted to reduce the heat soak from that to the tunnel. An added benefit will be to reduce drumming from the large panel. I already had some heatshield material, left over from working on my TVR. I made some patterns from brown paper and cut out the material, being careful to get the pattern the right way up on the material. I used aluminium tape around some of the cutouts to stop them fraying. I cleaned up the inside of the tunnel with a sanding block and then wiped it clean with brake cleaner. I applied a good layer of contact adhesive to the metal and to the heat shield material. Once it had dried, I positioned each piece and pressed it down then used a roller to get it pressed on fully. I let it dry a bit more before running more aluminium tape around all the edges and again using the roller to secure it. 2 January 2021 Started to make a pattern for the gear lever panel heat-shield but decided not to line it until I have the brake lever panel made. Something that has been bothering me is that I couldn't remove the gearbox cover without removing the fusebox from the cover because the wires go through the fuse box panel I've just made. Had a long think about different ways I could mount the fusebox but then decided the easiest way was to enlarge the hole the wires go through. The fusebox is too large to pass through it but the individual modules can be unclipped and fed through without having to undo any wires. Then I turned back to the wiring, and terminated the main bettery cables on lugs. Added an earth bar to the underside of the dash bulkhead, attached the earth cable to it. I will use this to earth the various wires from the dash and fusebox. Then joined the cables for the rev counter, charge warning lamp, oil warning lamp oil gauge. Added ring terminals to the earth wires. Did some simple testing of the gauge and warning lamps to check the wiring I'd made, using a power probe. I still have a few more circuits to add to the car (temp gauge, brake light circuit, reverse light circuit as the switches for them are not in the dash. Ordered the vinyl and some scrim foam, edge trim, grommets, exhaust pipe gaskets, exhaust hanger rubbers, O2 sensor blanking plug USB charge ports and a USB panel connector for the the ECU cable. 10 January 2022 My edge trim has arrived so fitted that to the hole behind the fusebox. I decided my interior/map lights would be mounted on the sides of this panel. Checked the polarity of the LED lights I've bought and like the number plate lights white was the negative connection. Measured and cut out a hole in the panel for the lights and screwed them into position. I decided to try out my Superseal connections that I bought for the light circuits, on the map lights as I wanted to be able to disconnect them from the loom easily. Where they are shouldn't get wet but as I've not assembled this type of connection before thought it would be a safe place to try them out. Getting the terminals crimped in place was straightforward but had a bit of a problem getting the pins to push through far enough and as I wasn't familiar with how far they needed to go I ended up destroying one of the locking clips. I was going to put the fusebox back in the car so I could run the last few circuits but realised I had not mapped out which fuse position each of the circuits was connected to. Came back inside and spent some time updating my wiring diagram with the fuse box layout. I plan to print out a smaller version that can be laminated and sit inside the fusebox.
0 Comments
Leave a Reply. |
AuthorThis is my first kit car although I've messed about with cars all my life. Archives
November 2023
Categories |


 RSS Feed
