|
28 September 2020
This project has not started well.... Torqued up the water pump inlet and filled the radiator – no leaks, yeah! Connected up the engine then immediately shut it down when I remembered I had not refilled the engine oil! What an idiot!!! I'm feeling like a complete numpty, I've not started the stripdown and already I'm making more work for myself. Need to find a way to remember things like this in future Filled the engine oil and restarted it but, too late, a nasty knock from the bottom of the engine so the crankshaft is coming out at some point, at the very least new bearing shells but I suspect a regrind will be needed. Oh well it's all part of the learning curve I guess. To try and cheer myself up I did a few other preparation tasks. Disconnected and removed the battery. Started labelling the loom in the engine bay I'm using parcel tags tied on with string to label the connectors (including the unused ones) Got under the car and sprayed any visible nuts or bolts with penetrating fluid, hopefully it will soak in and make dismantling them less troublesome. Also went round the engine bay and sprayed any more nuts or bolts I could see. Sat down to plan the dismantling I referenced a really detailed set of videos of an MX-5 strip down done by PixelArmoury, this is my playlist of their videos www.youtube.com/playlist?list=PLNNqz9ci04cO4FjCifiGC-JK_JQG4DQMO I also have the Chilton workshop manual and the Enthusiasts Restoration Manual as well as PDF copies of the factory workshop manuals for reference. Next jobs are to get video set up for the strip down and build a tumble cleaner, I have a design in mind based on a number of online videos.
0 Comments
20 Sep 2020 Cleaned up some of the parts in my parts washerl also used some wire wheels to clean up the alloy water inlet and outlets. Need to find a less time consuming way of cleaning small parts. Replaced the cam and crankshaft oil seals. Read the torque setting for the camshaft cap bolt wrong (specified as inch pounds not foot pounds). Result one snapped bolt. I ordered a set of Sealey left hand drills and bolt extractors. Also ordered some replacement camshaft cap bolts online. ordered a replacement lower timing cover as mine was cracked around most of the bolt holes, and a new o-ring for the water pump outlet. Fitted the new water pump and gasket, also the inlet pipe gasket and o-ring torqued up, to the right value….. 21 Sep 2020 I drilled out the bolt using one of the left hand drill bits I used a small piece of plastic pipe that fitted inside the bolt hole to hold the bit icentrally. When I drilled into the bolt the left hand turn of the drill unscrewed the bolt until I was able to grab hold of it. I was careful to cover the area around the bolt hole with a cloth and tape to prevent any swarf getting into the head or onto the cam bearing. After carefully removing the cloth I used a clean cloth to mop up around the bolt hole. I cleaned the threads out with a clean cloth and then ran a bolt in and out a couple of times by hand. Cleaned the other plastic timing belt covers, intake pipe and other plastic and rubber pieces with degreaser and wipes. Wire brushed the crank and water pump pulleys then degreased and painted them black, also painted a couple of brackets from the VVT cam cover. The cam cover is going to be painted at a later date. Removed and cleaned up the VVT pipe which will remain metal coloured. 22 Sep 2020 Fitted the cam caps with a very light smear of sealant, inserted the oil seal and torqued up the caps correctly! Waiting for a new o-ring to seal the water pump outlet pipe to the block. Measured and rdered new copper washers for the VVT oil feed pipe from Simply Bearings. The metal tube spacers on the damaged lower timing belt cover had got stuck in the block. Managed to pull one out easily with pliers. The other one iwas more stubborn, soaked it in penetrating fluid and left it for a few days, if it doesn't pull out then I will need to get a drill on it but I'll wait until the body is off and access is better. 24 September 2020 Refitted the the water pump outlet, cam sprockets, crankshaft sprocket, timing belt, crankshaft pulley and covers. Timed the engine and torqued up the crankshaft bolt. 25 September Started well and got the rest of the engine back together started to fill the radiator only to see water coming out from the nearside of the engine. On investigation the water pump inlet was leaking from the small pipe used to connect to the thermostat housing. It's a common problem as the pipe rusts and and eventually a hole appears. Cleaning up the housing had exposed a weakness in the rusty pipe. My first thought was to find a replacement but a new one was over £100, second hand was around £30-£40, but looking at the pictures of the ones available, they looked worse than mine. I decided to try to repair mine by replacing the pipe. 10mm steel pipe was readily available at my local DIY store for a few pounds. Drilling out the old pipe was easy enough. The bend in the pipe is very tight but with some heat and careful bending I was able to make a piece approximately the same. It took a couple of attempts to get a bend I was happy with. I did several trial fittings of the inlet on the car to make sure the angle was right so when the hose was fitted it didn't foul anything. This required a bit of trimming and a small amount of additional heat and bending. I used some JB Weld to secure the new pipe into the housing and left the inlet loosely in place with the hose connected while it cured 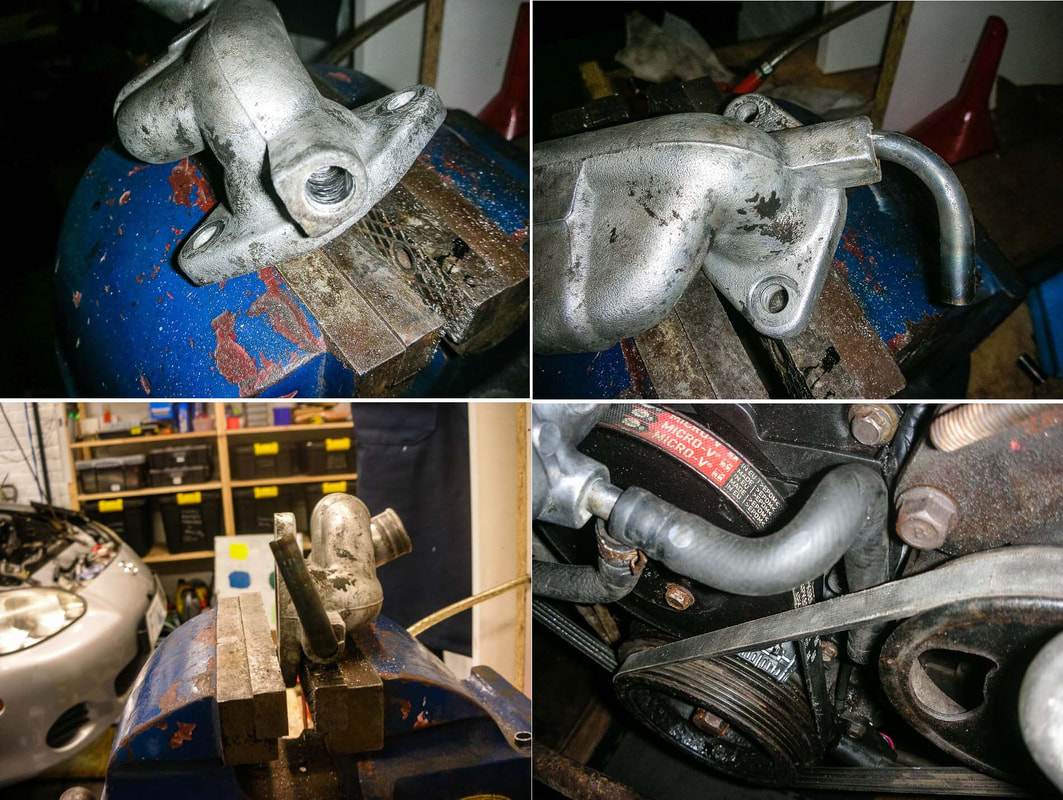 I did a compression test (cold engine, dry) and the results were as follows
Cylinder 1 154 psi Cylinder 2 156 psi Cylinder 3 154 psi Cylinder 4 155 psi All good there. The spark plugs were also in good condition, light brown electrodes and no sign of problems. I plugged in my OBD scanner and ran a scan for faults - none found. All OBD tests were passed. Engine fan comes on at 96C and off again at 94C I've ordered some service items to do an engine oil and filter change, cambelt and waterpump change, new spark plugs. I put the car up on the ramp and had a good luck around underneath and found no major issues. Brake discs look like they have recently been changed and the shocks and springs all look in good condition. Wishbones and subframes had some surface rust as expected but resisted the hammer test. I took the car out for a bit more enthusiastic drive after the inspection and handling was good, and no nasty clonks from the suspension. Engine and gearbox were good. Took the car back to the garage to do a service on the engine. Completed the strip down ready for new seals, water pump, cambelt, oil and filter. After speaking to a couple of people I decided my ideal specification would be
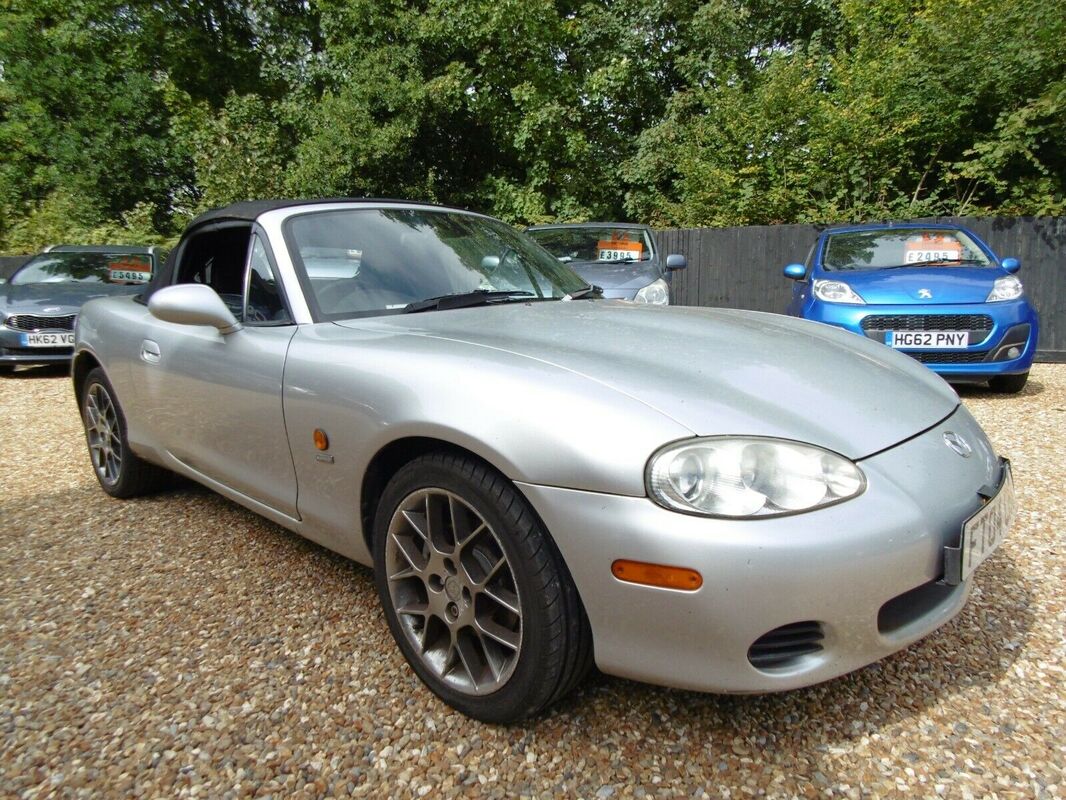
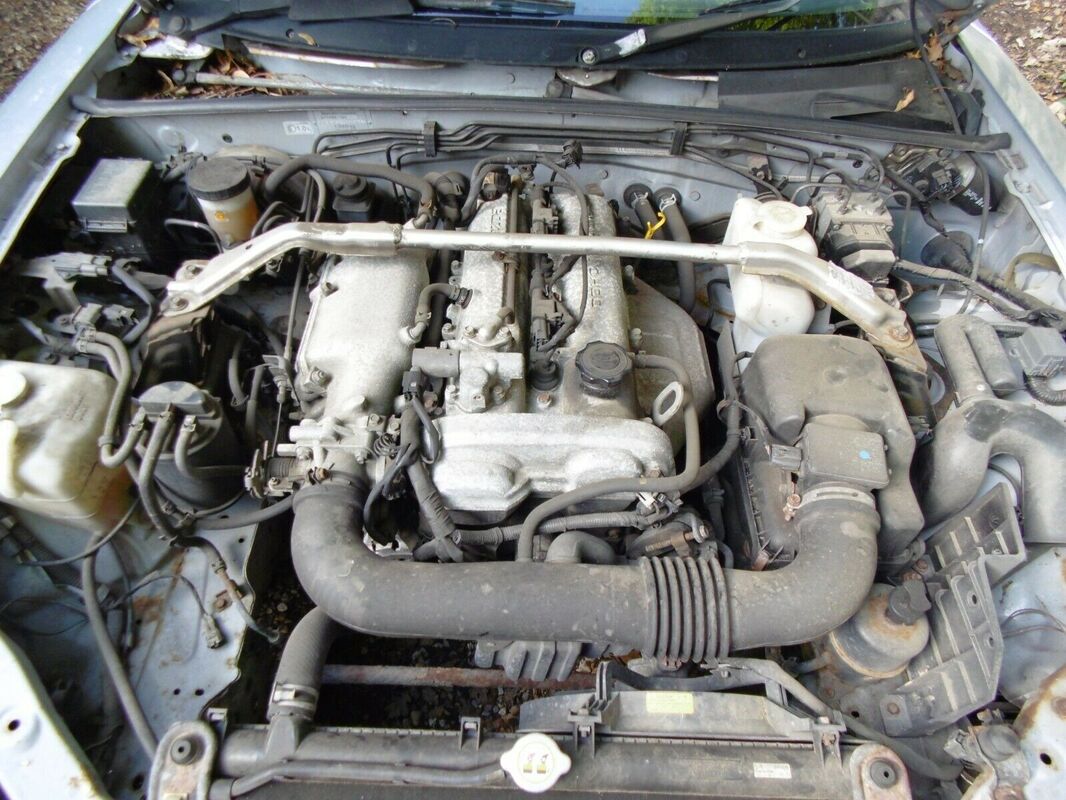
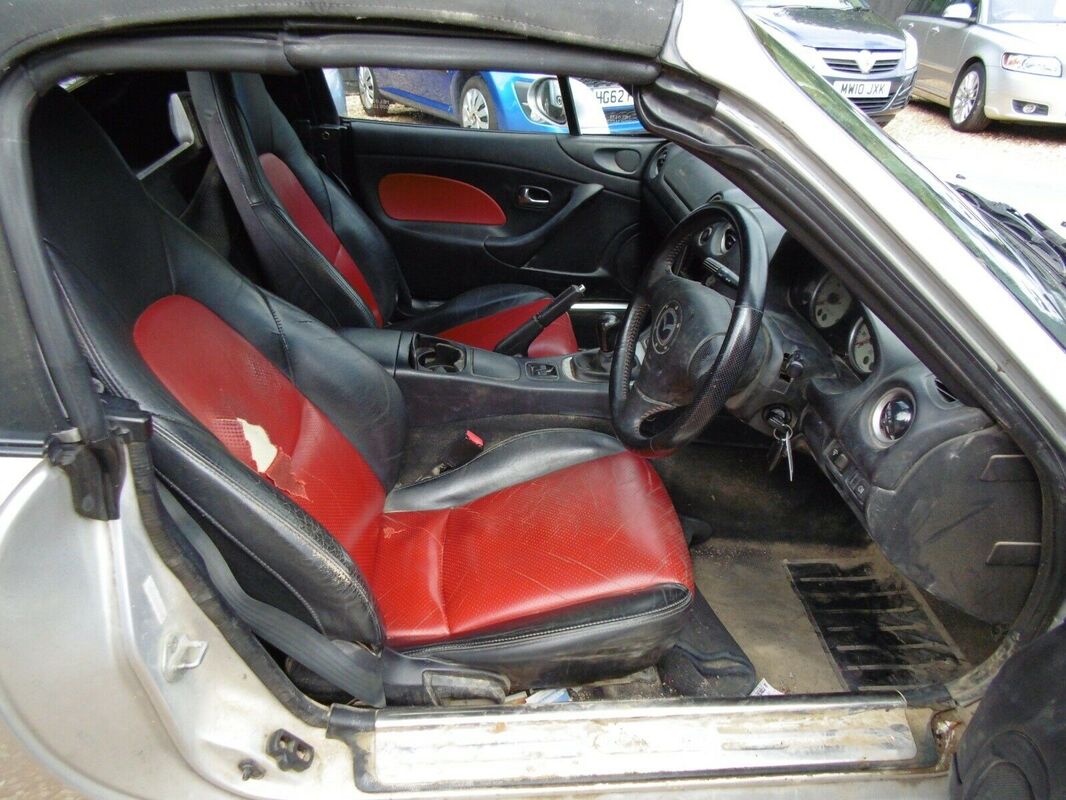
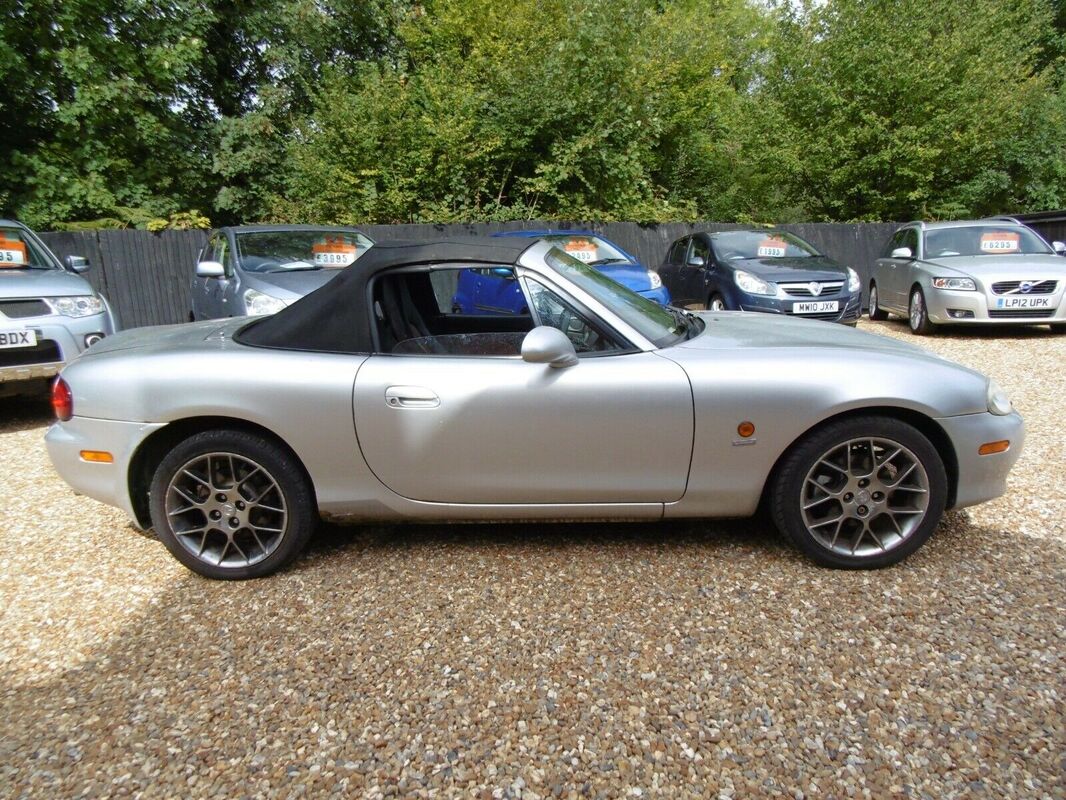
I searched online for cars (ebay, gumtree, Facebook MarketPlace, Auto trader), and went to see a few to make sure they were what I needed. I identified a few cars that might be suitable I missed one early on and a couple went before I could see them but I finally bought a 2004 MK2.5 1.8L Euphonic with an MOT, for £430 I was very happy with this. The car came from a dealer in Hook who had taken it in part exchange and they just wanted to move it on quickly. Although it was completely filthy inside and out, it started easily and seemed to run well, didn't overheat and no obvious mechanical issues apart from a noisy clutch spigot bearing. The subframe and suspension seemed tired but OK and not obviously rusty from what I could see. I taxed the car for a month and I was able to add the car to my daily driver insurance policy for a very small amount (£25). The drive home was uneventful and didn't throw up any new issues. Once home I gave the car a quick wash and vaccum to get rid of the worst of the grime. Vendor sale pictures are shown below I've wanted to build a kit car since I saw the Caterham 7 kit featured in a car magazine back in the 1980's. That was a long time ago and things have moved on a lot but I've always wanted to build a car myself.
Now I am about to start that dream, the kit I've have selected is the ANC Replicar. This kit is based around the look of an Aston Martin DBR1. Aston only made 5 of these cars but they won the Sportcar Chanpionship with them. I picked this kit for a number of reasons. 1. The donor car is relatively cheap and available 2. The kit is good quality and value for money 3. The build process is straight forward 4. The end product will be a car that will have classic 50's race car looks and be something I could not own if I tried to buy an original. The first step is to source a suitable Mazda Mx-5 to strip down......... |
Archives
January 2021
Categories |
 RSS Feed
