|
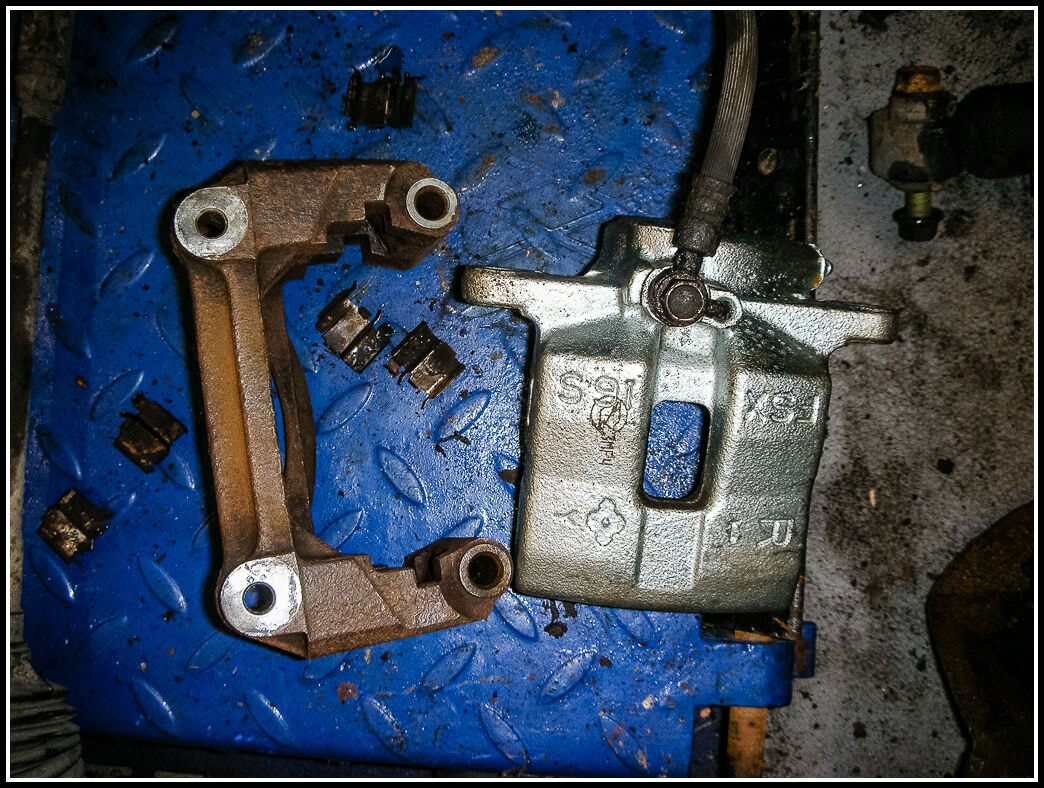
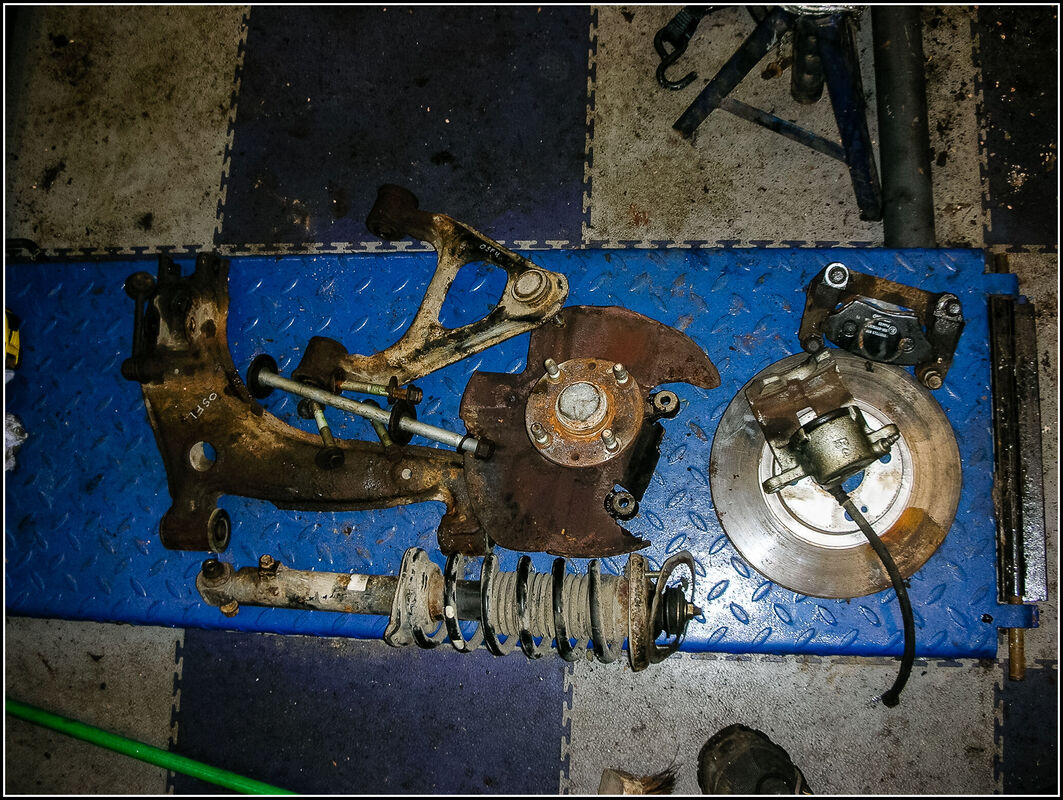
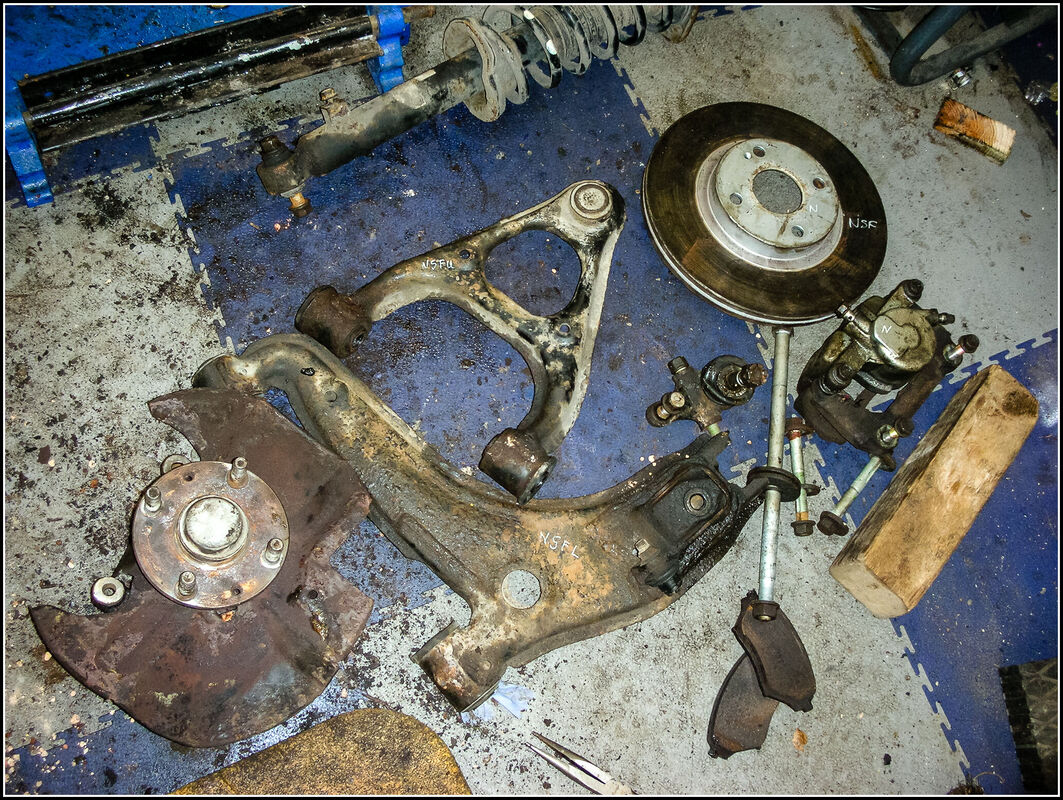
30 November 2020 I took advantage of a 10% saving at MX5 Parts to order a new radiator, spigot bearing, brake hoses, fuel filter, gear lever bush and some o'rings. In the garage this evening I cleaned up the other front upright, brake calipers, slide pins and caliper carrier.. The calipers look very new and won't need any other refurbing. The carriers and uprights will get painted.
0 Comments
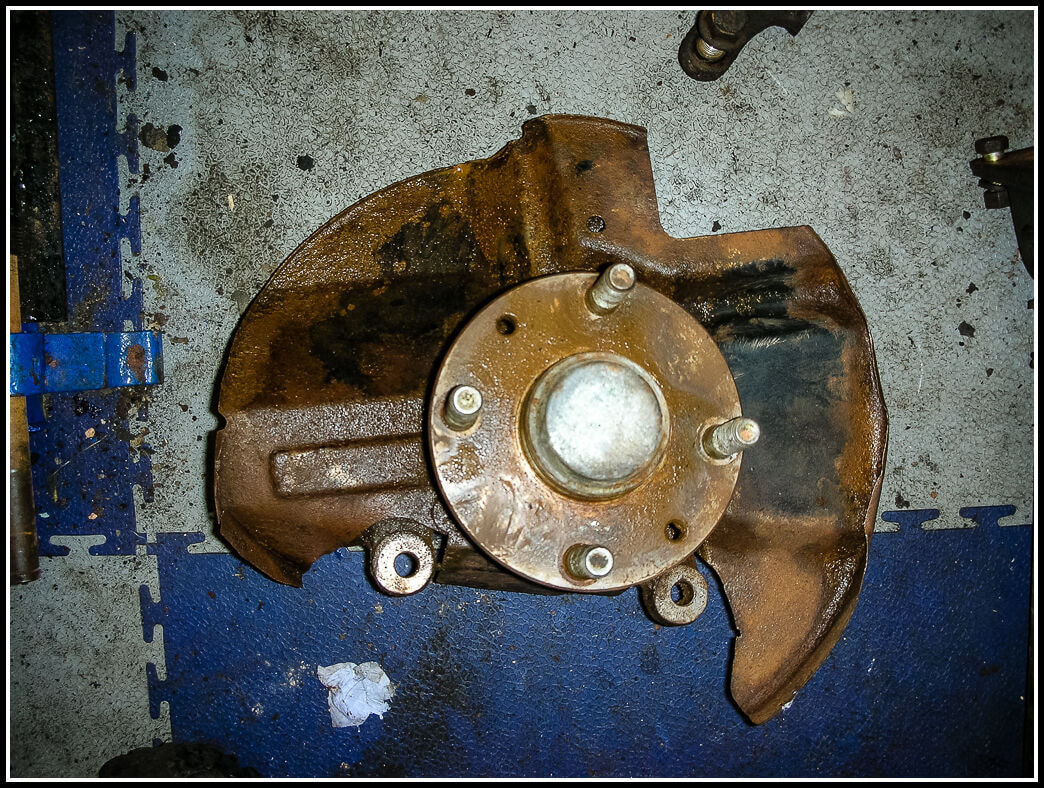
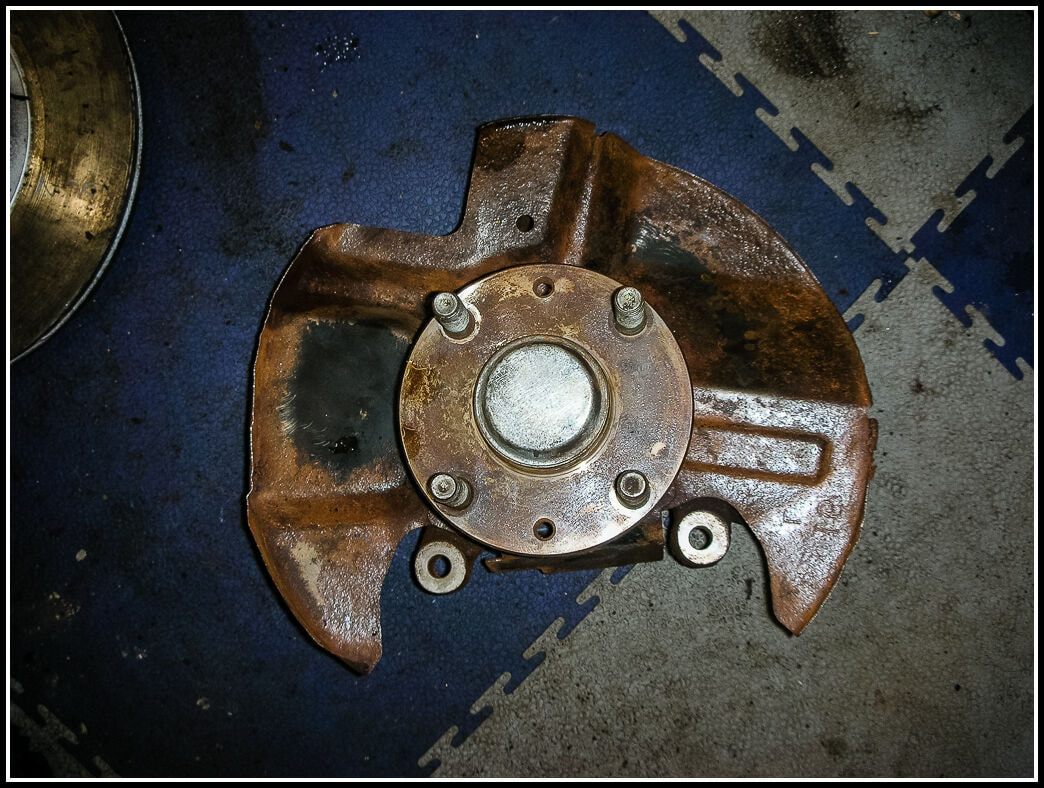
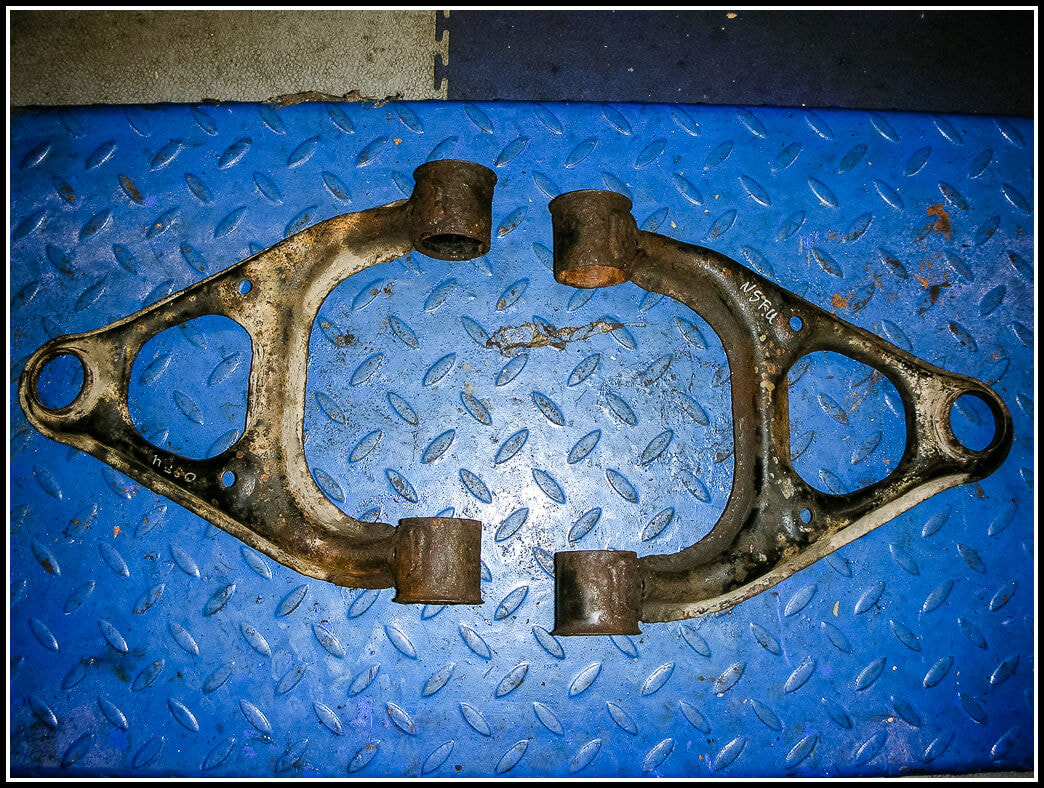
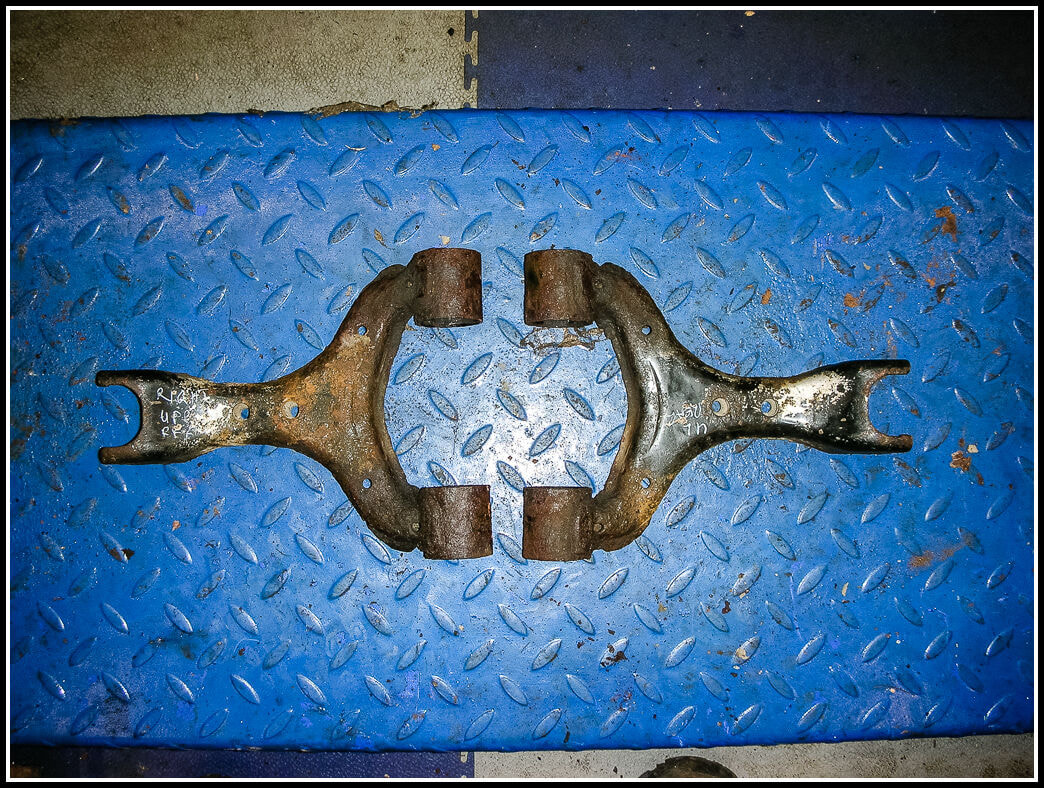
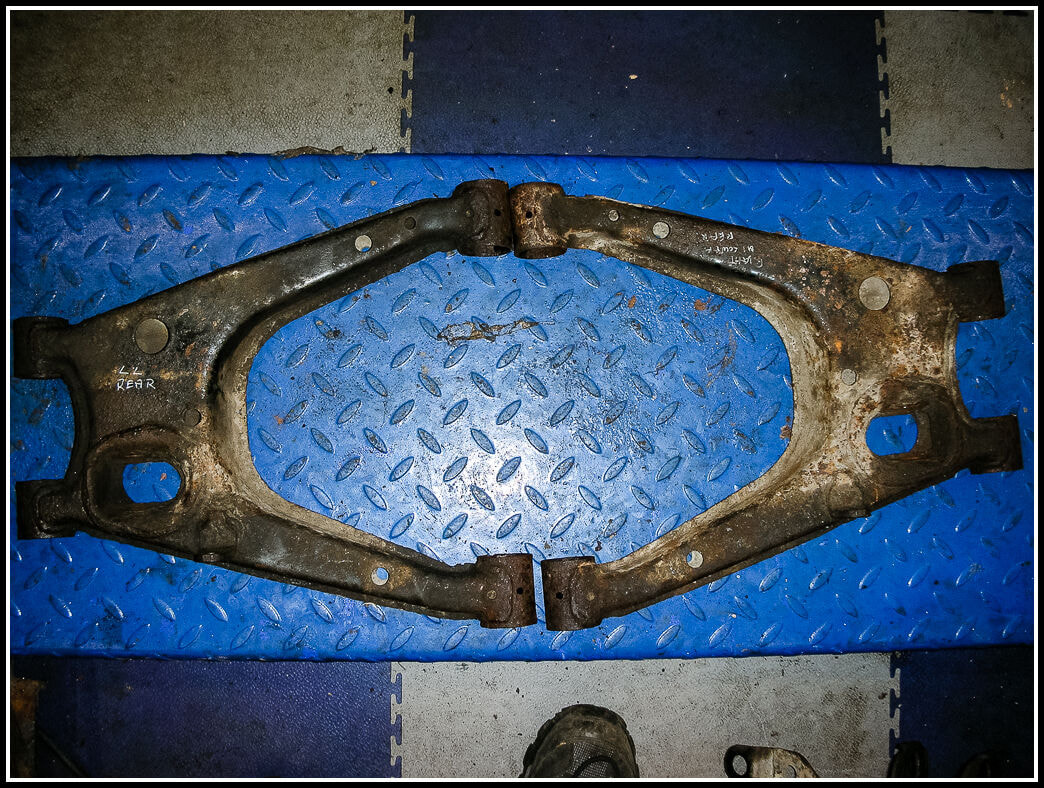
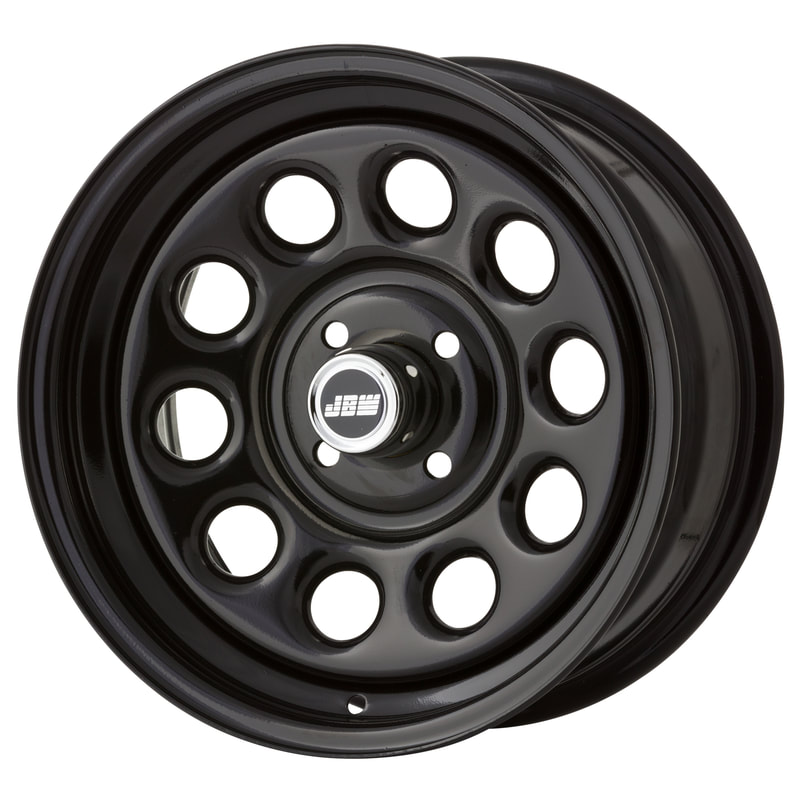
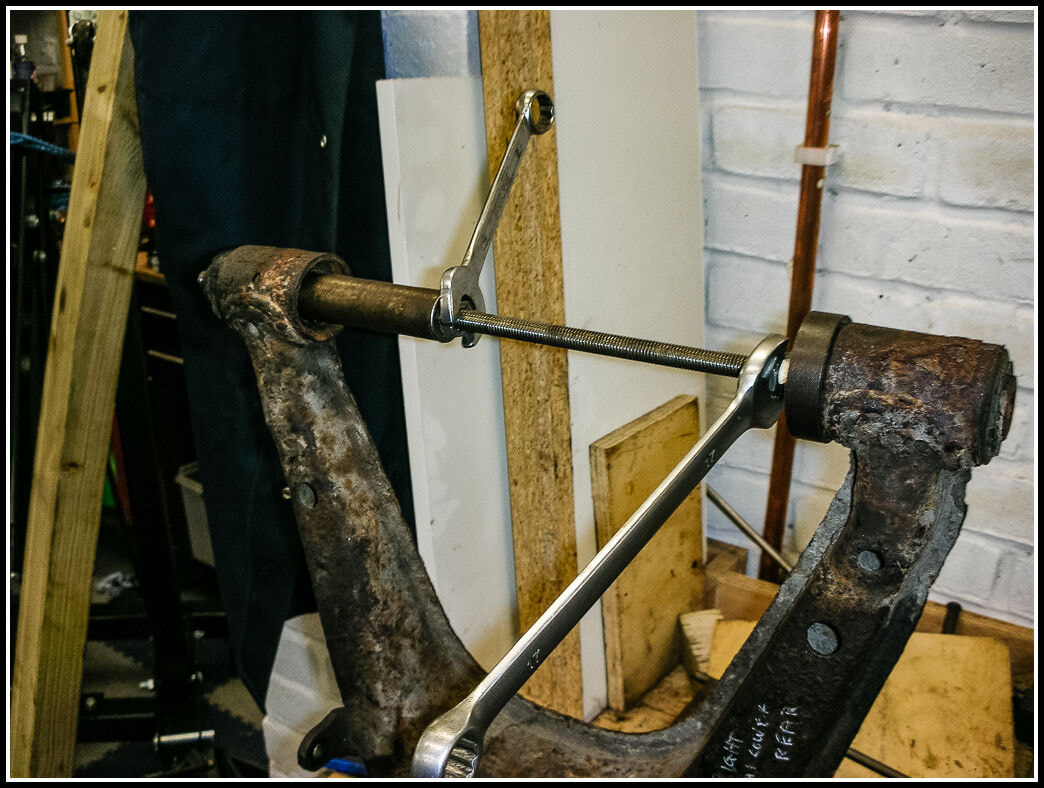
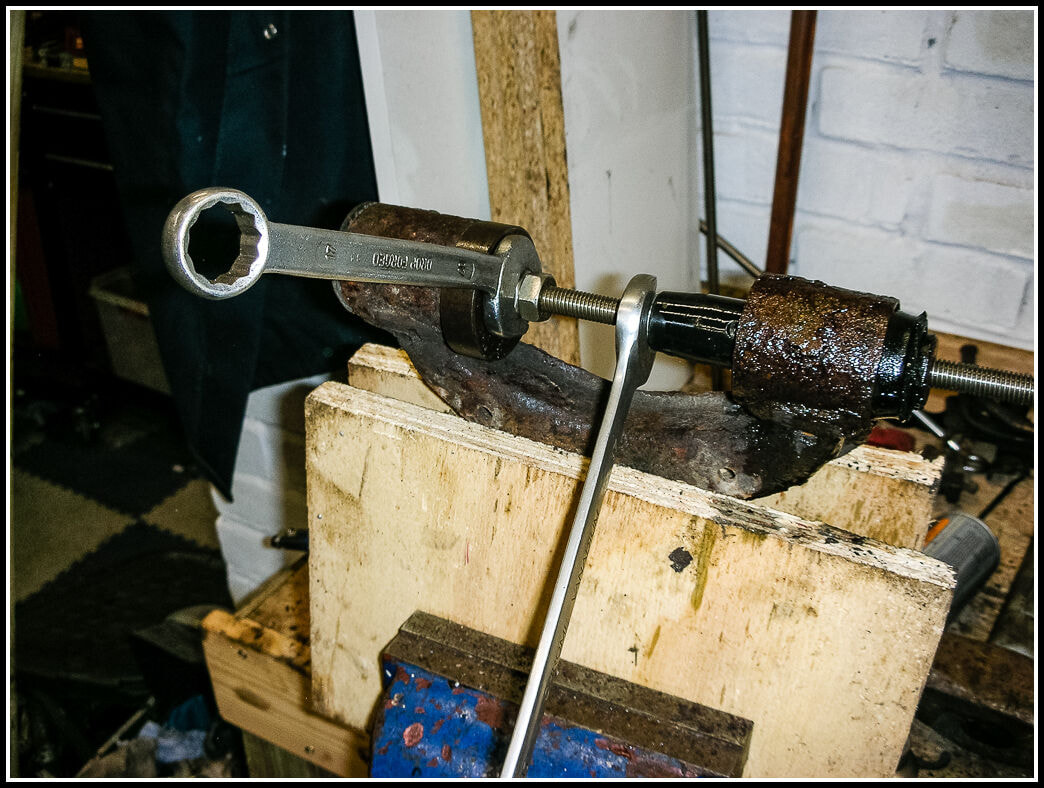
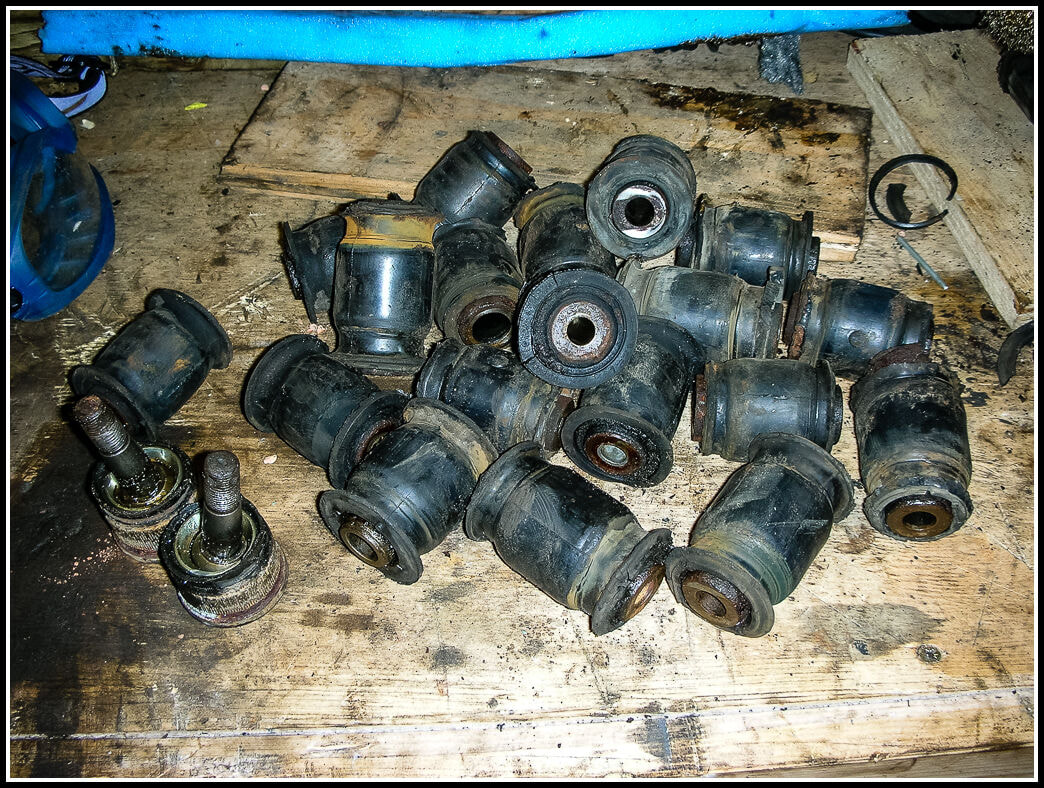
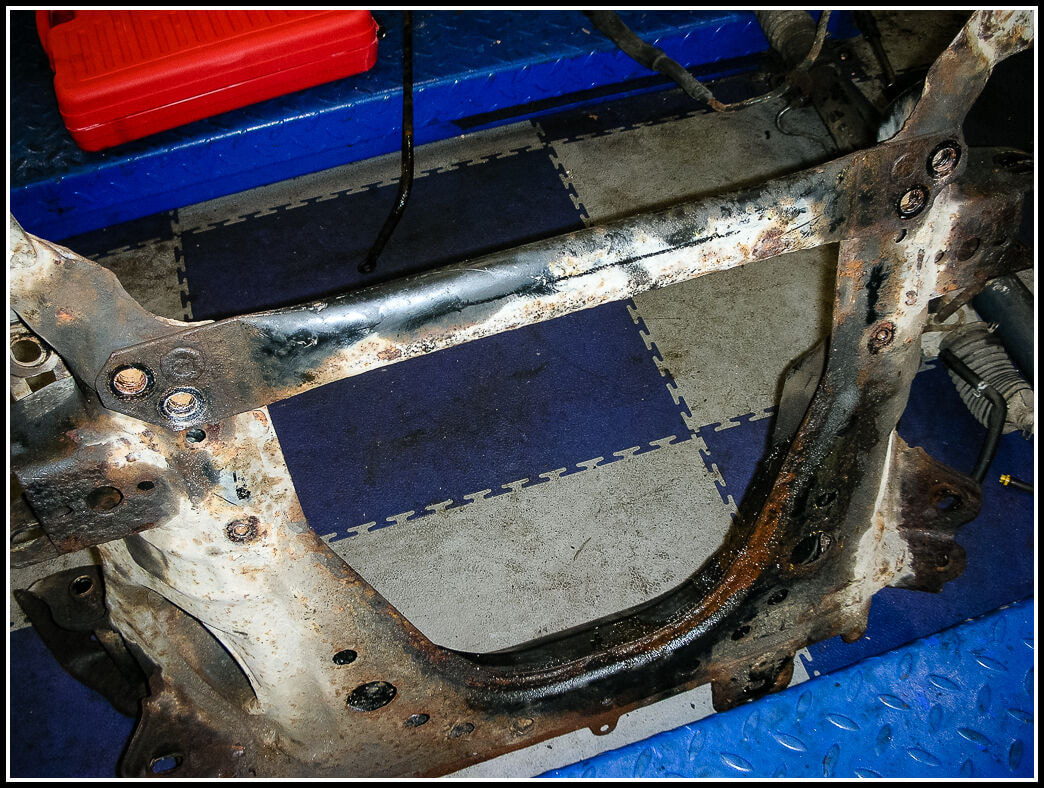
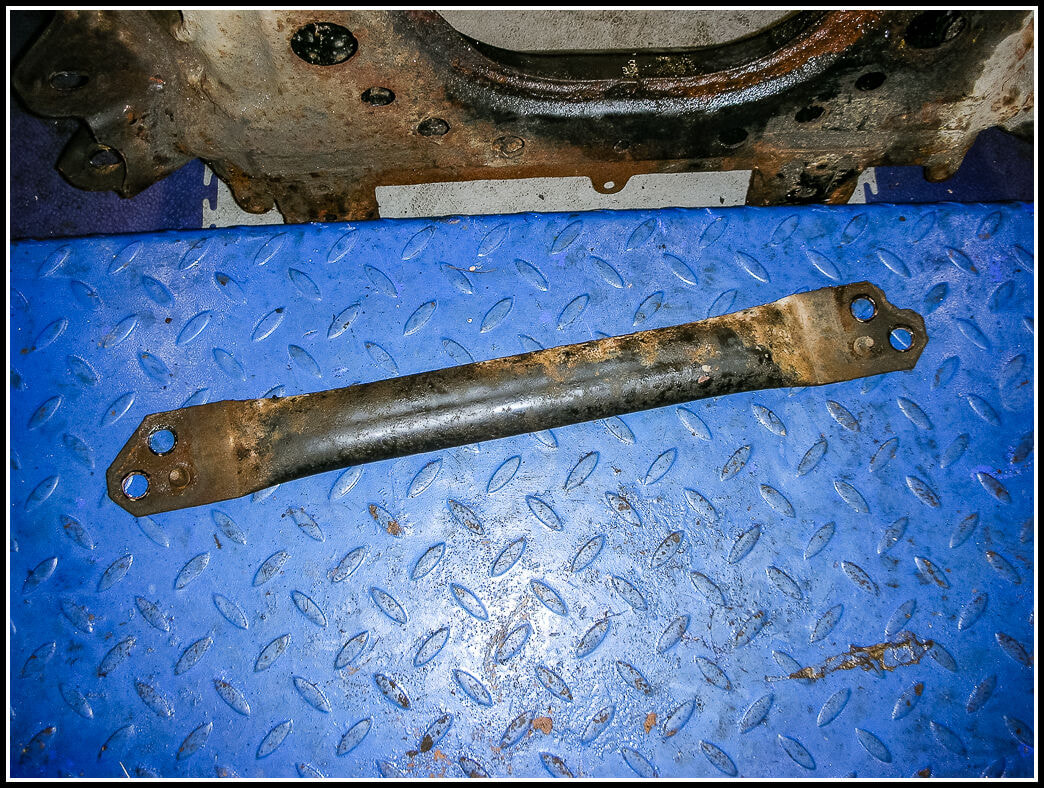
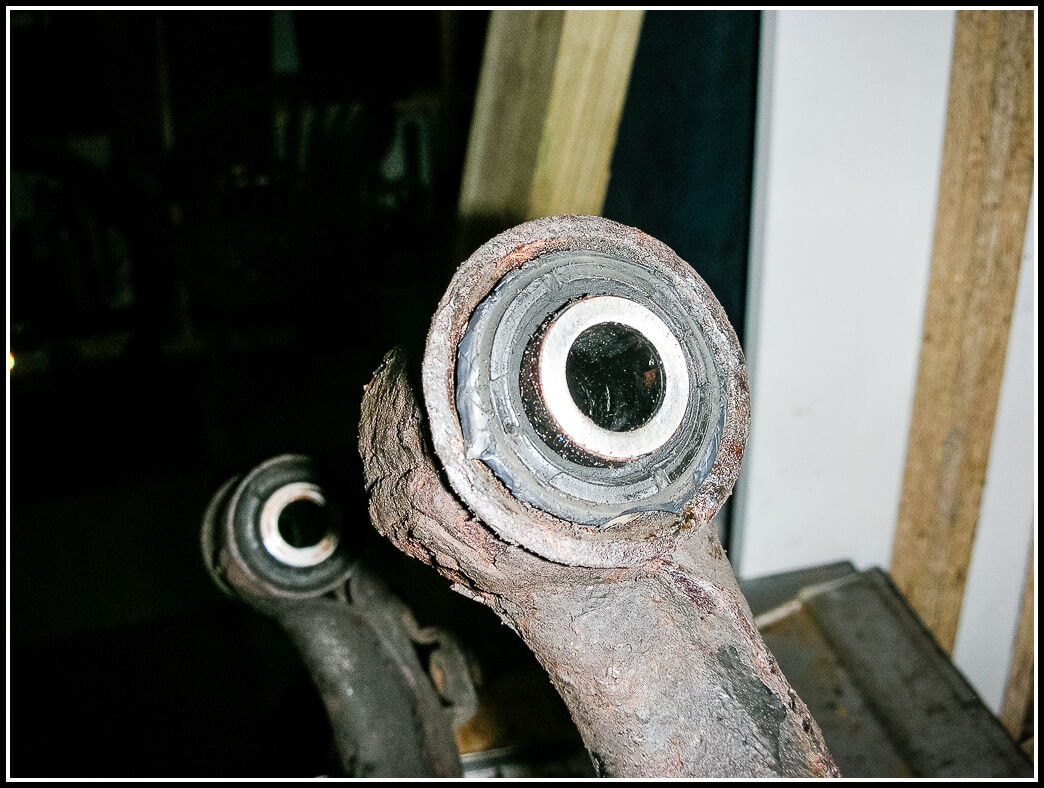
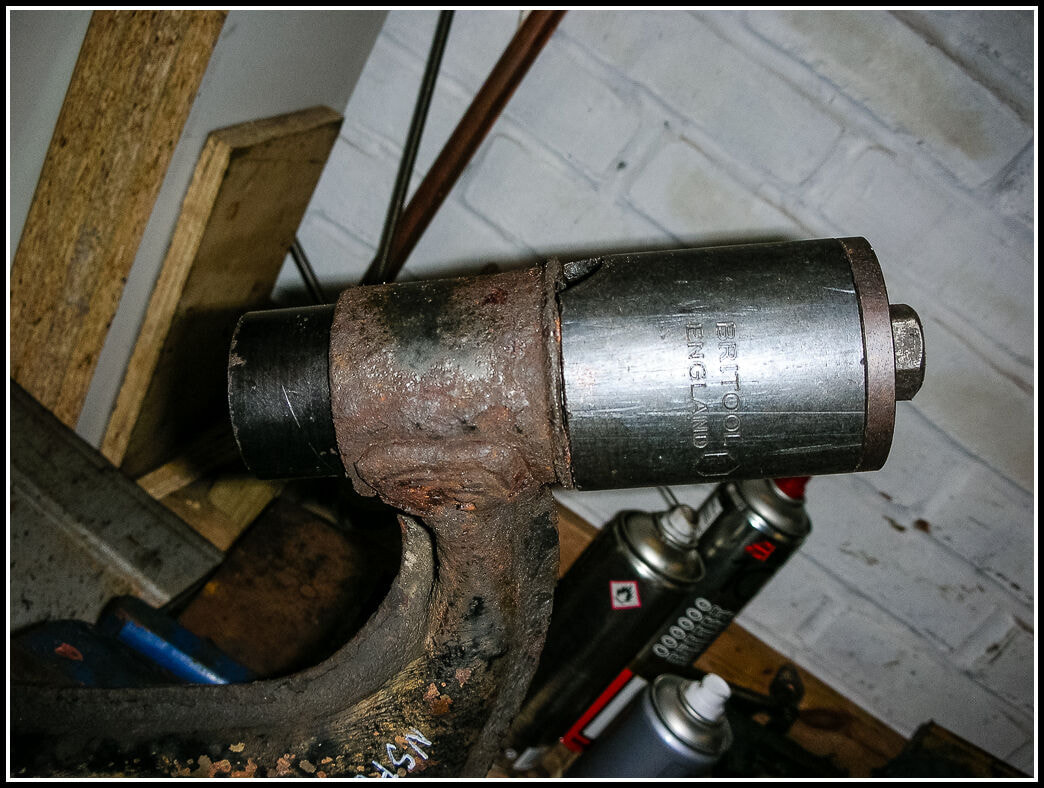
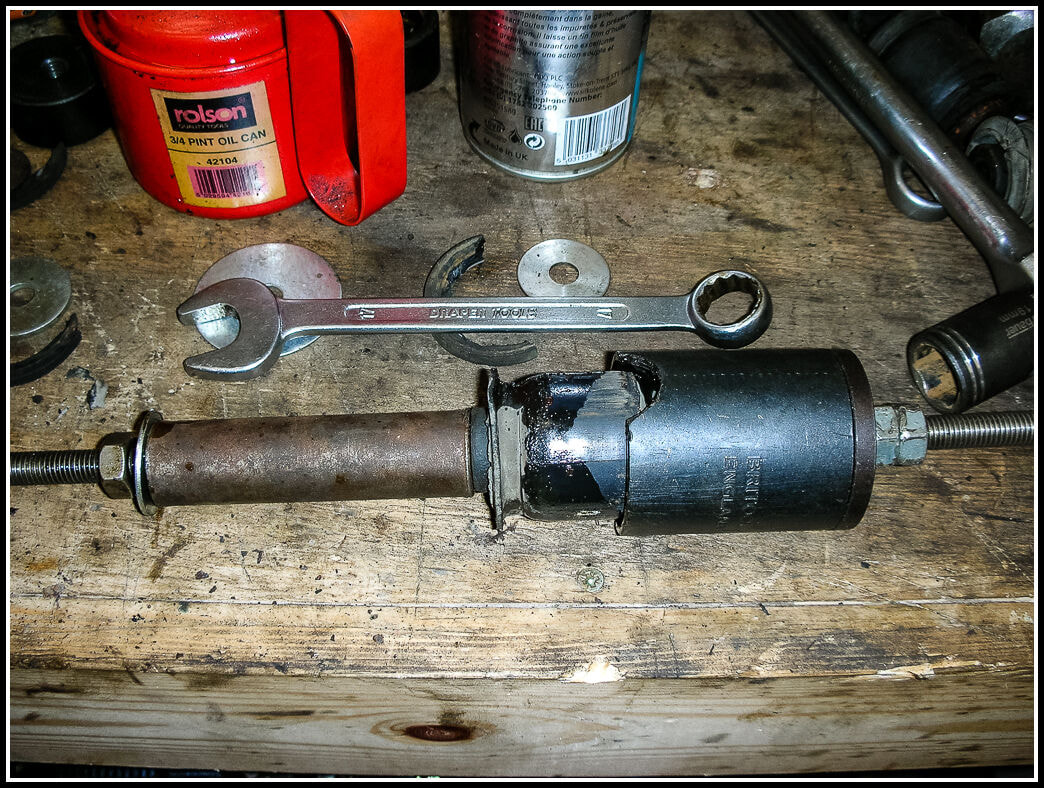
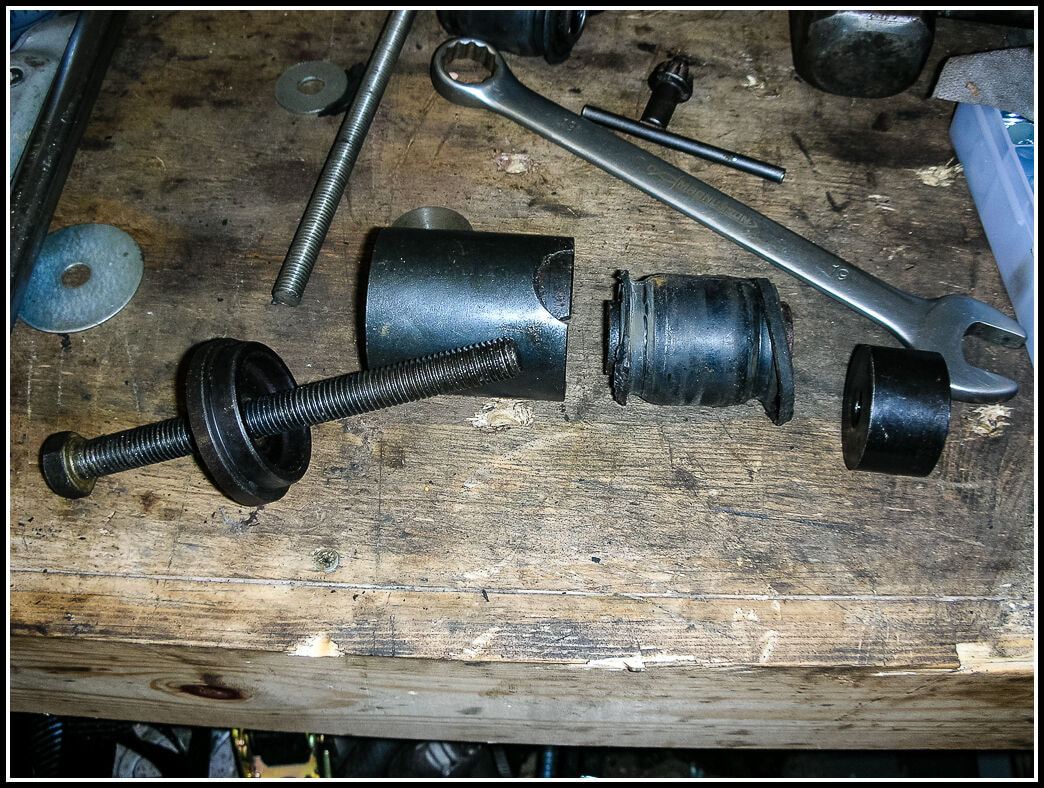
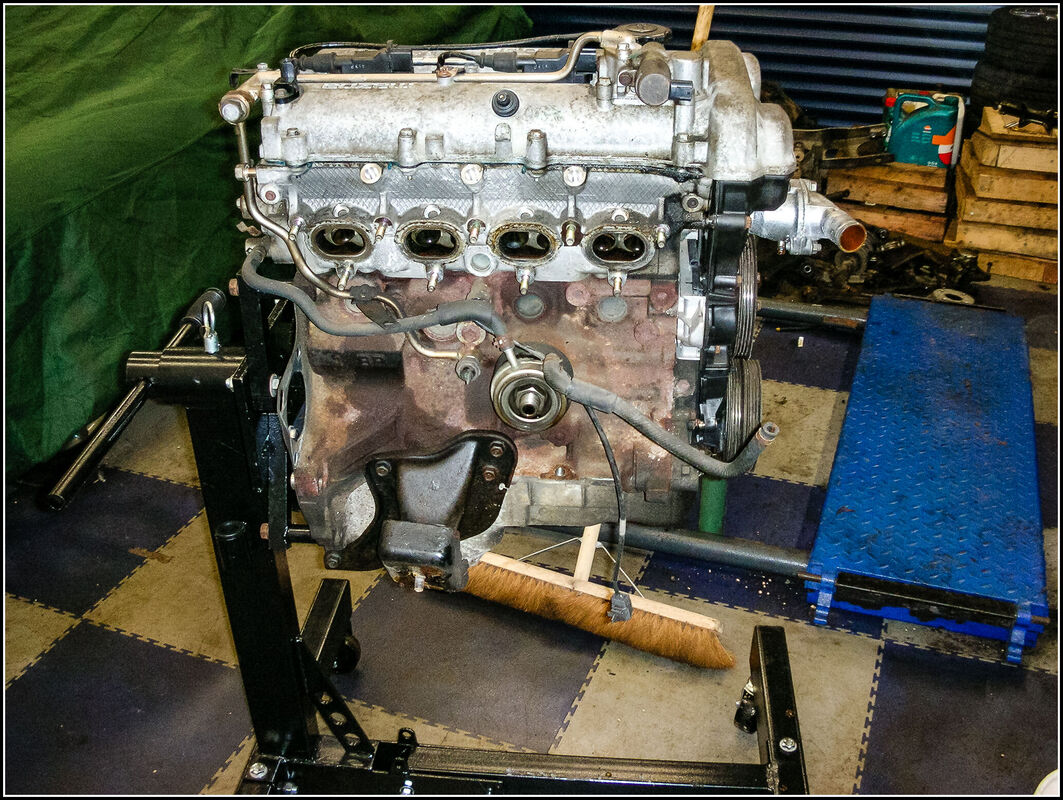
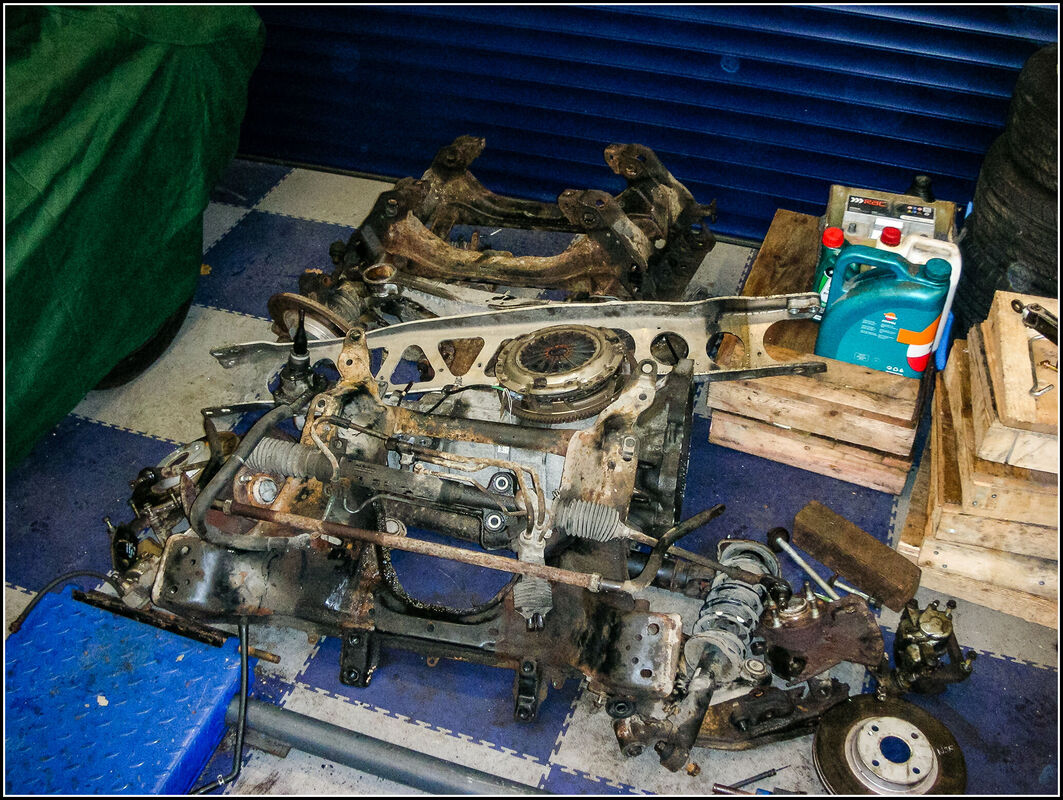
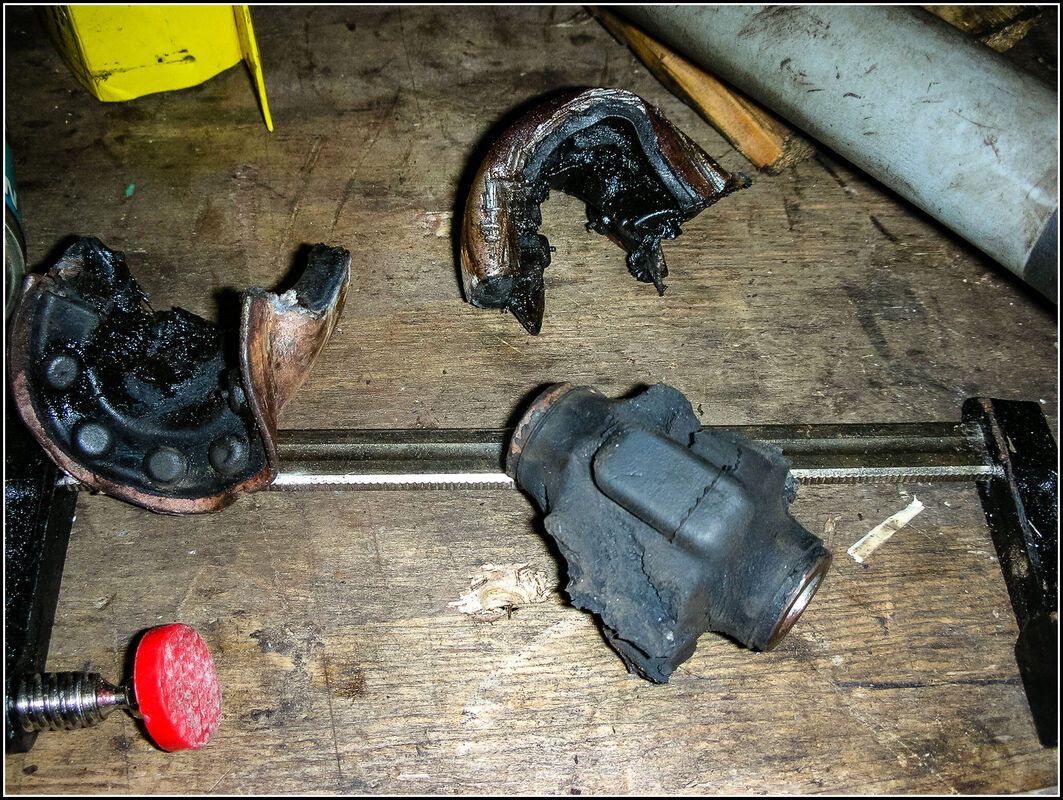
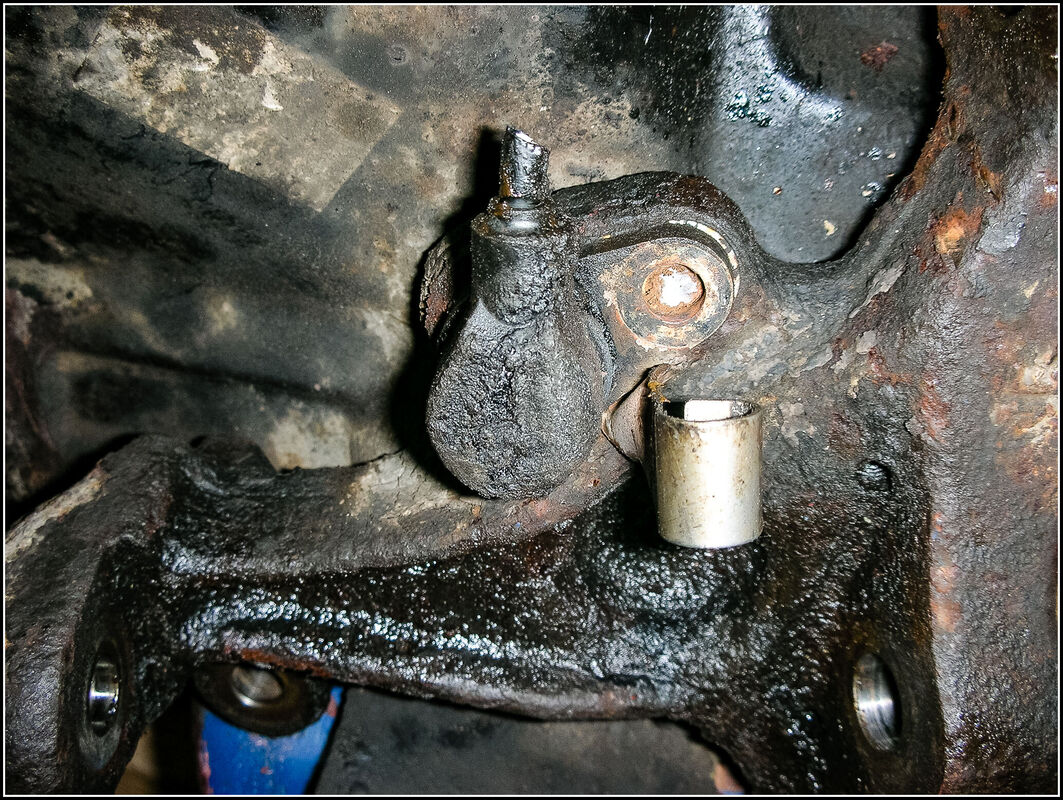
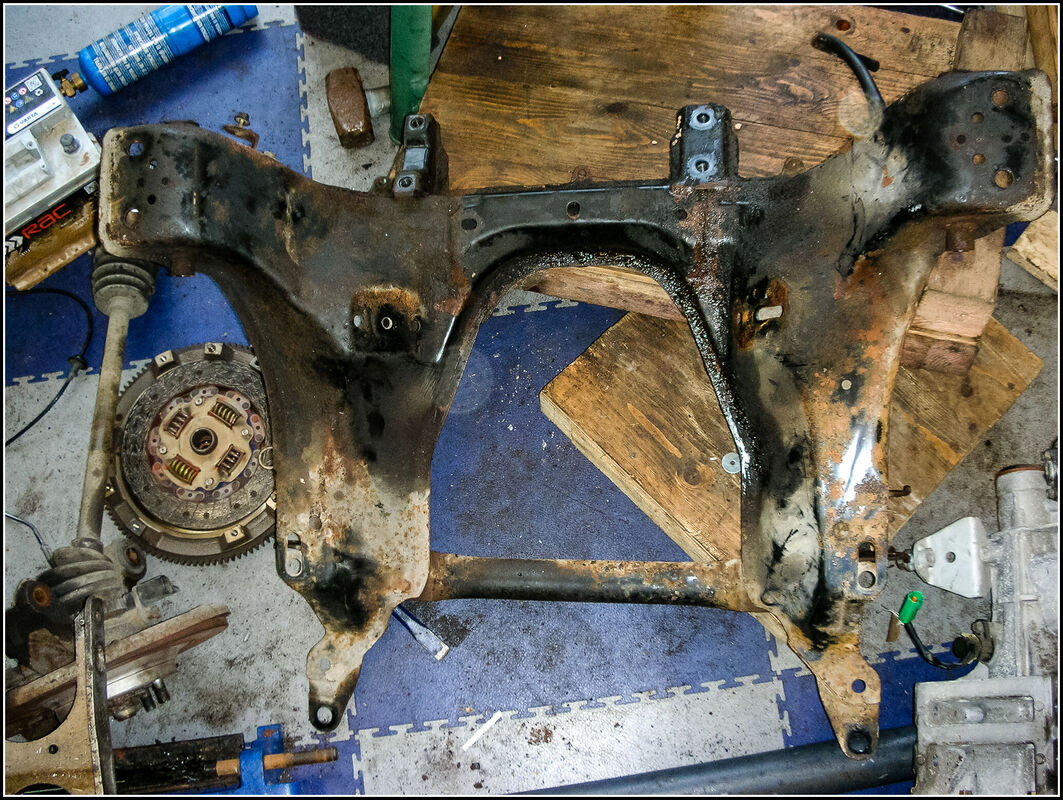
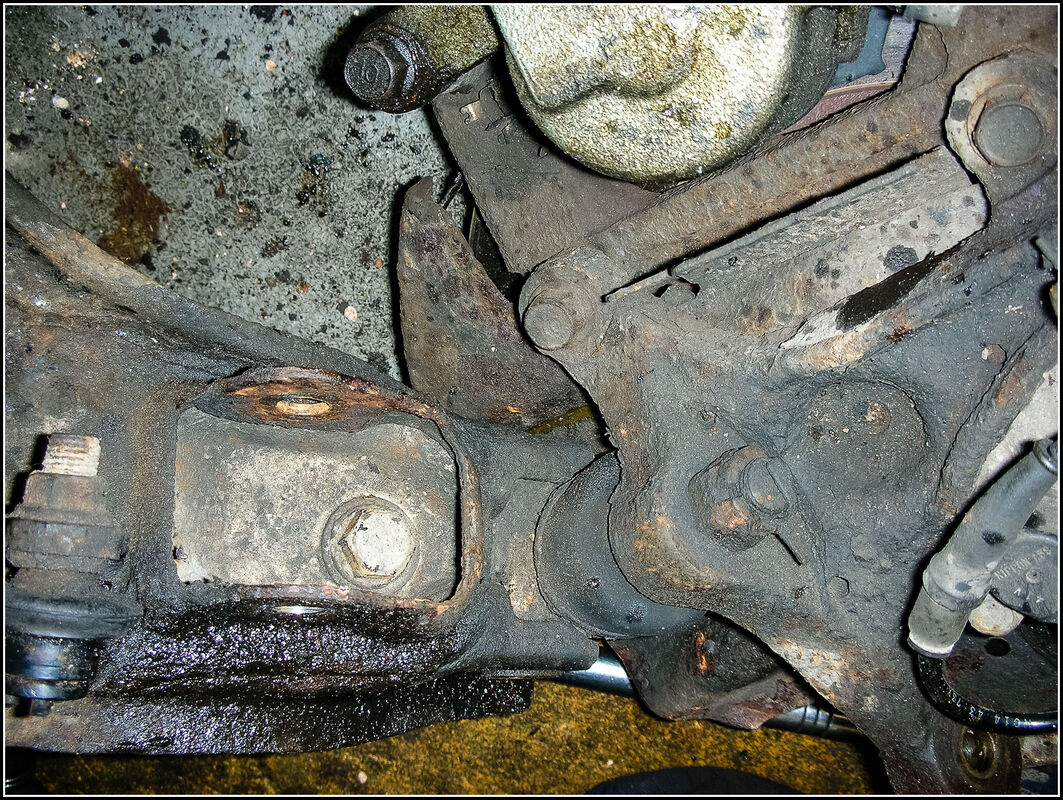
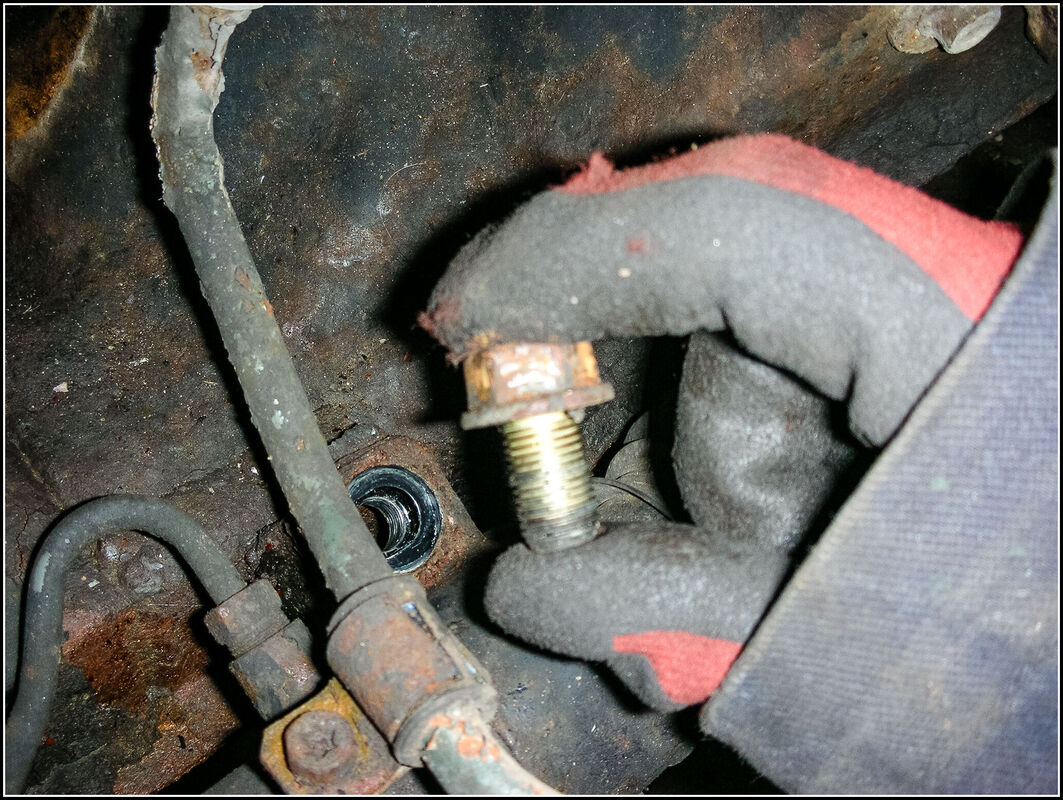
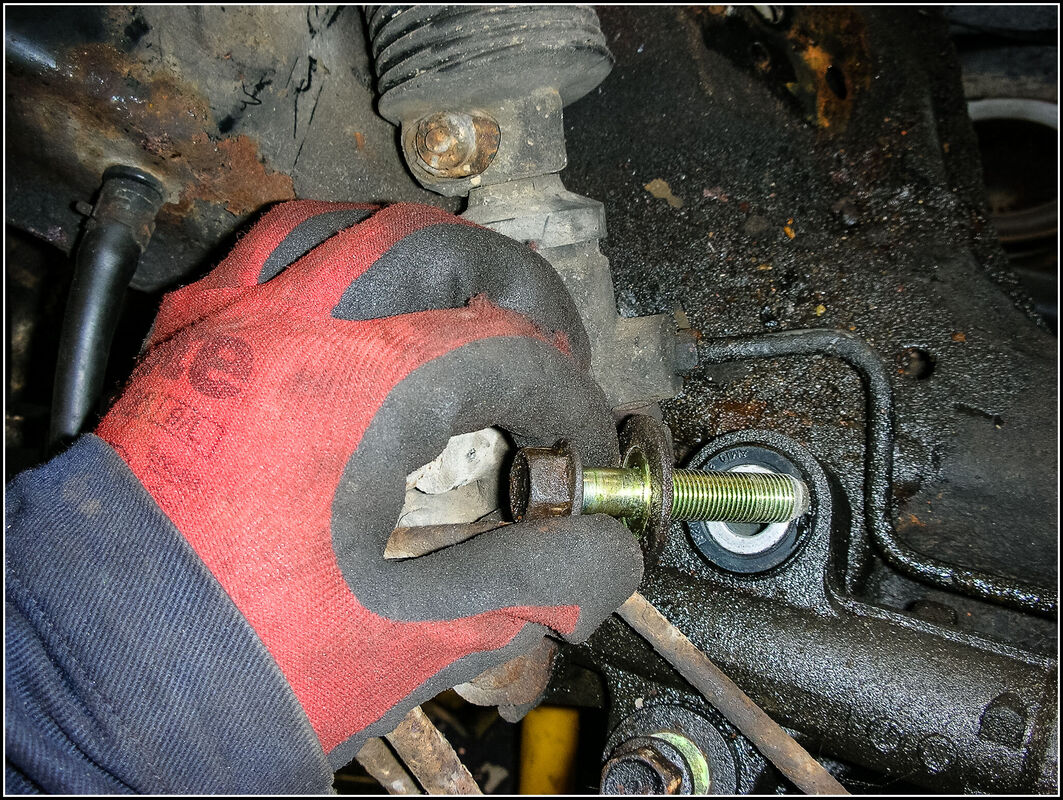
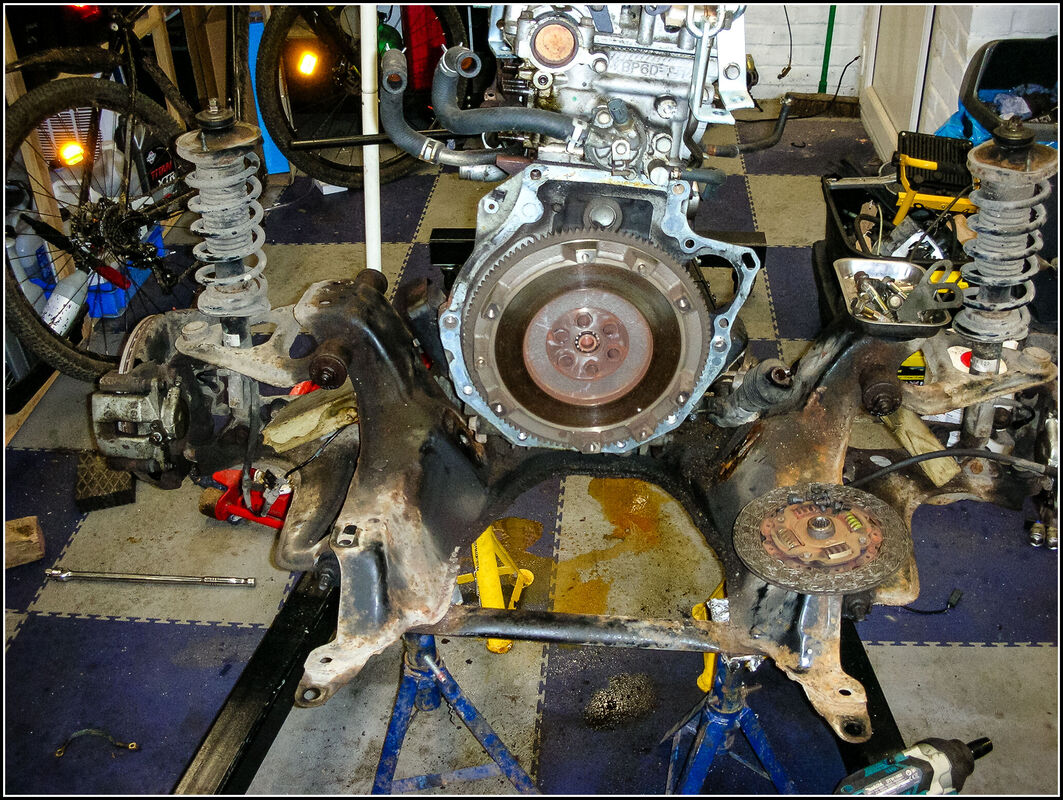
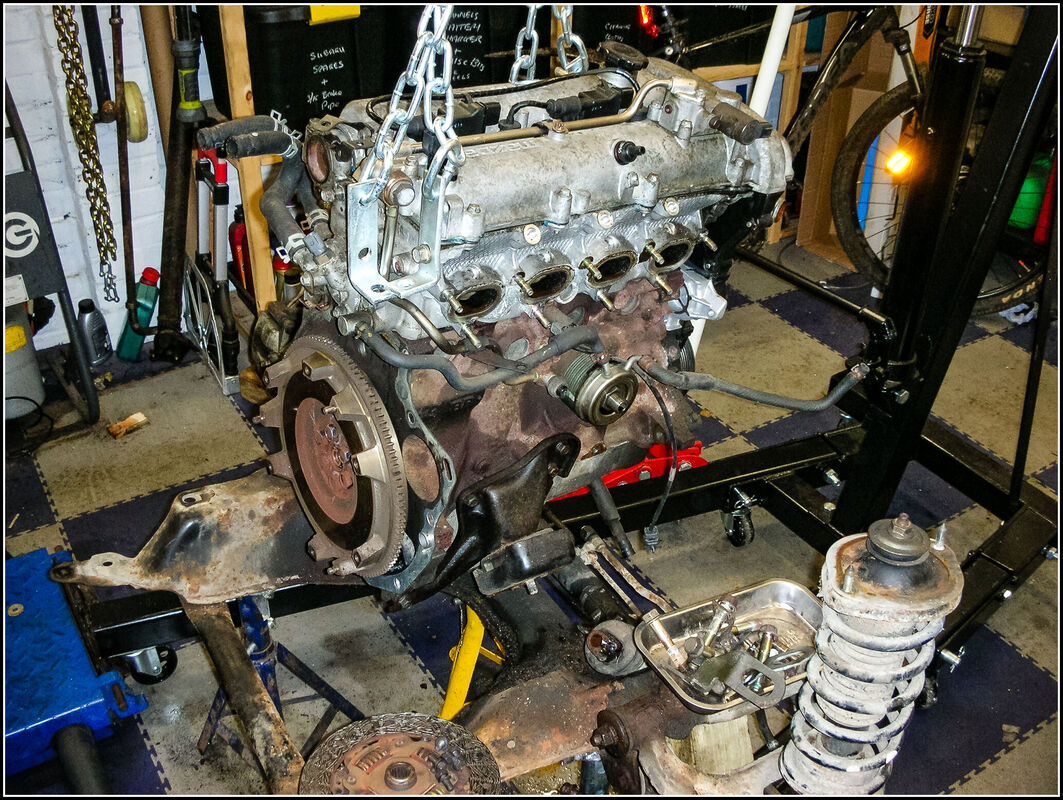
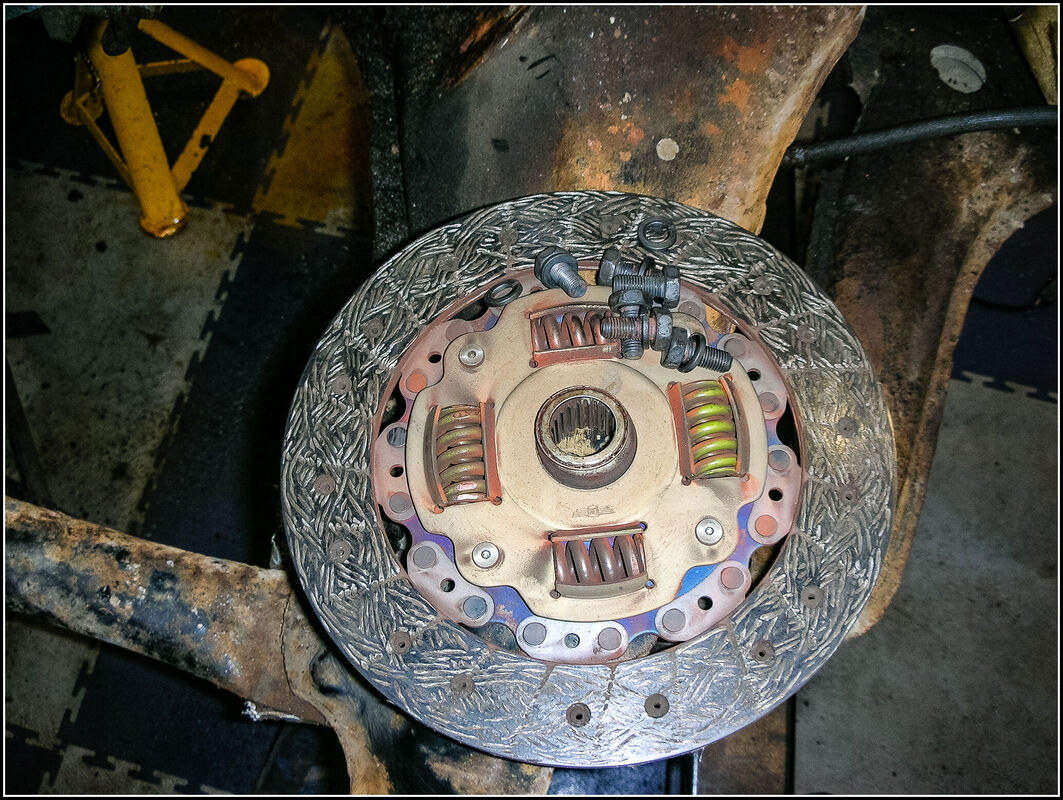
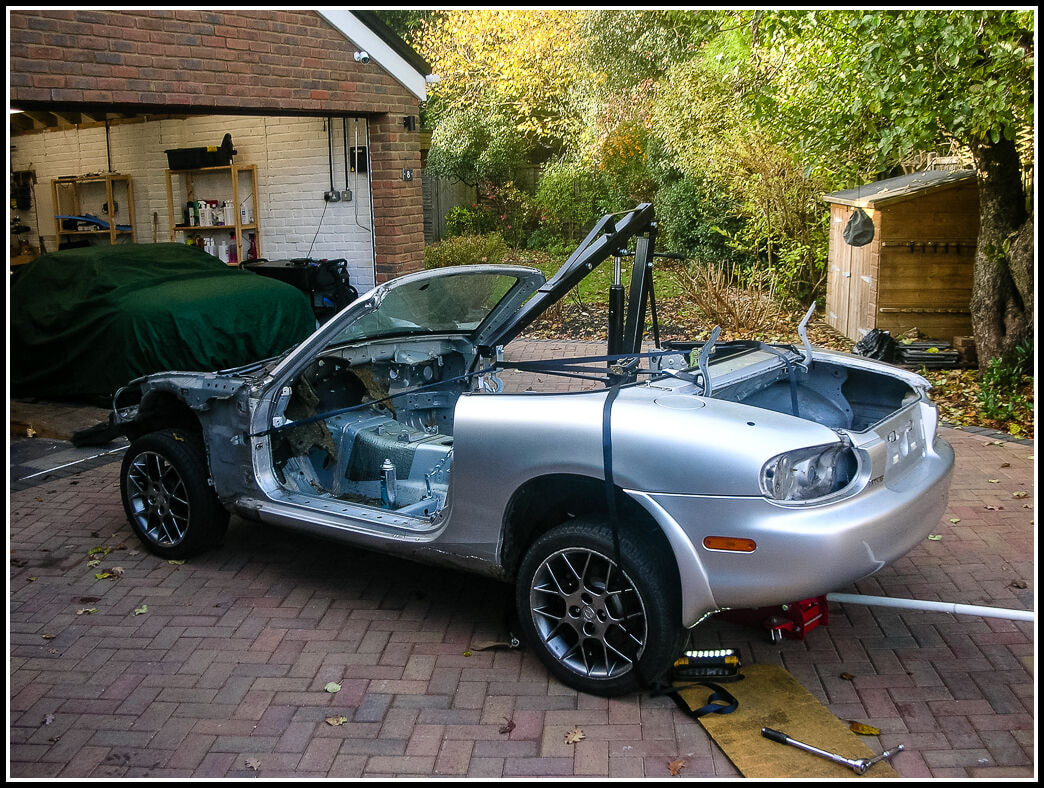
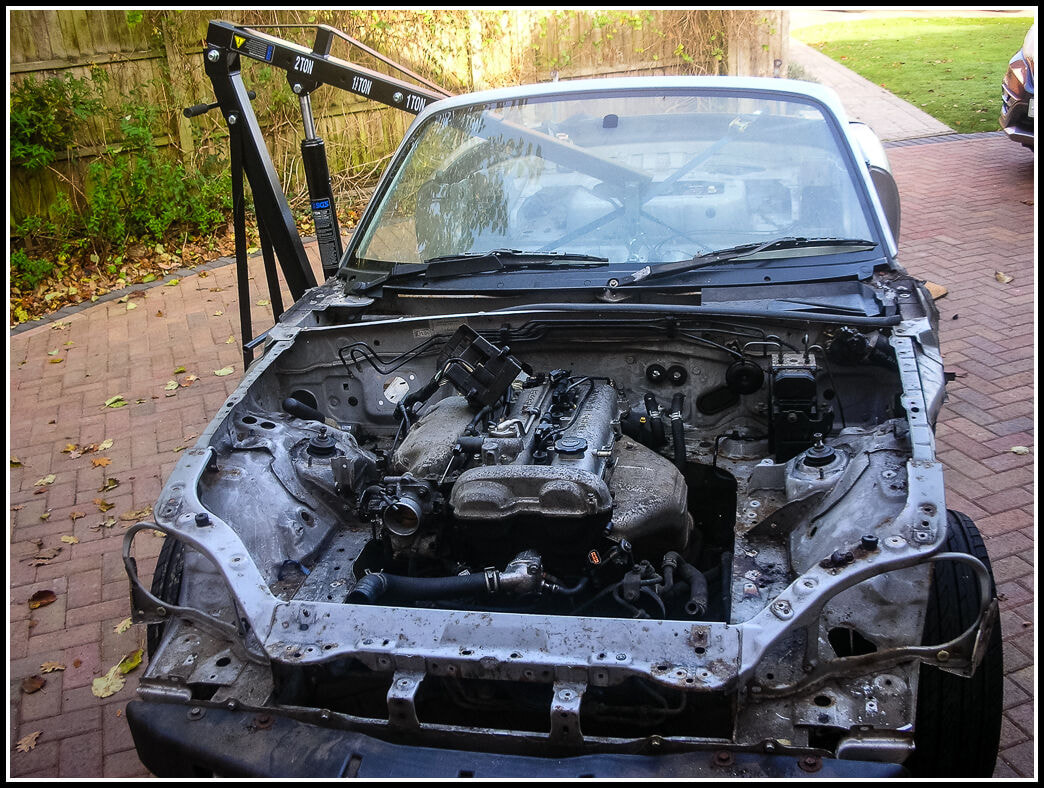
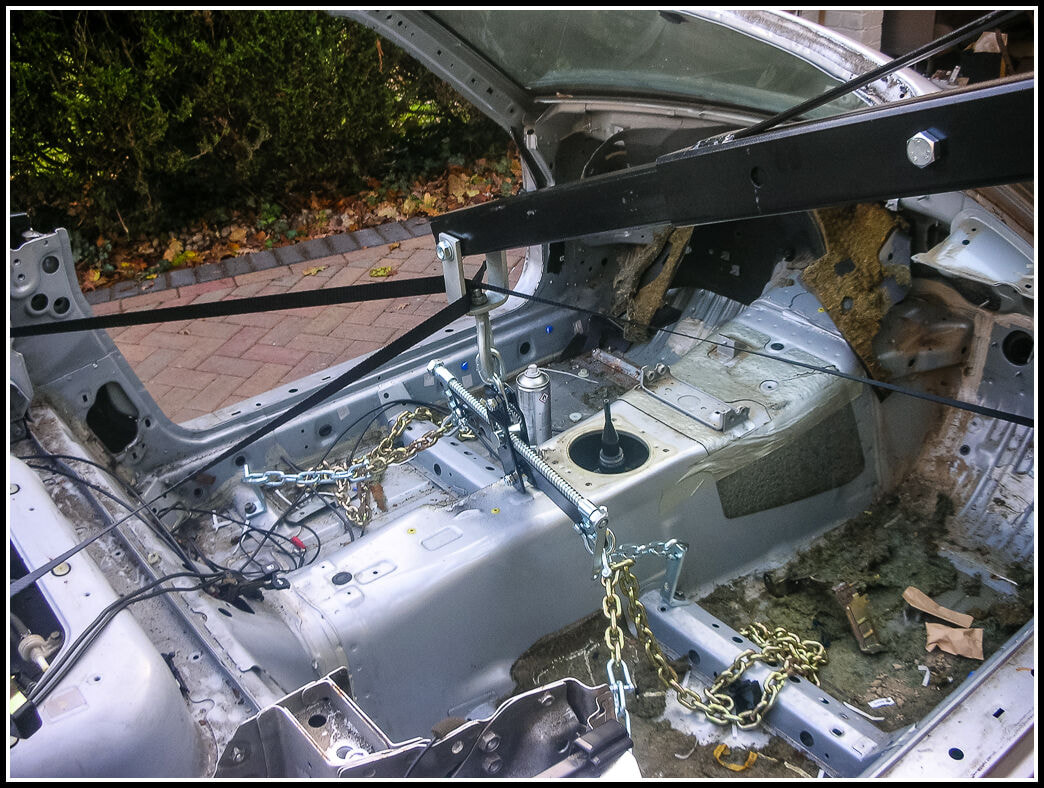
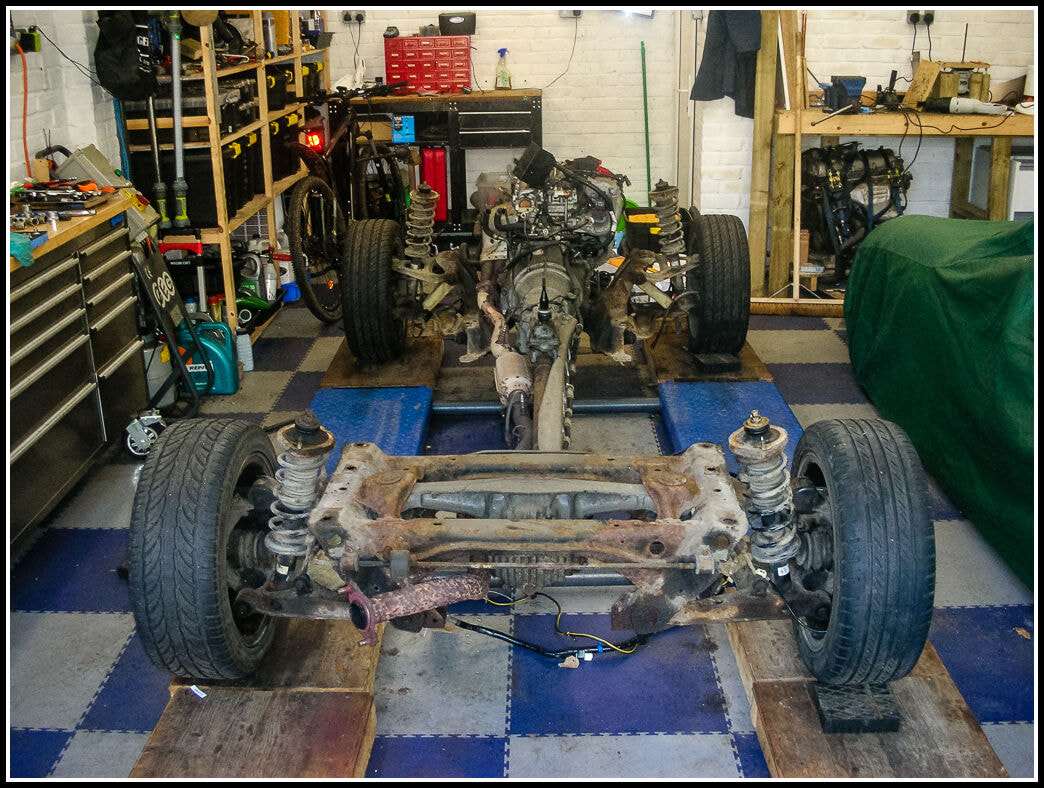
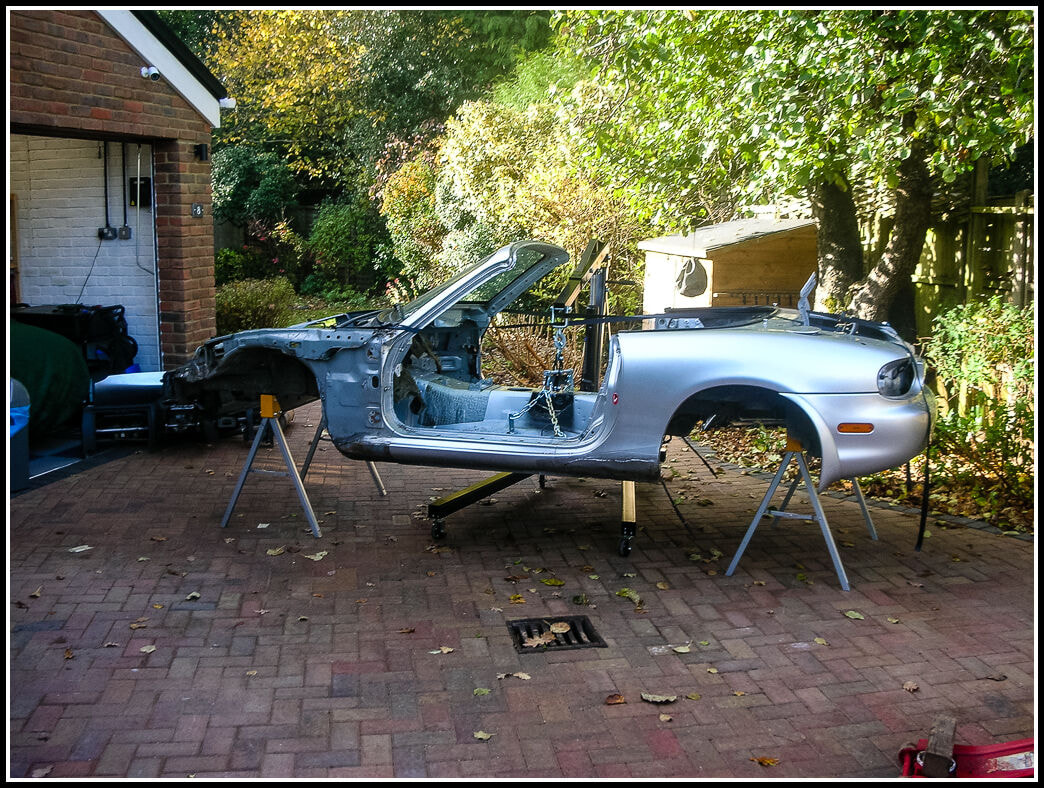
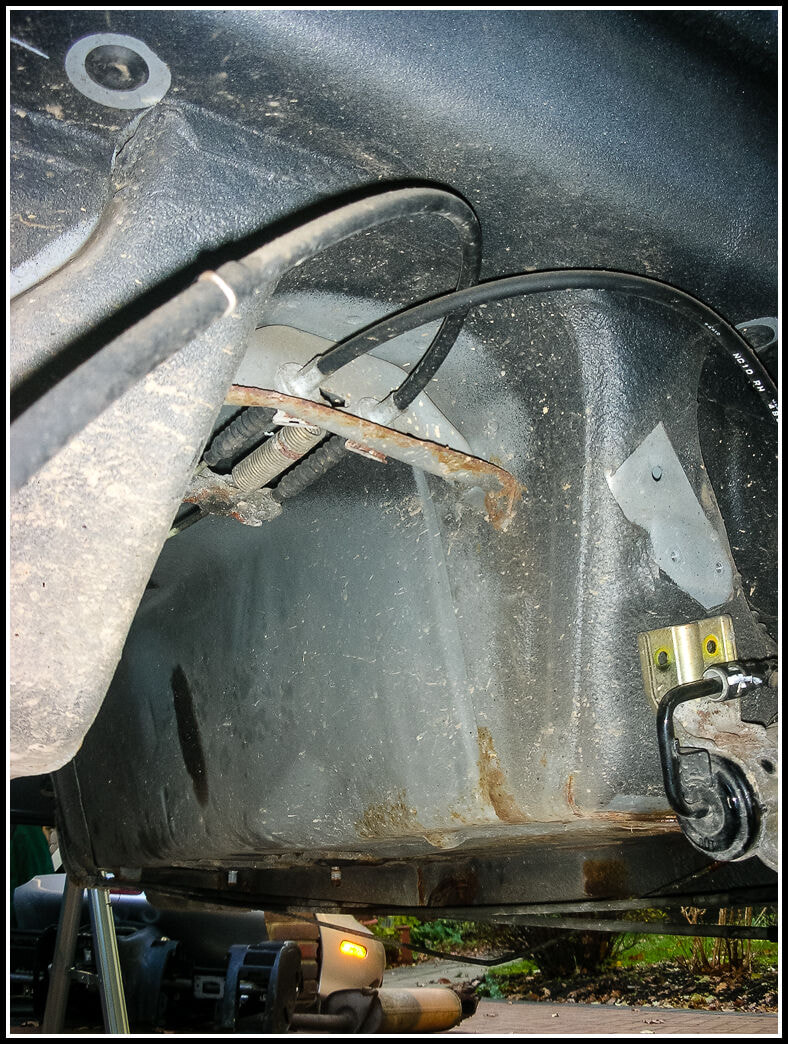
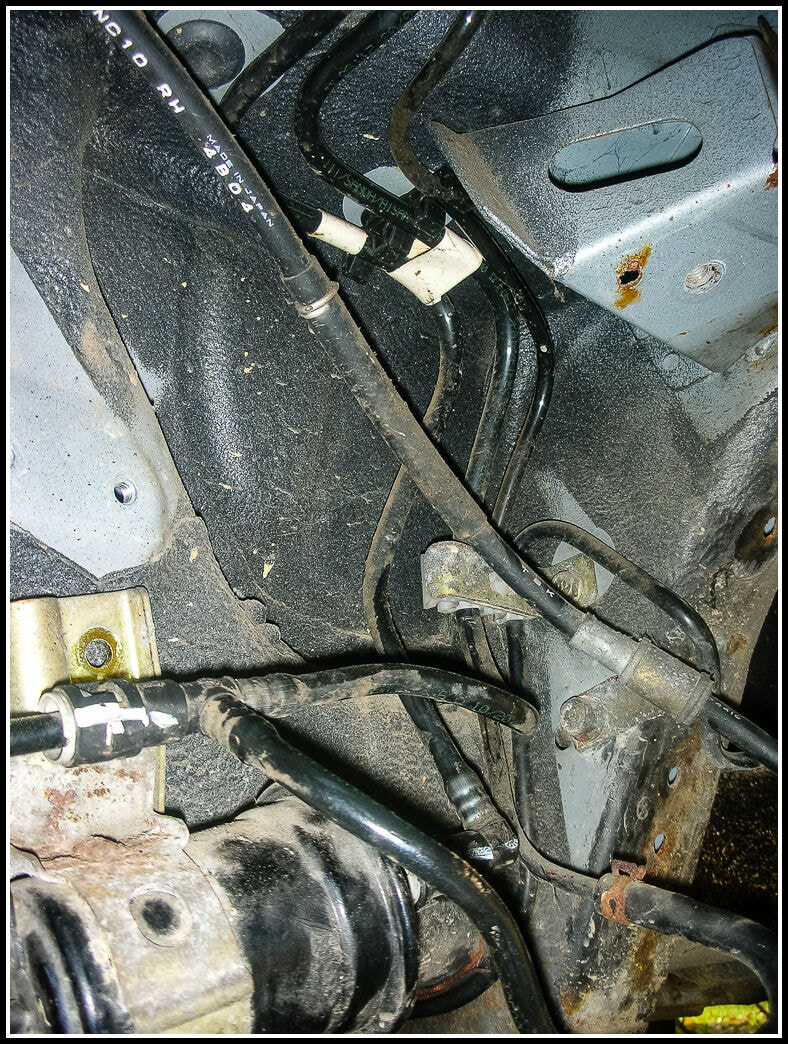
29 November 2020 Domestic activities took priority for most of the weekend so only a few hours in the garage. I had a final look over the control arms and subframes and piled them up ready to go to the powder coaters. Then I started cleaning up the front knuckles and hubs, first though I needed to get the ABS sensor out, the securing bolt of which had snapped of when I tried to remove it. Drilled out the remains of the broken bolt but that didn't help. So I used a combination of heat, a cold chisel, hammer and drill to get it out. My technique was to heat the back up with a gas torch for a few minutes then pulled off the rubber cover. Then gradually remove it bit by bit. Then I gave one of the hubs a wash in my parts cleaner then went over it with a variety of wire brushes in my drill. Only had time to get the ABS sensor out of the second hub and didn't have time to start cleaning that up. I bought some wheels at the weekend. The wheels are not the right colour (they are black) but they are brand new and cost me less than £200 for all 4 wheels. They should be straightforward to paint the colour I want, I could probably get them powder coated and still save money on a set of the Wellers. 27 November 2020 Back out for an hour or two this evening extracting the rest of the bushes out of the control arms. I also pressed out the ball joints in the front upper wishbones. The only things that need further dismantling are the brake assemblies, and the engine. I will be starting on the cleaning and refurbishment of the running gear next. The subframes, control arms and the front subframe brace will go off for blasting and powder coating. 24 November 2020 A productive few hours in the the garage this evening pushing out the control arm bushes. I had a bush tool that I had bought before to remove wishbone bushes on my TVR and that had the perfect size of cup to push out the Mazda ones. Thankfully the Mazda ones come out a lot easier than the TVR ones. This evening I got all the bushes removed from the front control arms and made a start on the rear one. 20 November 2020 A few frustrating hours in the garage on Friday evening. Started by removing the flywheel and transferring the engine from the hoist on to my engine stand. That was about the only thing that was straightforward this evening. Next I tried removing the differential bushes. These are large rubber bushes encased in steel the are pressed into the differential carrier. To remove them you have to drill out the centre of the bush then the ususal method is to bash the living daylights out of the metal casing with a cold chisel and hammer, so that you drive them out. Another method I've seen is to use a gear puller to push them out using a suitable drift. Well I tried both those methods but they didn't want to move at all. I succeeded in severely distorting the metal casing but it wouldn't move. I tried the puller method but my puller kept slipping off. So I gave up on that. Thought I would start dismantling the front suspension I needed to remove the steering rack so I could remove the rest of the suspension. However I was unable to separate the steering arms from their ball joints, I started to use my ball joint separator but as it was getting late I had to leave it because I was going to need to hit it very hard and I didn't want to disturb my neighbours with the noise. 22 November 2020 Couldn't get into the garage on Saturday as the leaves in the garden needed clearing up. So Sunday I had another go at the steering rack, with a few good wacks of the ball joint separator the steering rack ball joints came loose. Then I could unbolt the rack from the subframe. Next I undid the lower bolt securing the spring/damper unit to the lower control arm so I could remove it (after unbolting the ABS sensor wire clamp. I loosened all the control arm nuts which was tricky because the subframe without the engine weight was easily pushed off the axle stands and the nuts were very tight. In retrospect I would have been better loosening all the nuts before separating the power-plant frame. I undid all the control arm bolts and removed the knuckle assemblies. Then I undid the top and bottom ball joints from the knuckle (more ball joint separator action) and removed the brake caliper, carrier and disk. I tried to remove the ABS sensor but despite applying some heat the bolt sheared off and I was not able to remove the sensor, cut the wire off and will need to research a bit more on removing the sensor from the knuckle but I will have to drill out the remains of the bolt. Back to the differential bushes. I got the diff up on the bench and got to it with the cold chisel and lump hammer. After a lot of hammering one of the diff bushes gave up the fight. The second one seemed to give up with less of a fight. The technique seems to be to push the lip in as much as possible and then turn the diff over, push the edge in where the two halves split and then hammer the bush down to drive it out. That little lot took most of the day. Time to sweep up a bit and put some tools away before dinner. I still need to dismantle the rear knuckles so I can clean them up. I will need to remove all the bushes from the front and rear control arms and then they will be ready for blasting and powder coating with the subframes. 17 November 2020 A few hours in the garage this evening. Tidying up the rust that dropped off my subframe during dismantling, and generally clearing away tools just to give myself room. I spoke to Dave at Canems earlier today, to confirm the list of connections he needed, I went through the loom and cut them out, ready to send to Canems so they can build my new engine loom. Had to move a things around so I could get my engine hoist into place and then I jacked up the front subframe and put it on axle stands. I removed the wheels, then I attached the hoist to the gearbox and removed the bell-housing bolts. I separated the gearbox from the engine and lowered it to the floor. I removed the clutch cover and friction plate and found the cause of the noisy spigot bearing, it was completely dry and falling apart. Finally this evening I undid the engine mounting bolts and lifted the engine off the subframe. 14 November 2020 I started by stripping things off the engine to get it ready to lift off the subframe and also getting ready to separate the powerplant frame. Alternator, starter motor and power steering pump unbolted easily. I had already undone the connectors for the starter motor, alternator and oil pressure switch, gearbox neutral switch, reverse gear swith and speed sensor (for the speedometer. I released this last piece of loom from the powerplant frame. I went through this loom and the main engine loom to make sure I had identified all the connectors I need to send off to Canems for them to build my engine loom to go with the ECU. Drained the engine and gearbox oils. 15 November 2020 Spent some time stripping the bumper and spats off the donor (hoping to sell them for a bit of cash). The shell is now ready to go to the scrapyard. Moved a few more of the bulky items into the shed out of my way and also moved the petrol tank and steering column up into the storage space. Back to dismantling. I decided to start at the rear to get that out of the way. I jacked the rear subframe up, supported it on 4 axle stands and removed the wheels. I stripped out the rear damper assemblies and unbolted the rear anti roll bar. The notoriously difficult lower wishbone bolt, which holds the hub assembly to the wishbone, were thankfully quite straightforward. After I had loosened the nut I applied an impact wrench to the bolt and with lots more penetrating fluid I was able to get it to turn in the bush and then I was able to drift it out witht a 3/8” extension bar. I unbolted the wishbones from the subframe, I marked them up so I know where they come from. Next I wanted to dismantle the power plant frame, the front bolts came out easily and the rear bolts came out with a bit more persuasion from a long breaker bar. However the lower spacer wasn't coming out, no matter how I tried to lever it or hit it with a cold chisel (as advised in the workshop manual). So I unbolted the propshaft bolts and removed the front of the powerplant frame that allowed me to turn the rear subframe over and get to the spacer more easily. I was able to move it a bit with the chisel and hammer but I couldn't get it out fully. However, the bit of movement allowed me to get the powerplant off the diff and then I used my vice to press the spacer out. I unbolted and removed the differential and looking at them, the mounts were well past their best. I have new ones on order along with a full set of suspension bushes and new engine mounts. Finally for today I unbolted the final hard line that is clipped to the subframe. The rear subframe, wishbones and anti-roll bar are now ready to be blasted and powder coated. With my previous experience of working on older cars it's been surprisingly straightforward with the Mazda, I think the liberal application of penetrating fluid at the start and also during the dismantling process has helped avoid seized nuts and bolts. 13 November 2020 A couple of hours on Friday night making a start on dismantling the engine ancillaries. The exhaust manifold shield was unbolted along with the exhaust manifold after some liberal application of oenetrating fluid. I had to undo and remove the dip stick clamp and then pull out the dipstick tube to remove the manifold. I also had to undo the EGR pipe where it joins the exhaust manifold. The EGR system will be removed when the engine is rebuilt. The joint where the manifold joins the down pipe came undone quite easily after removing the bracket that supports it on to the bell-housing. I undid the remaining exhaust joints and removed the exhaust. Inlet Manifold I tried to follow the manual and some online videos for removing the inlet manifold but I found that the VVT manifold is a bit different. I could not get the fuel rail out, I had undone the nuts but they would not come out past the inlet manifold. I had to unbolt the top half of the inlet manifold/plenum which was held in place by 7 nuts and bolts. I had already removed the throttle body but I don't think that was necessary. Once the top of the manifold was off I was able to extract the bolts for the fuel rail and lift it out with the injectors. This made it simple to undo the electrical connections for the injectors. Even though the fuel tank has been removed for over a week there was still fuel in the injectors and the rail. Once the fuel rail was out of the way I undid the EGR valve to allow access to the rearmost manifold bolt. Both the bolts for the EGR valve sheared so they will need to be drilled out so I can blank off the EGR inlet. I also undid the inlet side of the EGR pipe and removed that completely. Then it was a simple case of undoing the manifold nuts and sliding the inlet manifold off the block. 7 November Today was the day for the body to come off. I rolled the car outside onto the drive. I hooked up the engine hoist to the lifting chains and ran some straps front and rear to help keep it level. I took the weight of the body with the hoist then put a jack under the rear end and undid the last 2 nuts on the rear subframe. Then repeated this at the front, everything was ready to lift the car. A friend helped me to monitor the other side of the car as it lifted and then up it went. The body lifted nice and easy, no problems, once it was high enough to clear the engine, we pulled it sideways with the engine hoist and put it down on to some heavy duty saw horses. These were rated to hold over 600KG so easily held the bodyshell. The powertrain skate was rolled back in to the garage. With the body on the saw horses, and still attached to the hoist, I removed the fuel tank and the handbrake from under the bodywork. Watch your head on the rear subframe studs, they are pointed and can be very painful if you catch yourself on them, I know..... Probably a good idea to slip a bit of rubber hose of them just in case. The fuel tank is held in place by 4 bolts and a sort of hook arrangement on the nearside, so you have to undo the bolts and support the tank while you lift the nearside of the tank over the hook thing. I drilled out the rivets holding the vin plate on the front firewall and also cut out the VIN stamped on the front firewall (next to where the VIN plate was) and also on the rear of the offside door opening. I cut the front brake pipe brackets off the front chassis rails, they will be sent to Andy to be welded on the new chassis. I undid all the clips holding the brake and fuel lines from the car and retained them. I pulled out the fuel lines and fuel filter. Then I checked around and undid a few other things that might come in useful (odd brackets and clips) or that I want to sell (wiper motor, ABS pump). 6 November 2020
A few hours in the garage getting ready to lift the body. Cut some blocks of wood to jam between the suspension arms. This is to stop the subframes collapsing to the floor when the body is lifted off. I also removed some of the nuts and bolts securing the subframes and just left 2 on each subframe to hold them in place. I started loosening the final nuts but as I undid them the body lifted off the subframes which confused me as I expected it to just stay in place. The bodyshell was not heavy enough to resist the springs. I left the last 4 nuts undone slightly. I also smacked an impact socket on to the last rusty nut holding the back box in place and undid it, I cut off the hanger rubbers and pulled the back box out. Removed all the suspension top mounting bolts. I bolted my lifting chains in to the seat mounting holes ready for tomorrow. |
Archives
January 2021
Categories |


 RSS Feed
