|
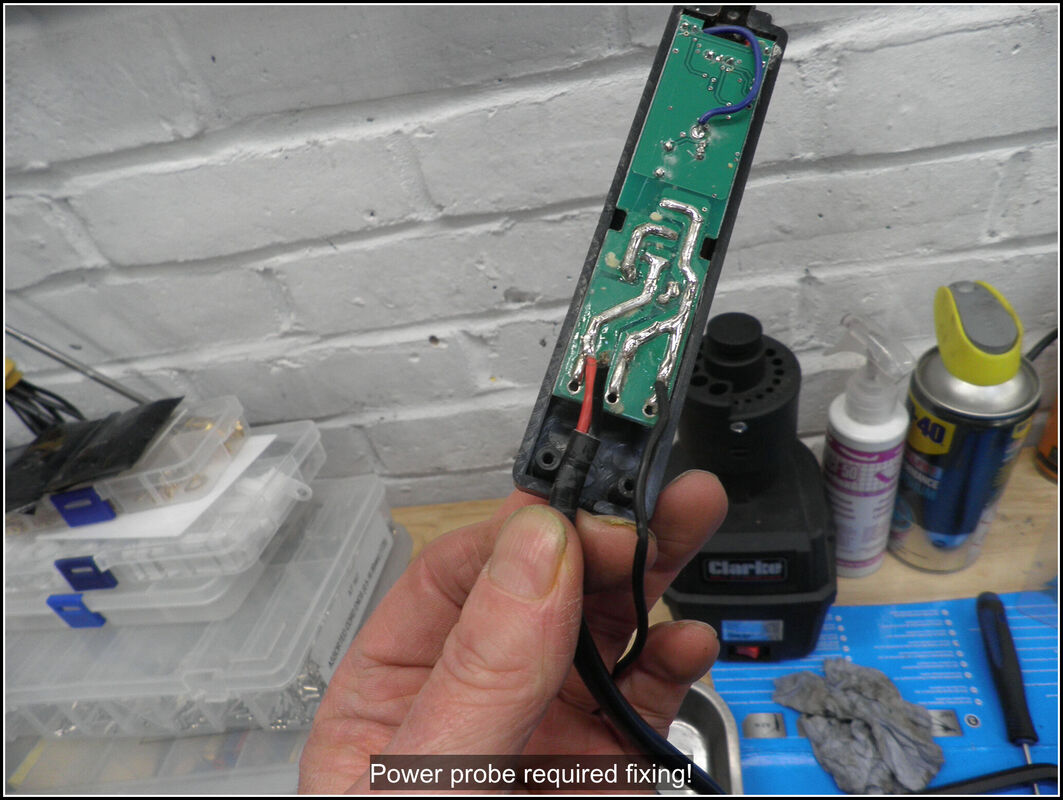
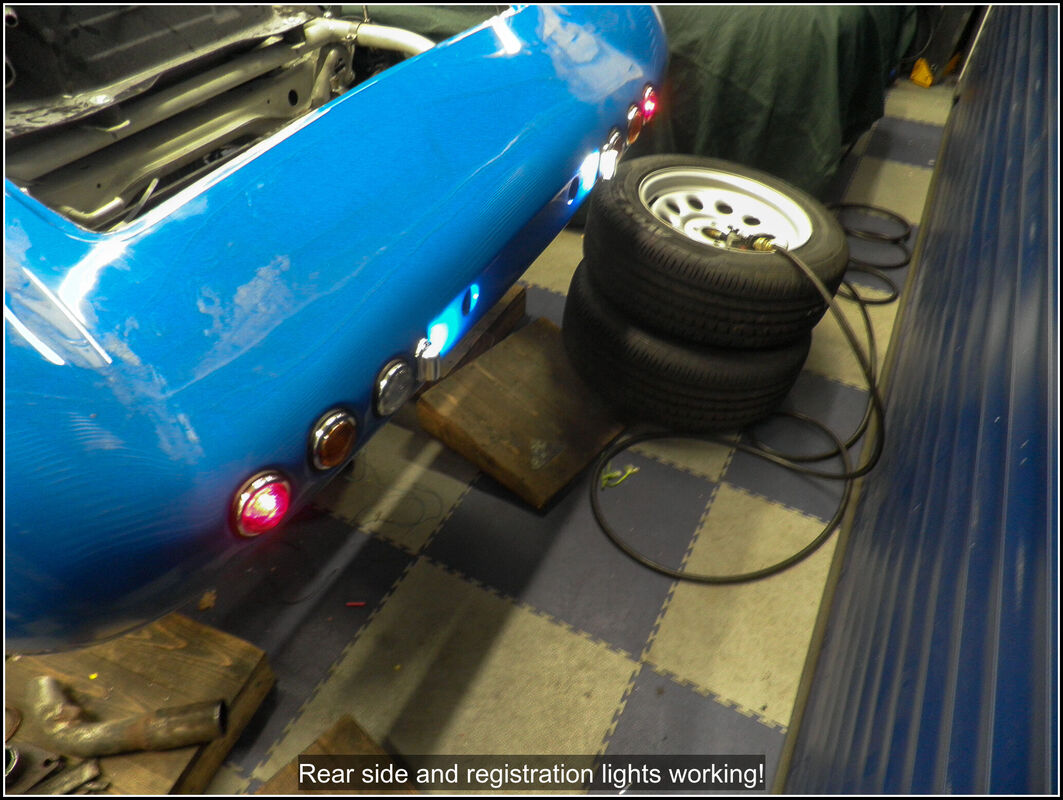
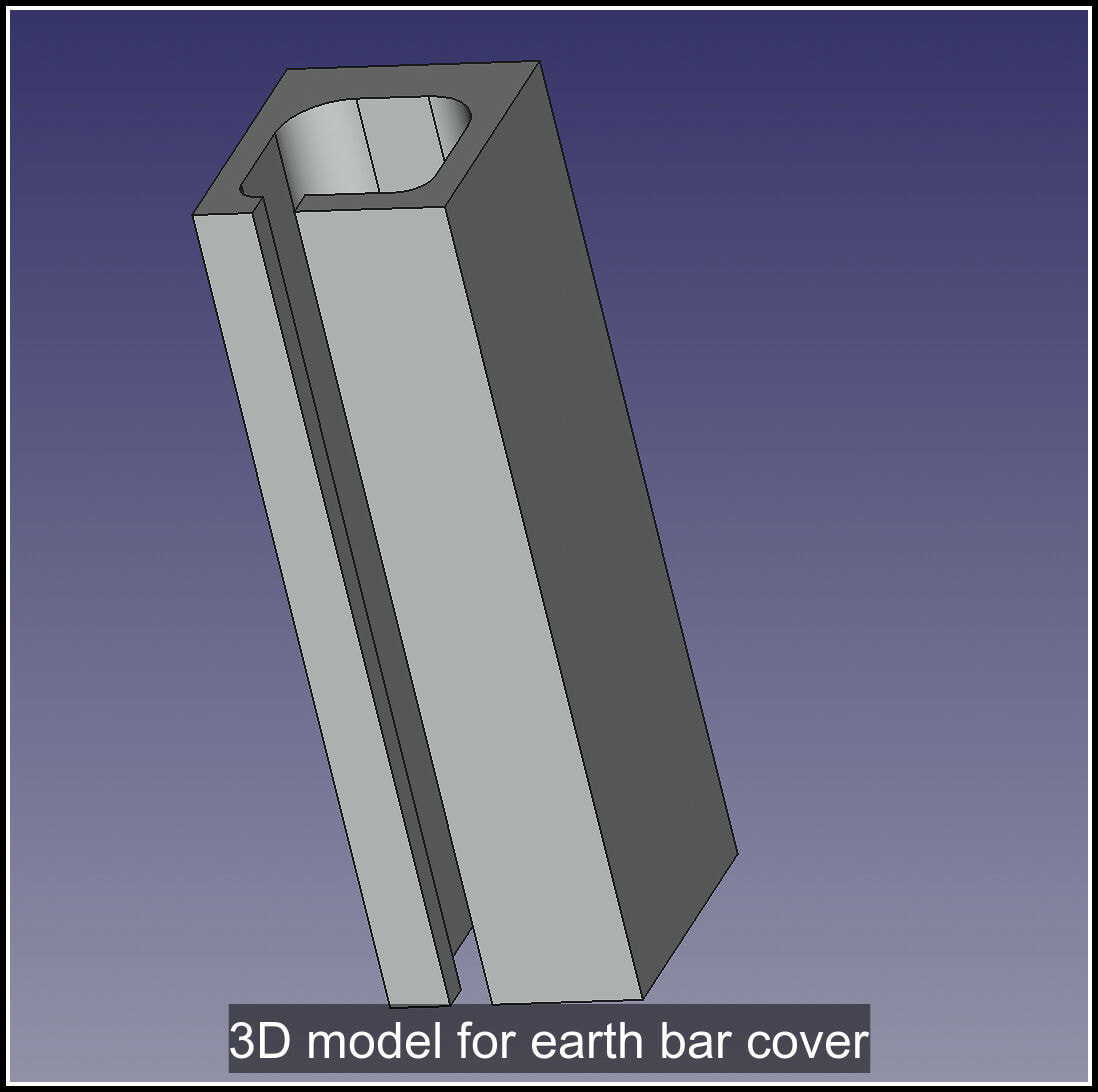
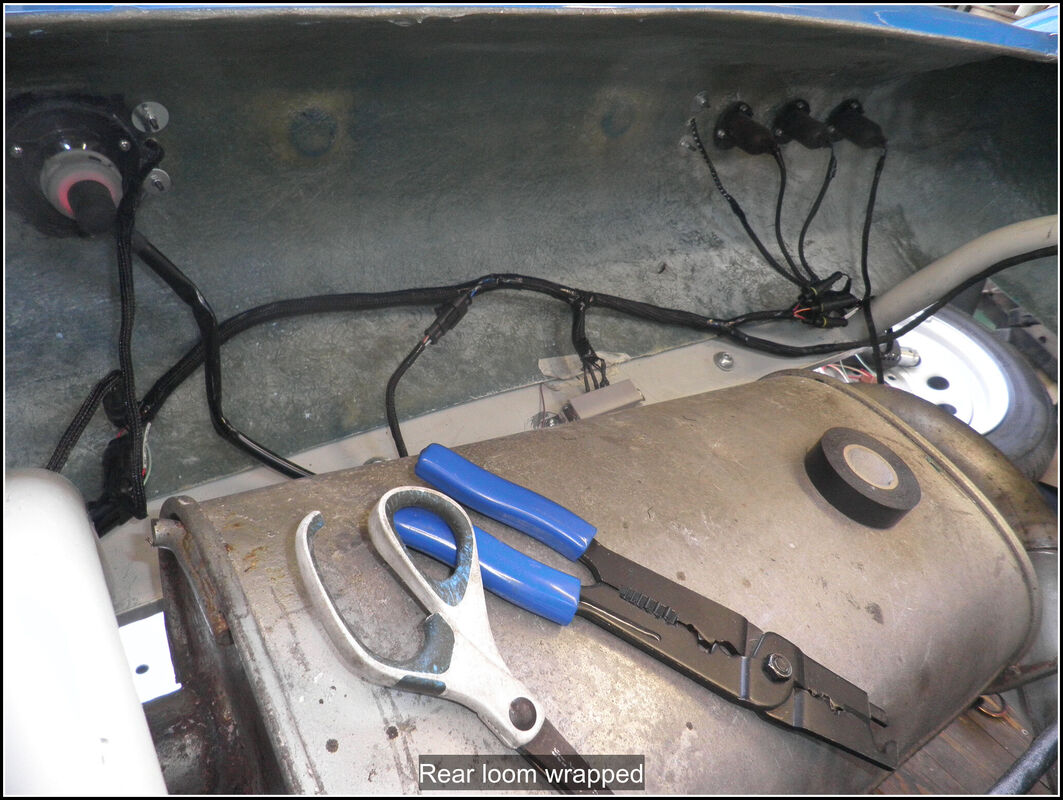
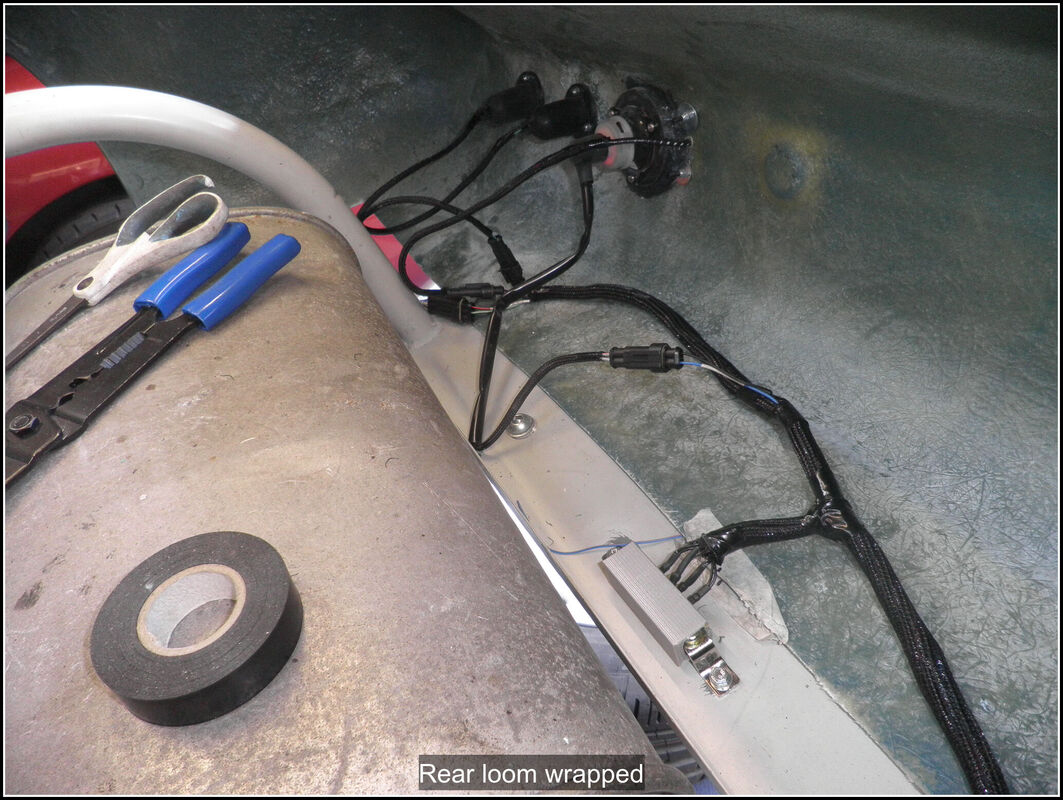
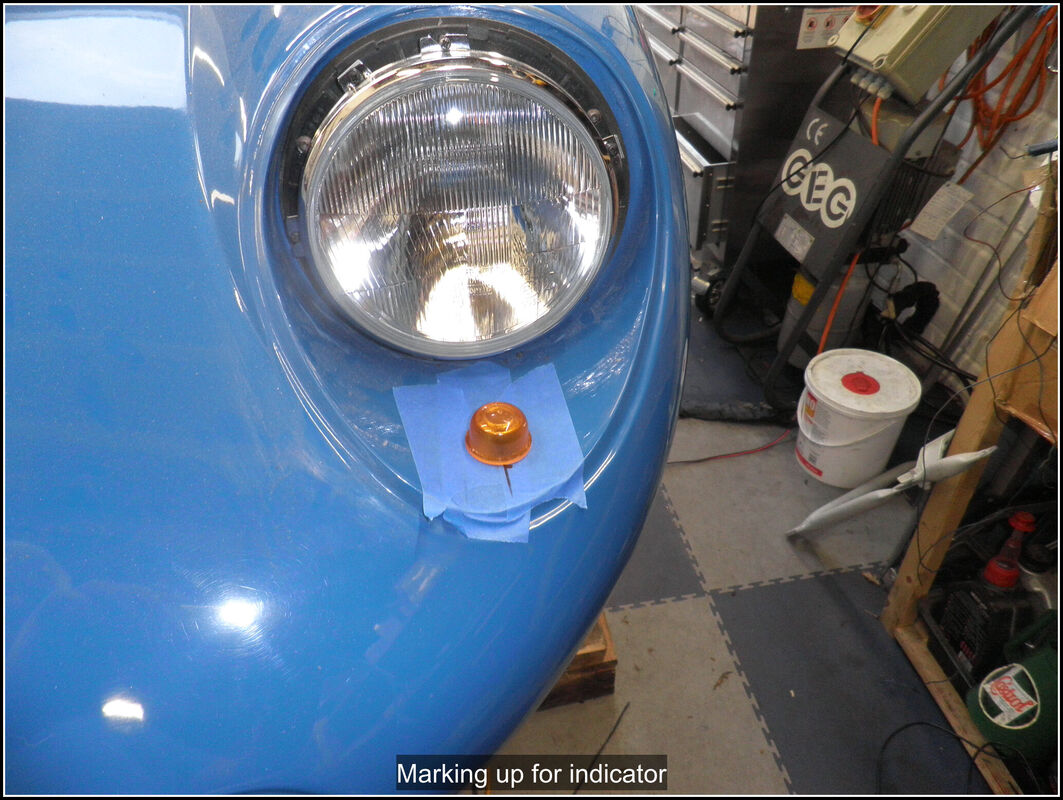
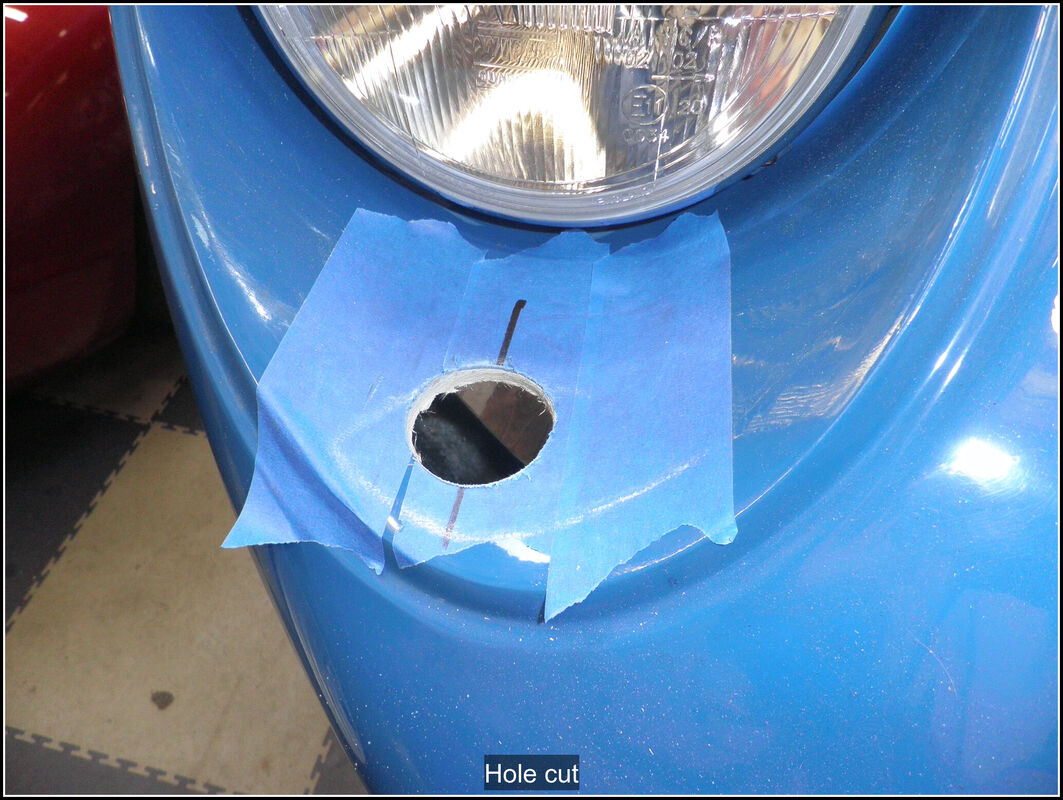
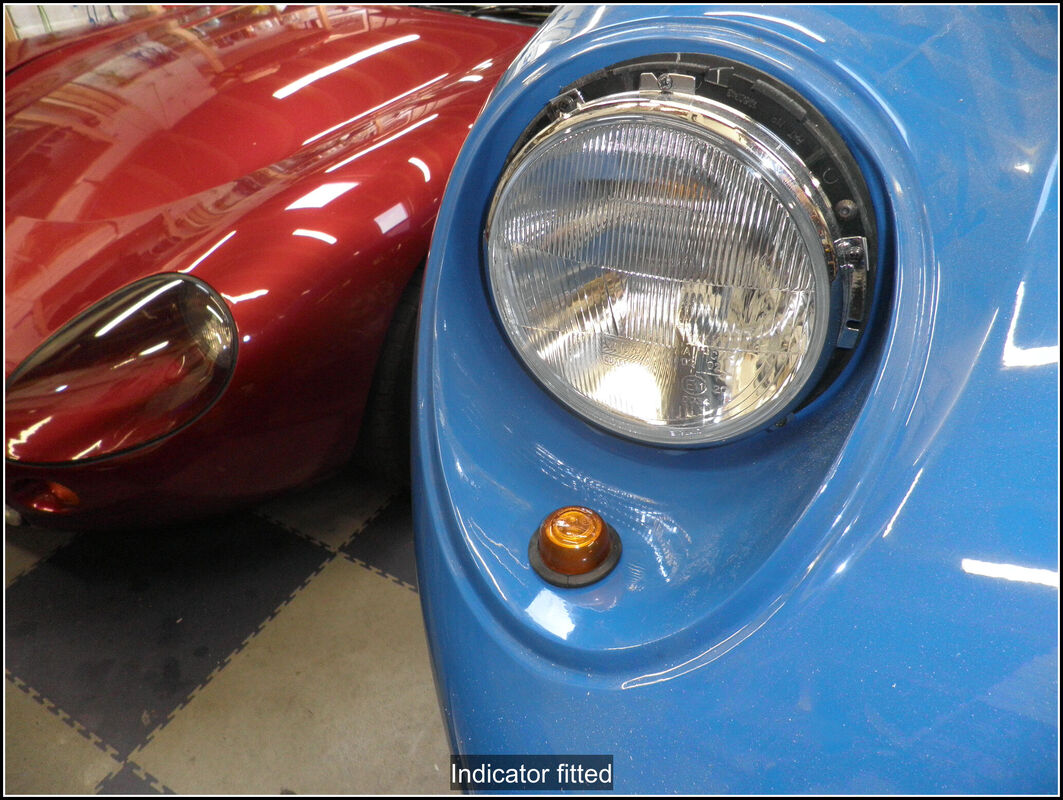
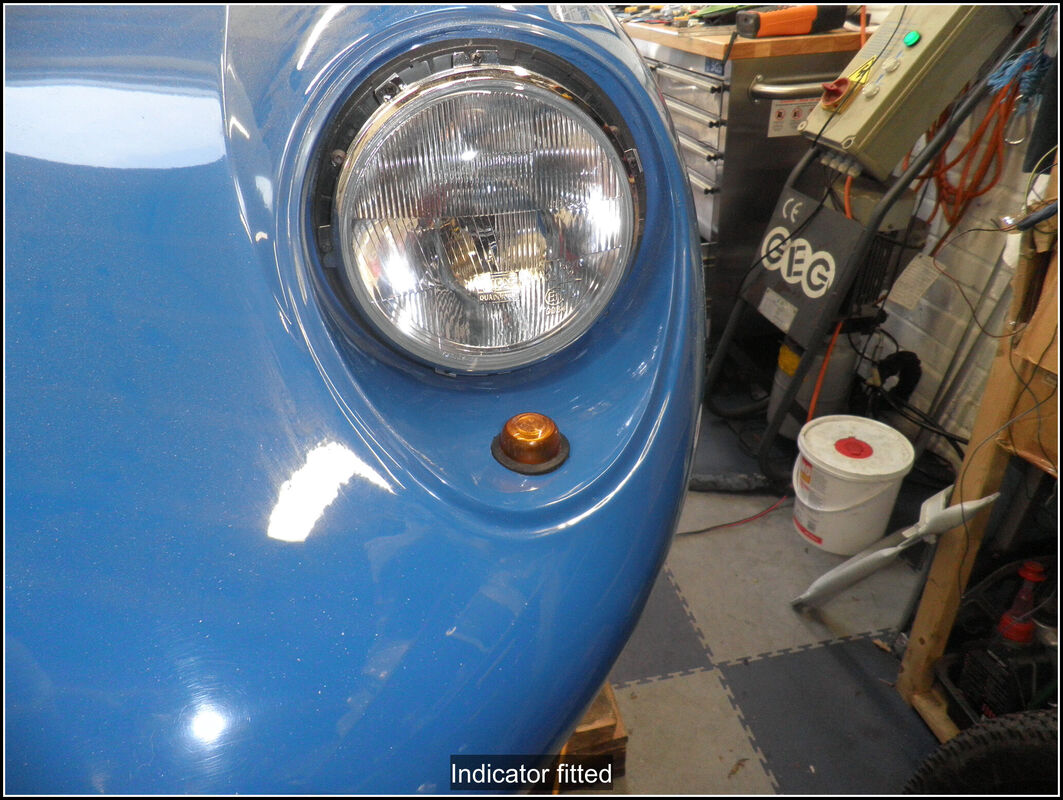
4 April 2022 Started connecting up the rear lights. Spent a bit of time thinking about how to group the wires and connectors. I terminated the brake, tail, number plate, and earths with SuperSeal terminals. I tested each one with my power probe, but first I had to fix a broken wire in the power probe. It's a really useful tool for applying voltage to components and checking continuity. To simplify the earth wires I added an earth bar on the rear outrigger plate then I made up earths for the number plate and tail lamps. Connected up the battery and added the fuses and turned on the side lamp switch. Success, the tail and number plate lights came on as well as the gauge illumination and warning light. Currently the terminals haven't been put into the holders, just while I check everything. Tested the headlight units and labelled each of the wires and terminated them with SuperSeal connectors. I found the side lamp bulb hadn't been put in correctly on one side so wasn't working. 5 April 2022 Did some calculations on how many of each connector, I'm going to need. I had bought a multi-pack some time ago but as always happens there aren't enough of the ones I need the most (2-way) so ordered some additional ones. I also ordered some more earth rings as I'm getting short of them. I want to have some sort of cover to go over the earth bar at the back to protect it and the connections a bit. So I drew up a design in CAD and after a few trial prints printed it off in some flexible filament so it can be fitted over the earth bar. 14 April 2022 Made up some earth wires for the front headlamps, additional main beams and indicator, added them to the earth bar. Got the horn installed and tested all working! 15 April 2022 A full day in the garage today, the first in a long time. Made up the additional wiring to extend the wires across to the offside lights. Put the earth wires into the p-clips. Terminated the wires to connect to the headlamp units and assembled the 4-way multiplug. Tested the sidelights, all working front and rear so one circuit ticked off. Put all the fuses in for the ignition switched circuits. Ignition on gave me the expected warning lights so that was good. Dip beams initially worked but when turning them off and on at the switch they would go off but not come back on again. Then I tried the main beam and while the warning light came on the lights themselves did not. Spent a long time testing the high beam circuit, I removed the high beam relay from the fusebox so I could check the resistances of the wires and make sure there wasn't a break. All seemed OK. Connected up the power and load to the relay and applied power to the coil circuit using my power probe and the main beam came on. So the problem was somewhere in the switch circuit. I put the relay back in the holder with the power/load wirtes inserted and made up some test leads for the switch circuit relay. After much testing many different scenario's I eventually found that the circuit works if I remove the warning light from the ciruit. Testing the warning light it has a 38ohm resistance which to me seems quite high. Measuring the other warning lights they are 28 ohm which seems high when I compare it to a small cap bulb at 5 ohm. I think the high resistance is causing too much voltage drop to trigger the relay but I need to do some more voltage checks. 16 April 2022 Had a chat with the supplier of the warning lights to check if the resistance I measured was correct but they couldn't confirm me. However they suggested I change the wiring so the warning light is fed by the same feed as the lights rather than by the switch. Had a think and a look at my wiring and that made sense and wouldn't be too difficult to do. I decided that I wanted to do all the lamps that way for consistency. I took the dash out of the car again and moved the wires around and made up the additional feed wires and earths for the warning lamps on the dash. I also took the time to make up longer wires to feed the charge, brake and oil pressure lights as this would give me a bit more length on the multiplug which was a bit tight when connecting to the main loom. I made up new wires to feed the fog, side, dip and high beam warning lights and spliced them into the relevant circuits and hooked them up to the spare positions on the multi plug. I had to order some spare pins as I was one short so I'll add that when they arrive. I tested all the circuits and side, dip and main beam circuits are all working. I moved to the back of the car and termiinated all the remaining lamp wires and made up the SuperSeal connectors. I've been able to tick off the reverse and fog light circuits which I am happy with. Tested the rear indicator circuits and somehow I have managed to mix up the left and right wires, I checked and the issue is the same all down the car which is not surprising as the are all spliced together. I should be able to just swap the connections on the indicator switch but that means taking the dash out again so it will have to wait for another day. 17 April 2022 A few minutes to take the dash out and swap the indicator wires round on the switch. Popped the dash back and tested and now they work the right way round. 18 April 2022 Brake lights tested and working, that's all the external light circuits tested now. Bundled and wrapped the wires in the rear of the car, haven't p-clipped them in place yet. Moved on to fit the front indicators. I masked the bottom of the front light recess and marked out the position for the indicators, a bit of lining up by eye and a bit of measuring to keep them looking symmetrical. I pilot drilled and cut out a hole with a 44mm holesaw, that made a nice tight fit for the indicators to sit in, I followed Andy's advice and pushed them down so the rubber was just proud of the surface. I don't think they will push all the way through due to the indicator lens. Made a start on deciding how and where to position the side indicators.
0 Comments
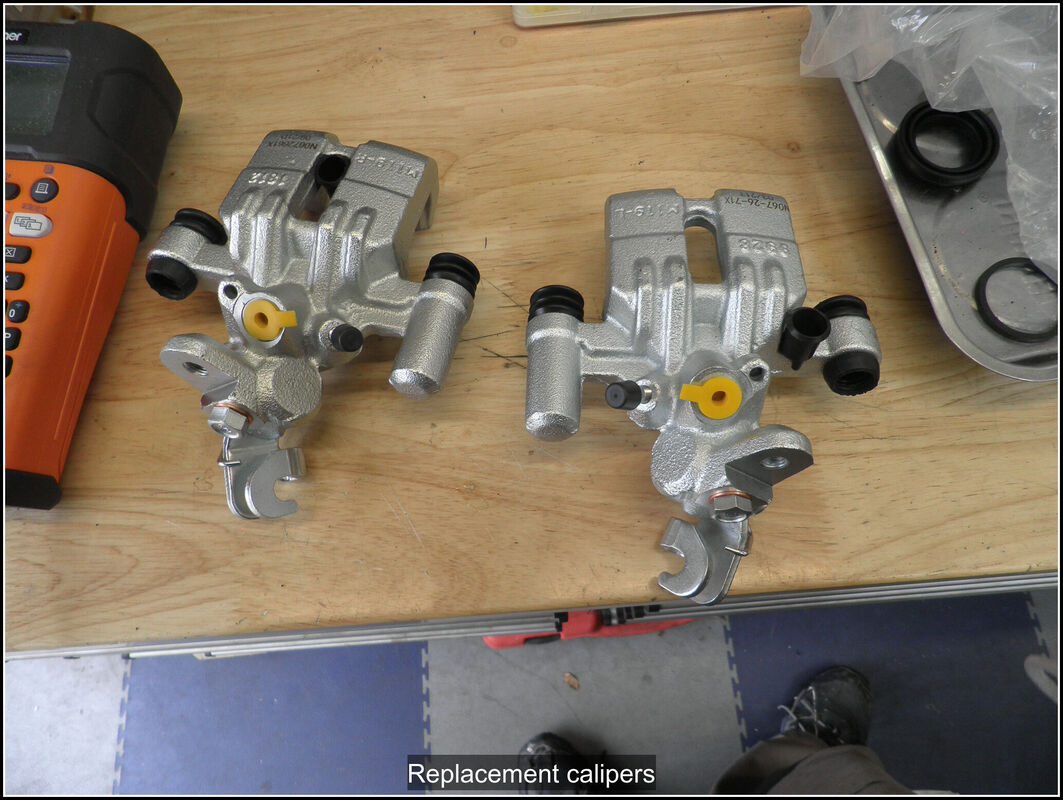
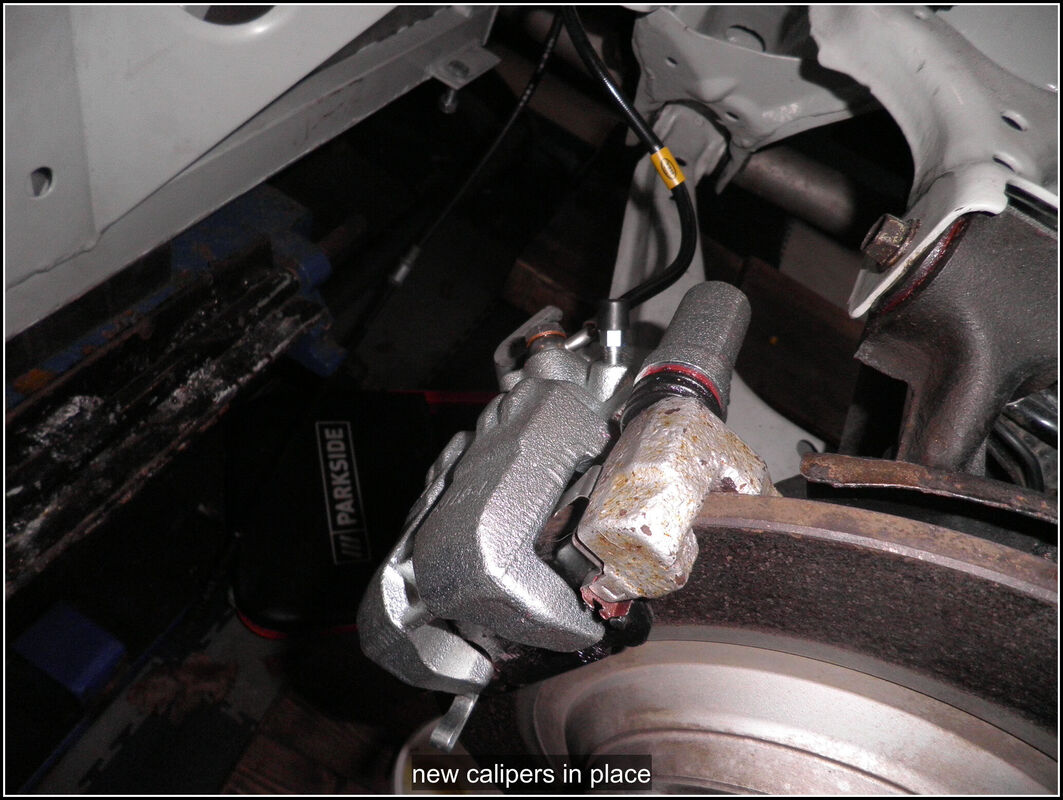
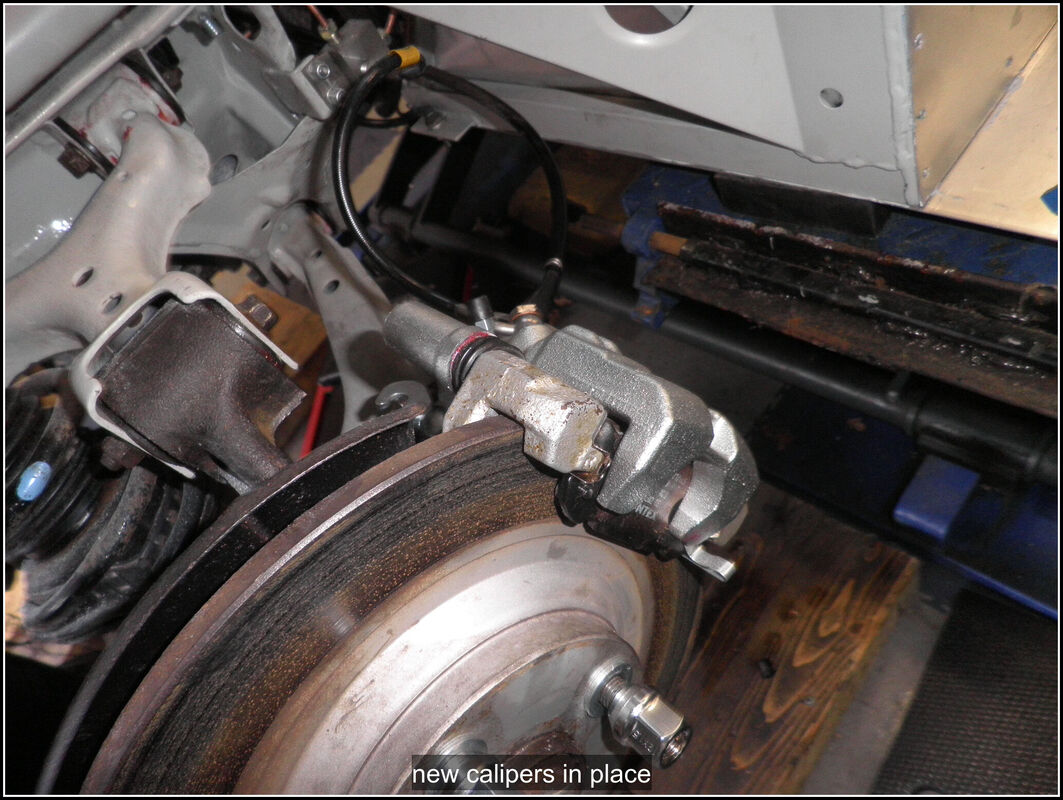
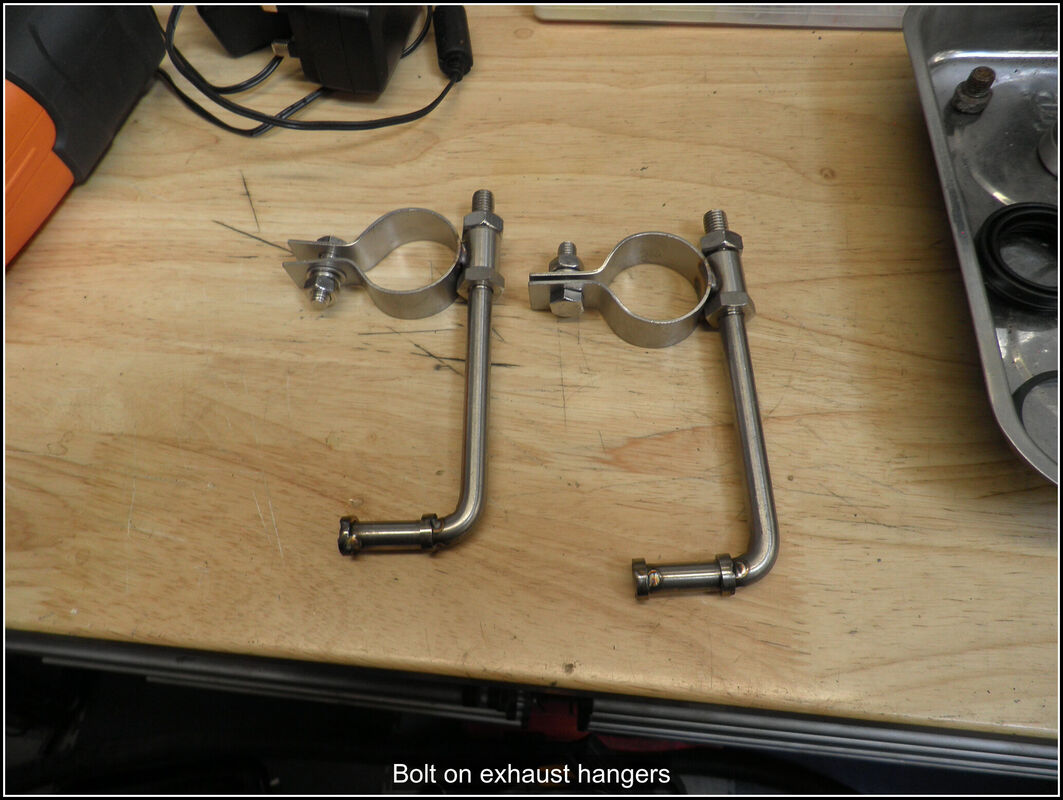
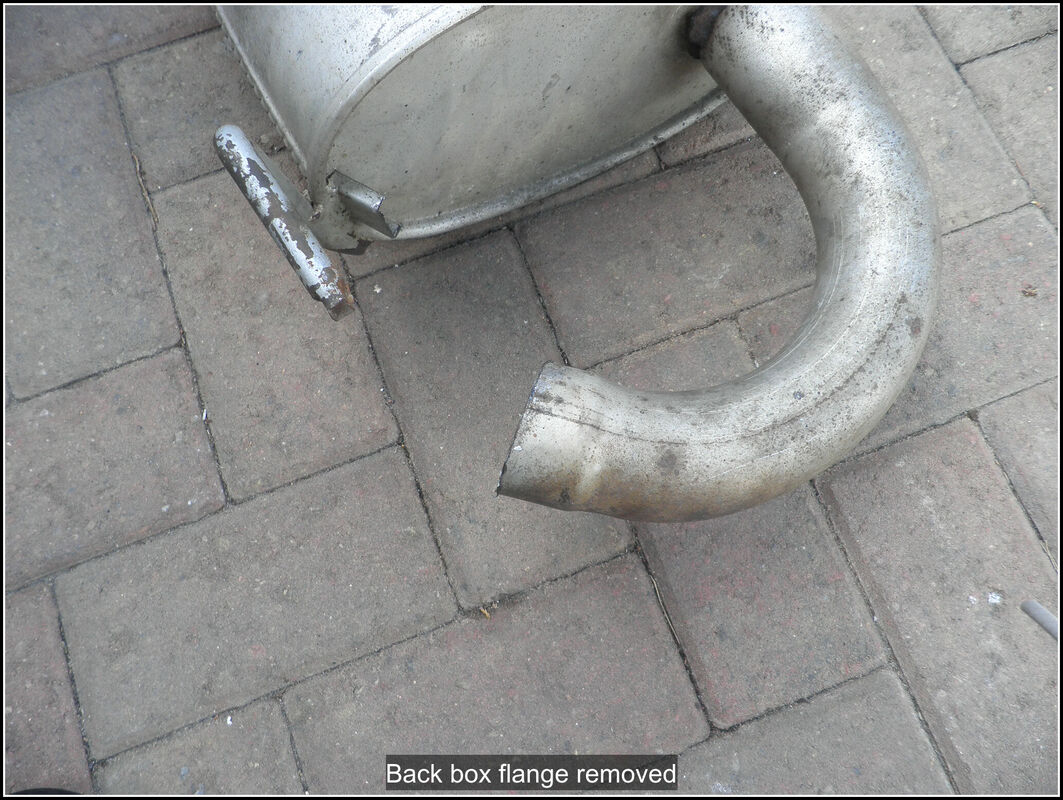
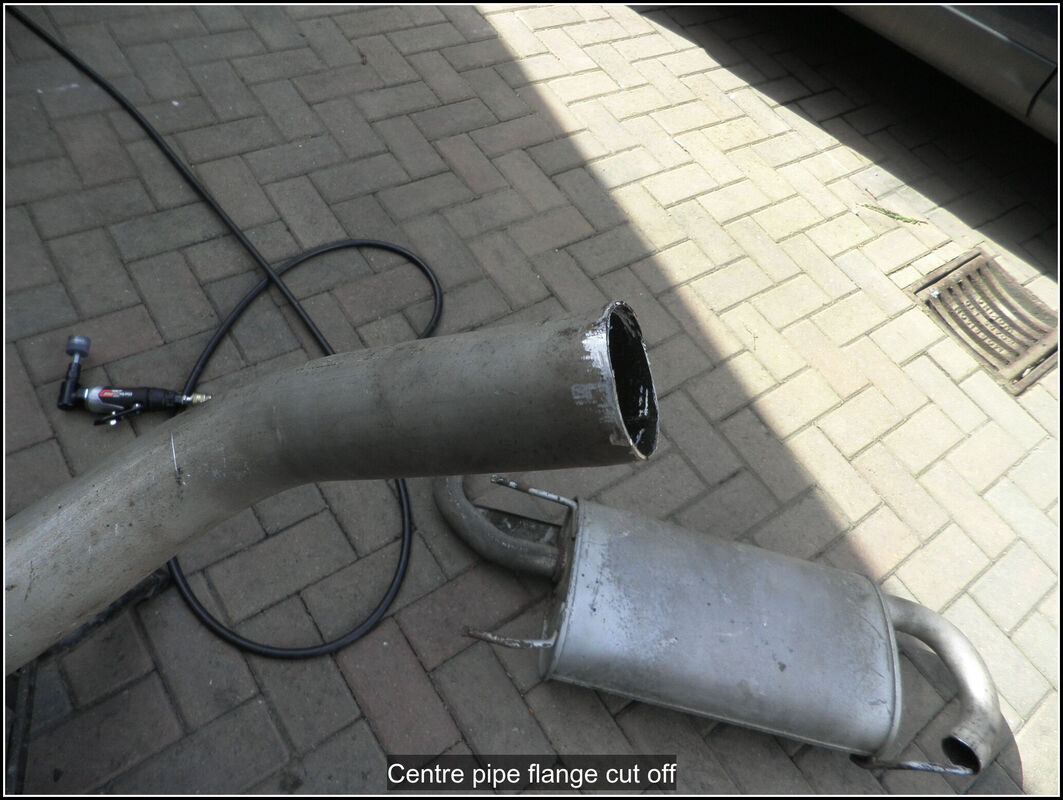
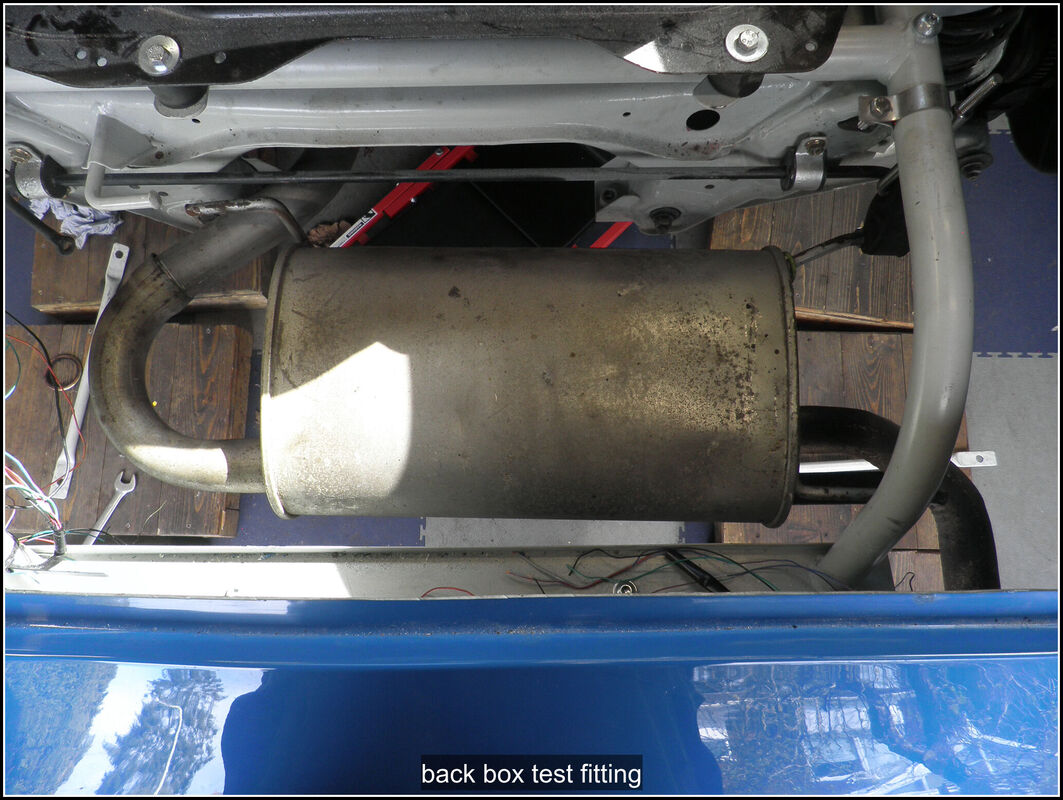
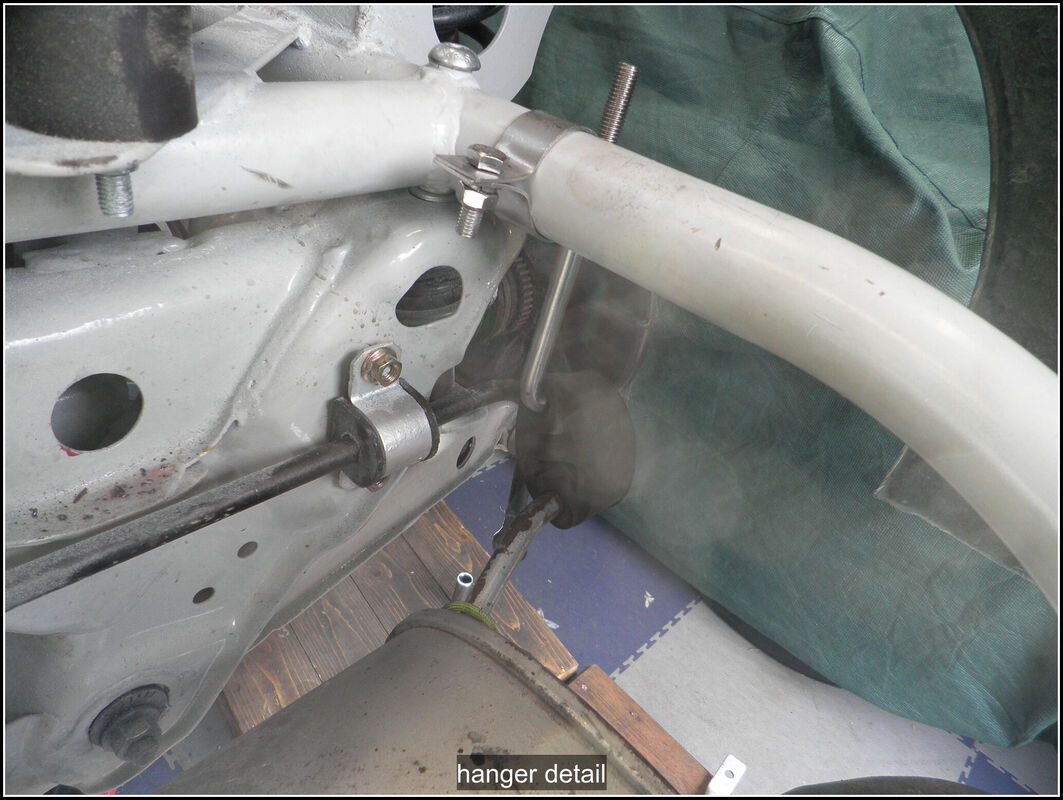
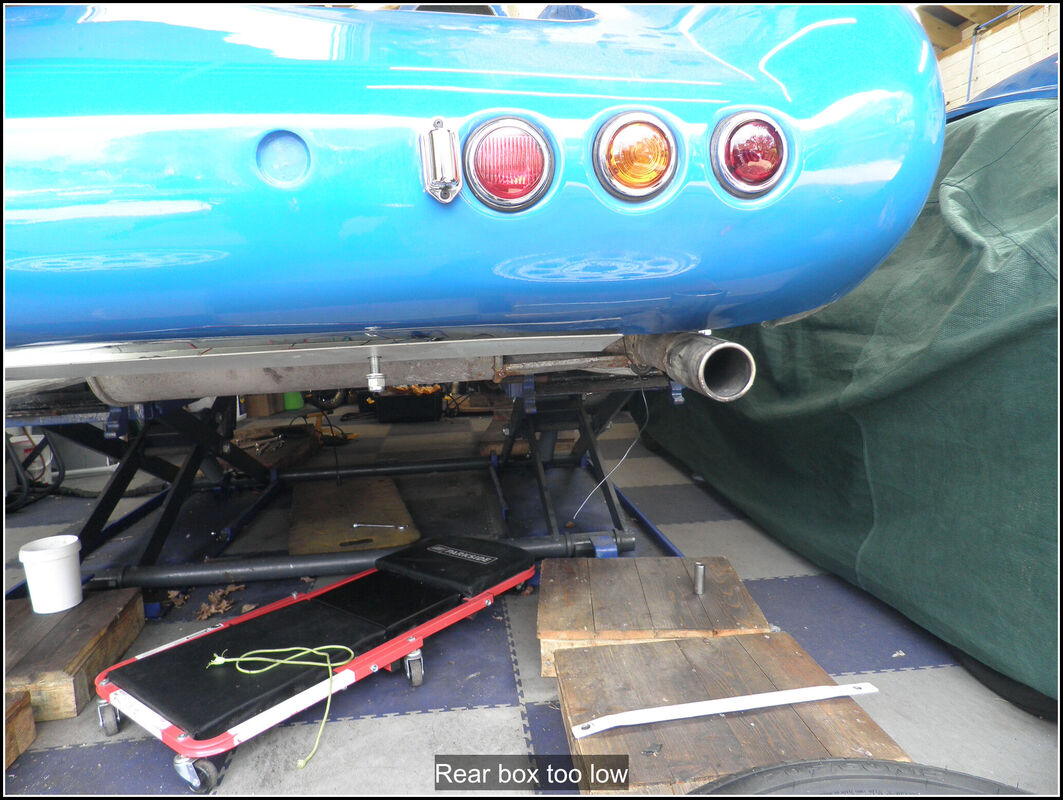
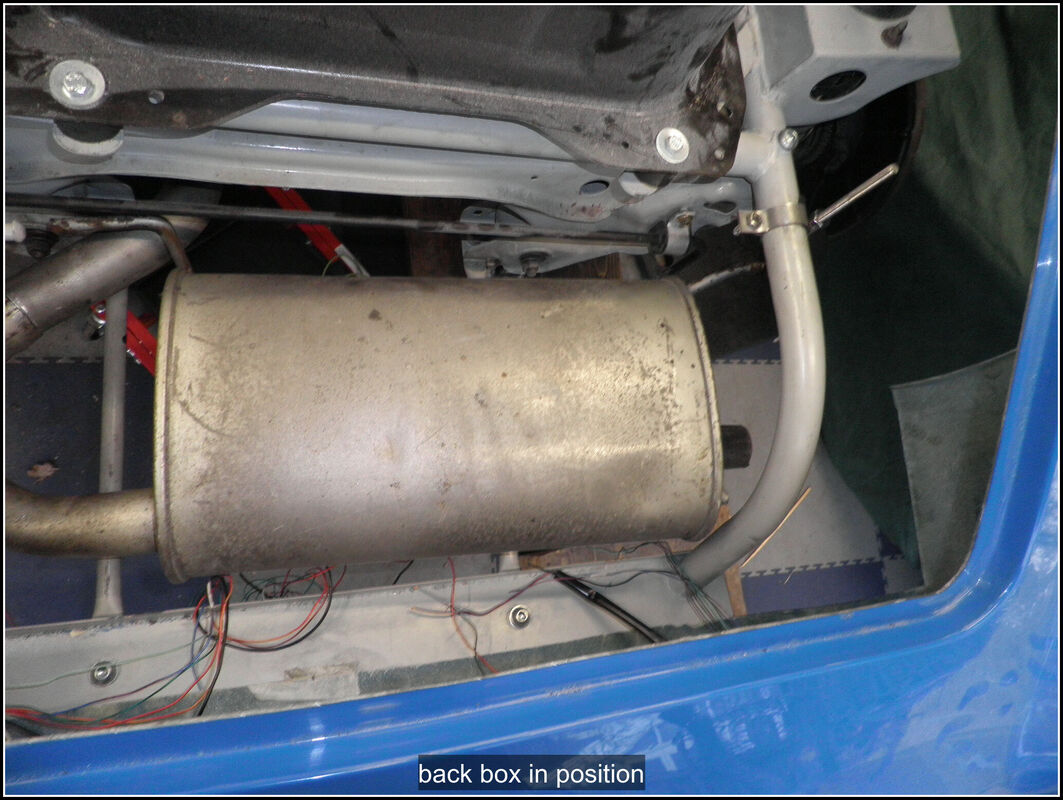
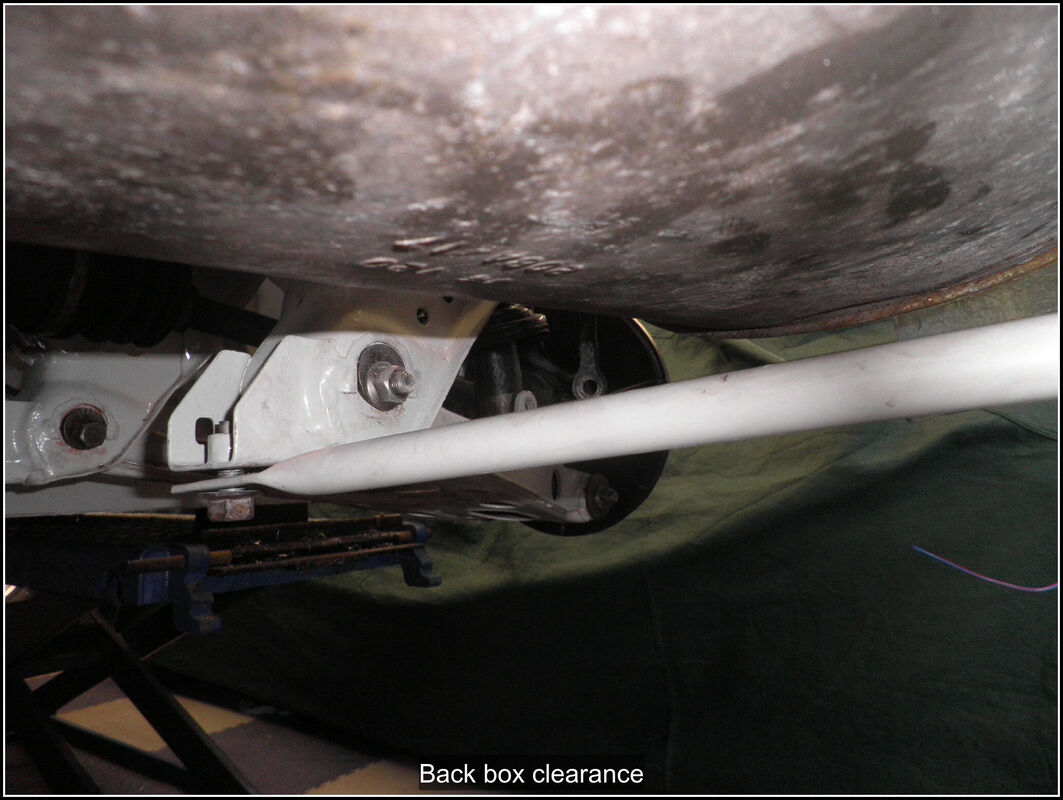
7 March 2022 Spent the afternoon having a tidy up in the garage, things have been piling up around the garage and there were tools everywhere. Spent a good few hours sorting things out, moving a few things into the shed out of the way. Move the car out of the garage and then back in on my lift ready to start work on it. I feel like I have a lot more room around the car again. 13 March 2022 Got a few hours this afternoon so got the car up in the air and removed the catalyst and centre pipe. I cleaned up the flange faces and got the replacement centre pipe I bought a while back and cleaned that up too. I put a bung in the rear O2 sensor boss as I don't need that with my ECU. I remounted the cat section with a new gasket and the centre section with a new seal. I tried fitting the back box, it's a tight fit in the space and runs quite close to the rear outrigger. The tail pipe will need cutting so I can rotate it down a bit, and I suspect a bit of hammering will be needed to create a bit of clearance. 21 March 2022 Decorating in the house has been getting in the way of car stuff. I went up to the NEC Restoration show and bought some supplies but no bits for the kit. I got out to the garage for a few hours today. I have pulled the wheels off as I noticed a leak of fluid from the rear nearside brake caliper. After some investigation it appears to be coming from the piston so I stripped it down I can't see anything specifically wrong but there seems to be corrosion in the channels that hold the seal is place so I suspect they are not sealing properly. Tried to clean them up but I gave up and ordered a pair off ebay which I will fit. Don't want to take any chances with the brakes. Spent some time thinking about the fuel tank filler position and also tried out some boot/bonnet edge trim samples I picked up from the show. Had another think about the exhaust rear box and decided that the centre pipe needs to be shortened to move the box closer to the subframe and away from the rear outrigger. If I cut the flanged joing off then I think the end of the back box pipe will slide over the end of the centre pipe, so a couple of slits and a clamp should sort that out. Due to the angle of the pipework, the back box will move slightly to the offside but I don't think it will be a problem. I think I need to drop the centre pipe down a bit to see where I need to make the cut and see where the back box will end up is the next step. I've ordered some clamp on exhaust hangers that I can use to make the back box mounting for the offside. 2 April 2022 A week away on holiday so not much progress. However having had a break I was keen to get back in the garage and had a fews hours after getting home. The replacement calipers had arrived so I swapped those over. I need to buy some more brake fluid so I can bleed everything again. My exhaust hangers had also arrived so I set about fitting the back box. I cut the flange off the back box and then put it back in against the centre pipe and marked where to cut off the flange. Then I took the centre pipe out and cut the end off. Refitting everything and I was pleased with the initial fitting, the back box wasn't rubbing against the rear outrigger anymore and the clamp on hanger was supporting it nicely. The end of the back box fitted nicely over the centre pipe, but there wasn't much overlap. However the box was sitting too low to get the rear support bars on. I cut the tailpipe off, it was fouling the rear body and I don't want to cut the bodywork for it until I have completed getting the box in place. I also cut off one of the hangers that was fouling the rear outrigger. With these out of the way I could get the box in with the rear supports in place but the clamp on hanger was too low, not a huge problem I just had to extend the thread on the hanger so I could screw it further in. My tap and die set came to the rescue, although it was a pretty tough session of threading as the bar is made from stainless. However, finally I got it done and I'm now pretty happy with the position of the back box. I will need to add another support to the other side of the box which I plan to do by adding a support on the pipe. I might change the joint between the centre pipe and the back box to a short flex section. |
AuthorThis is my first kit car although I've messed about with cars all my life. Archives
November 2023
Categories |


 RSS Feed
