|
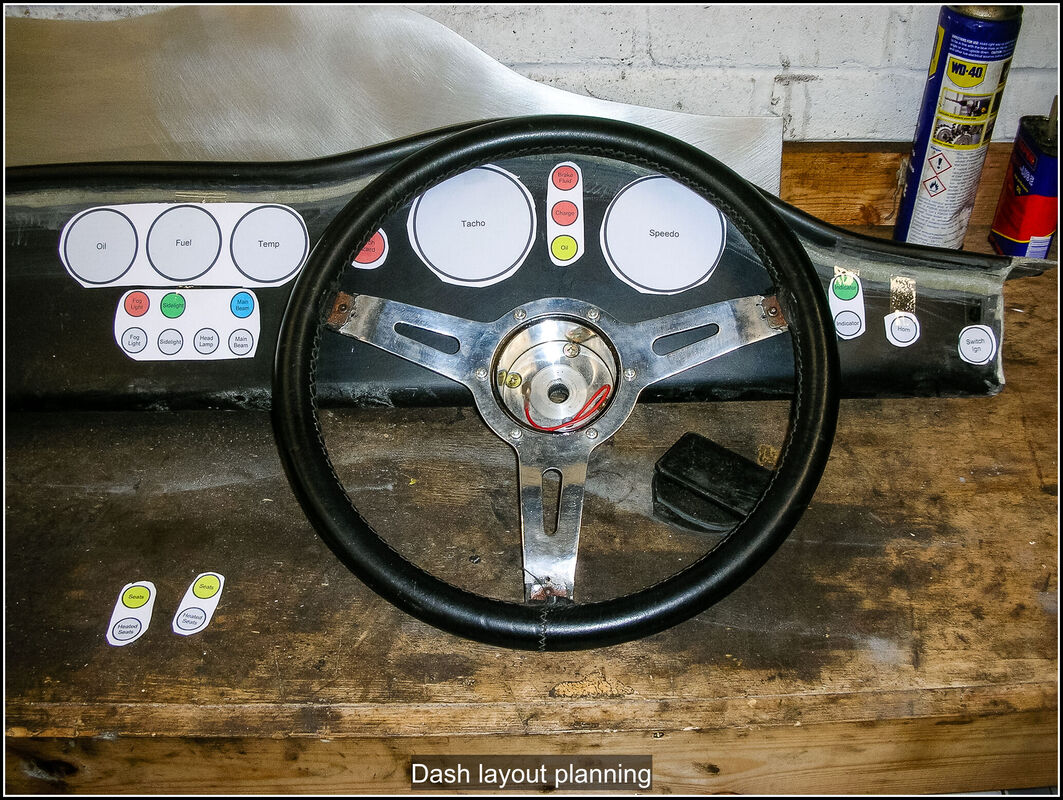
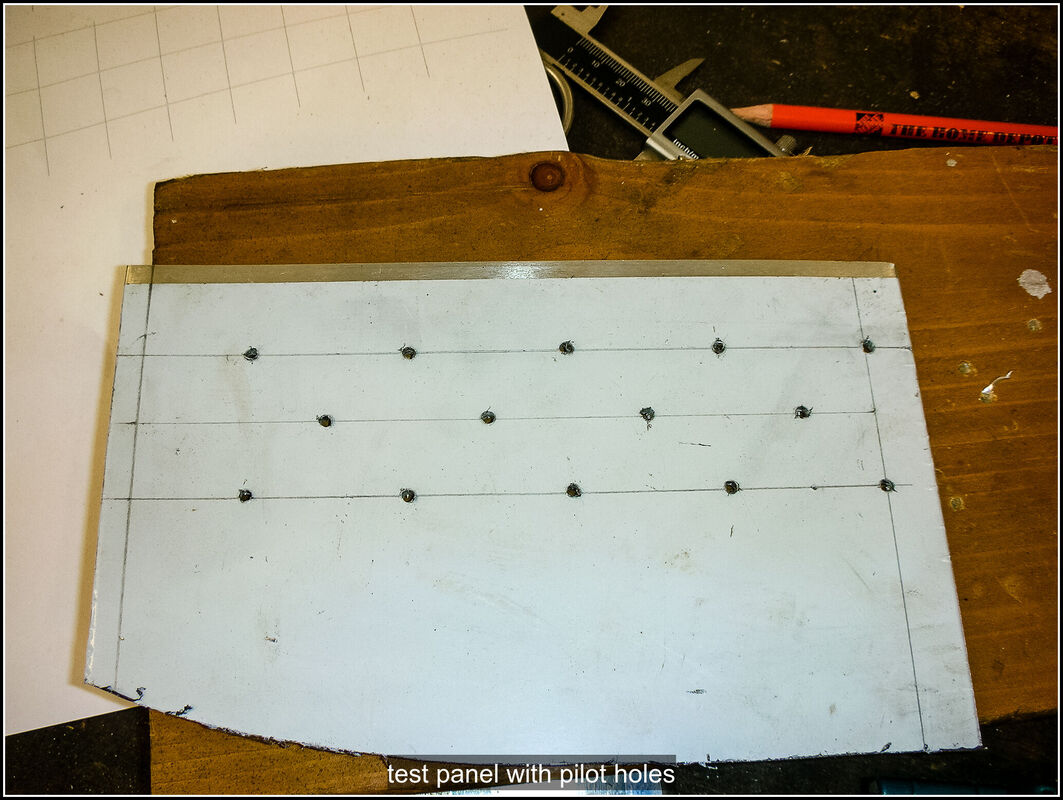
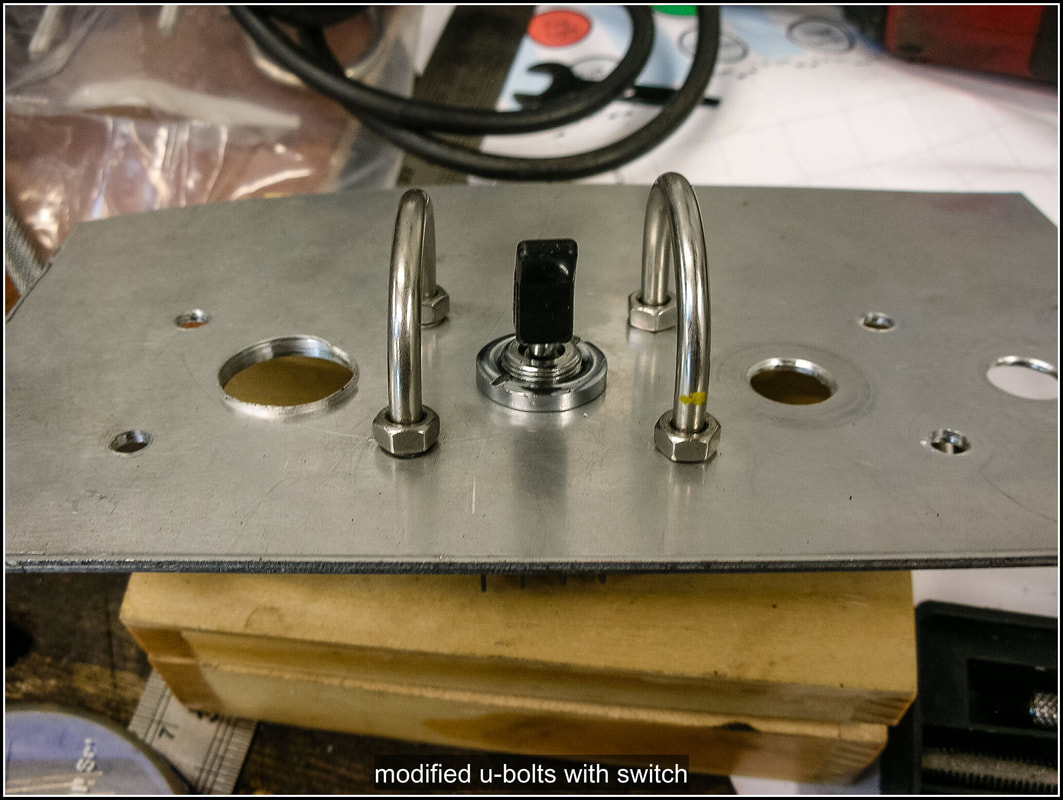
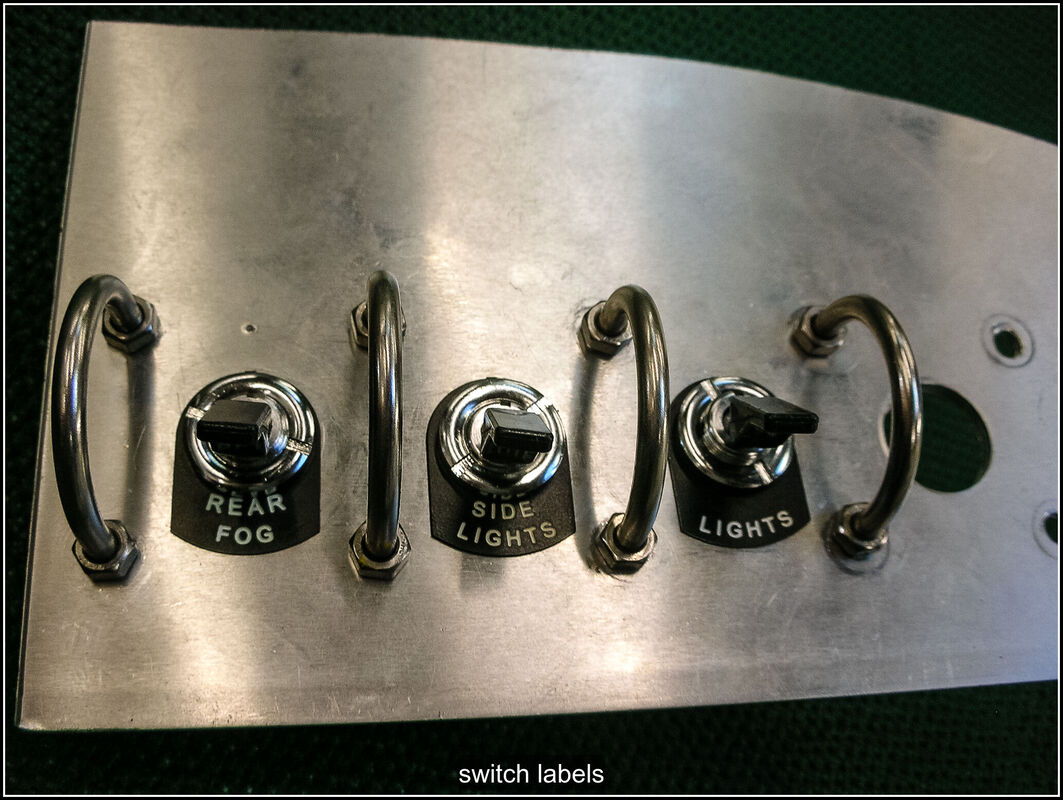
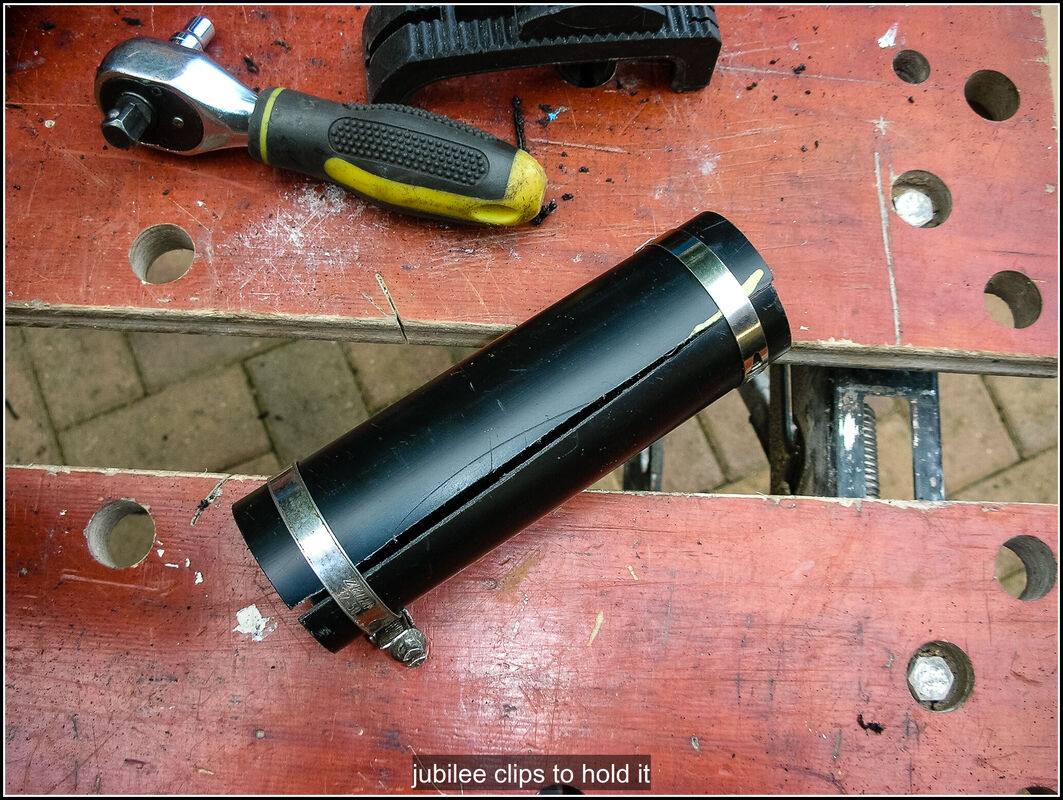
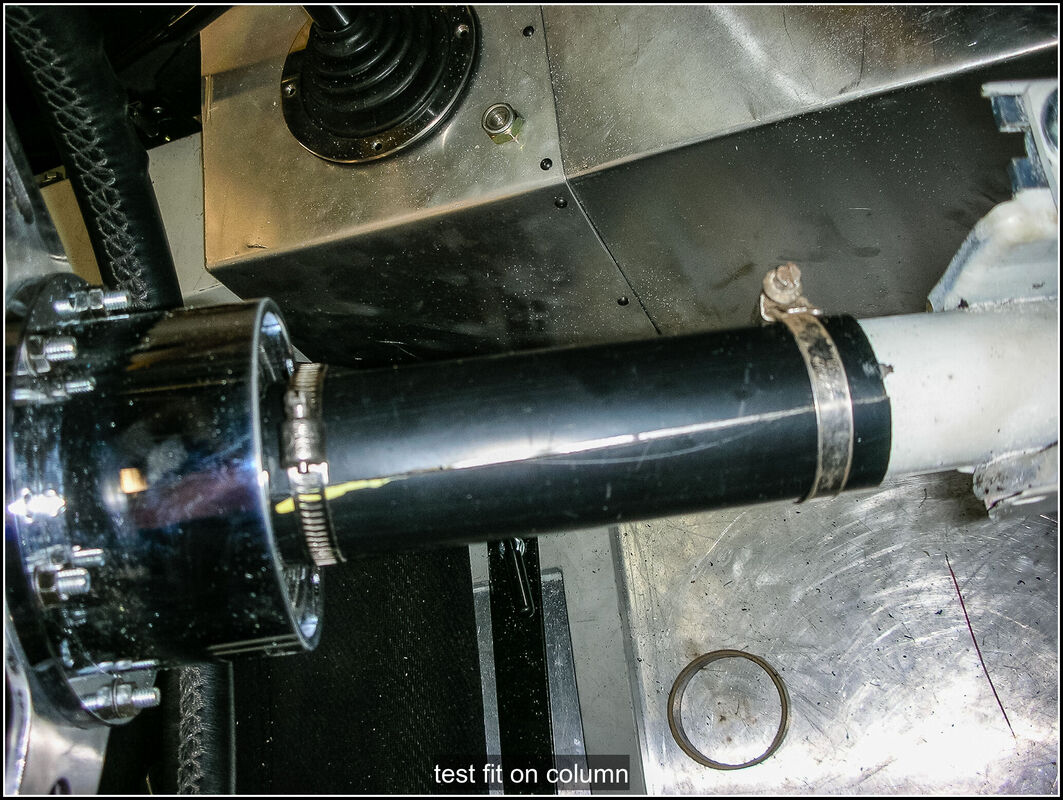
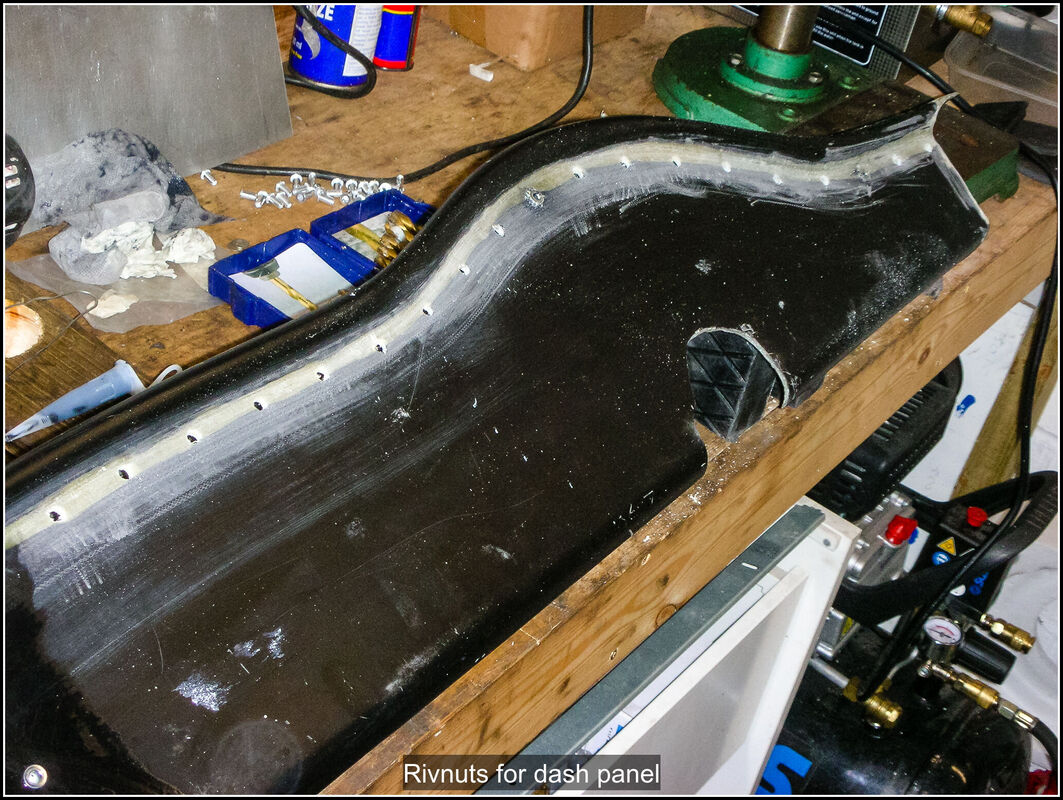
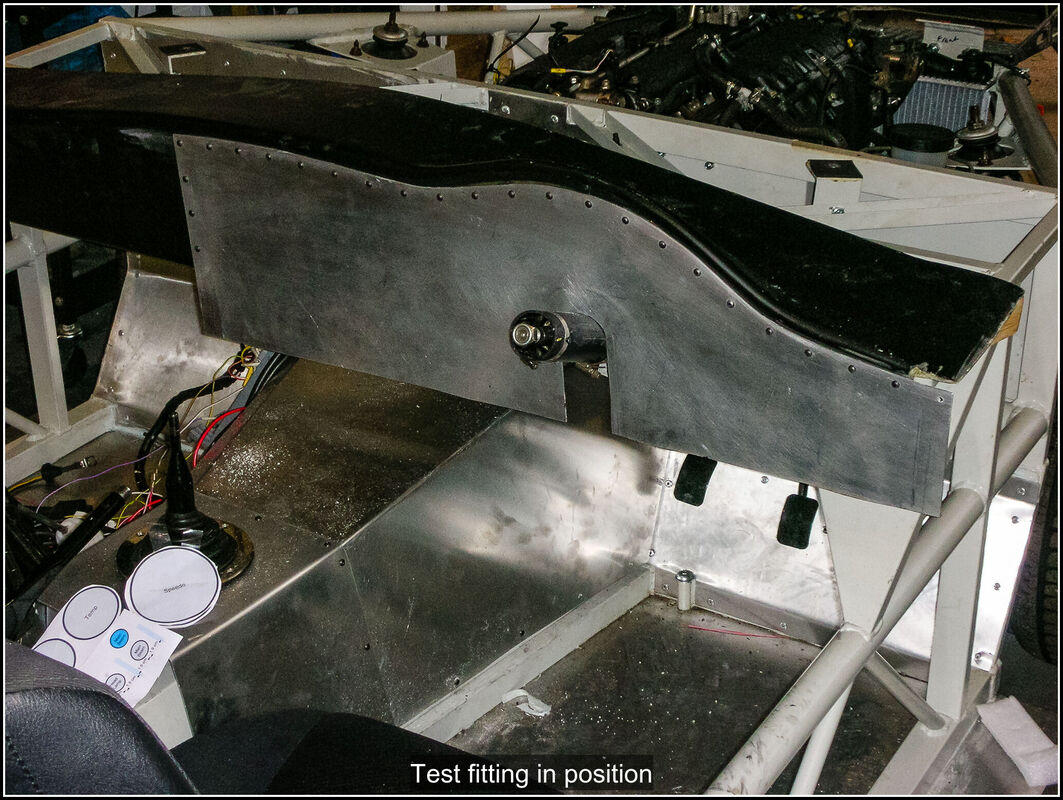
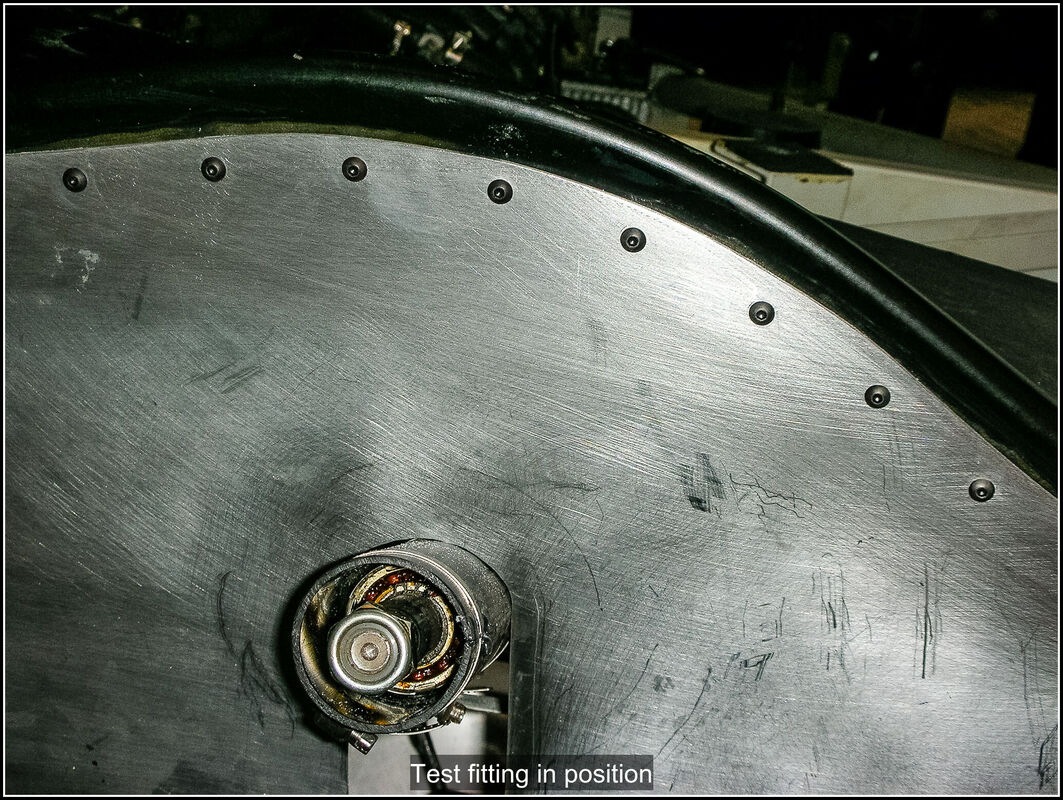
20 September 2021 More time shaping the dash facia so it fitted better to the curves. Did a bit of thinking about the dash layout. The toggle switches need to have guards for the IVA. I ordered some stainless steel u-bolts from a chandlers website as they were about a third of the price of the CBS ones. The U-bolts will need a bit of fettling, ordered some bespoke labels for the switches. 22 September 2021 I measured all the switches, lights and dials for their external dimensions and then drew them up full size in a drawing program and printed them off. I grouped them together as I thought they would be on the dash and cut the groups out. I then laid them out on the dash and stuck them in place with some tape. I'm pretty happy with the layout just a few things I want to tweak, possibly add another warning light for the main lights just for symmetry 23 September 2021 The u-bolts arrived today, I reworked the light switch layout to accommodate the u-bolts and worked out the spacing for the holes. I transferred the measurements to a piece of scrap aluminium so I could practise and see the layout of switches and u-bolts. I drilled out the holes for the u-bolts and the switches and did a trial fitting. Happy with the spacing but the u-bolts stuck out a bit far from the panel for my liking. I cut the the thread further up the legs of the u-bolts with a die and trimmed the length of them. By extending the thread it meant I have to add extra nuts to clamp it to the dash panel. Cutting the threads with the die was tricky as the other leg of the u-bolt got in the way of the die holder so I used a pair of mole grips. Once I had one that was correct I could use it as a template for the others. I didn't include the warning lights in my trial layout so I need to add them to make sure I am happy with the spacing. 24 September 2021 Finished modifying all the u-bolts for the switches. My switch labels arrived so I put a few on my test piece and they look really good. I need to get the aluminium fascia trimmed and fitted to the dash panel so I can finalise the dash mounting. Before I cut the hole in the aluminium for the steering column I wanted to make up the trim for the steering column that will hide the column where the steering lock and column switch used to be. A lwngth of 50mm drainpipe was cut and then a slit was cut down it's length with a dremel. I then removed a strip from the edge of the slit so I could close it up and make a tight fit round the column. The top of the column tapers so I made the cut wider at one end. After a bit of trimming I was happy with the fit I applied some strong glue to the edge and used some jubilee clips to hold the gap closed. I may paint ot or leave it black. Whilst I was waiting for the glue to dry I made up a bracket to secure the top of the dash to the scuttle frame from a piece of flat bar steel, heated and bent to fit. 25 September 2021 Cut out the slot where the column needs to go in the Aluminium panel with a jigsaw and after a bit of dressing with a file and sanding block it fitted nicely. Then I cut down the ends of the panel so I had the appropriate length. I masked up the panel and marked out where I wanted to place the holes that will secure the aluminium to the fibreglass and drilled them out with a 4.5mm drill. I'm using M4 dome headed bolts and rivnuts in the fibreglass. I cleaned up the back of the holes and then back on the car carefully lined up the fasica and clamped it in position. Then I drill 3 holes using the holes in the aluminium plate as a guide, so I could fix the plate into position. Then I took the dash of and drilled out my 3 reference holes and put the rivnuts in them. I then screwed it into place and drilled the remainder of the holes using the holes in the aluminium as my guide. I then removed the aluminium plate and drilled all the holes out to size and put the rivnuts in. I added a bit of glue in each hole before adding the rivnut to make sure it stays in place, the fiber glass is quite thick and so the rivnuts don't fully compress. Cleaned up all the excess glue and then attached the aluminium fascia using all the screws to check every thing lined up, which thankfully it did.
0 Comments
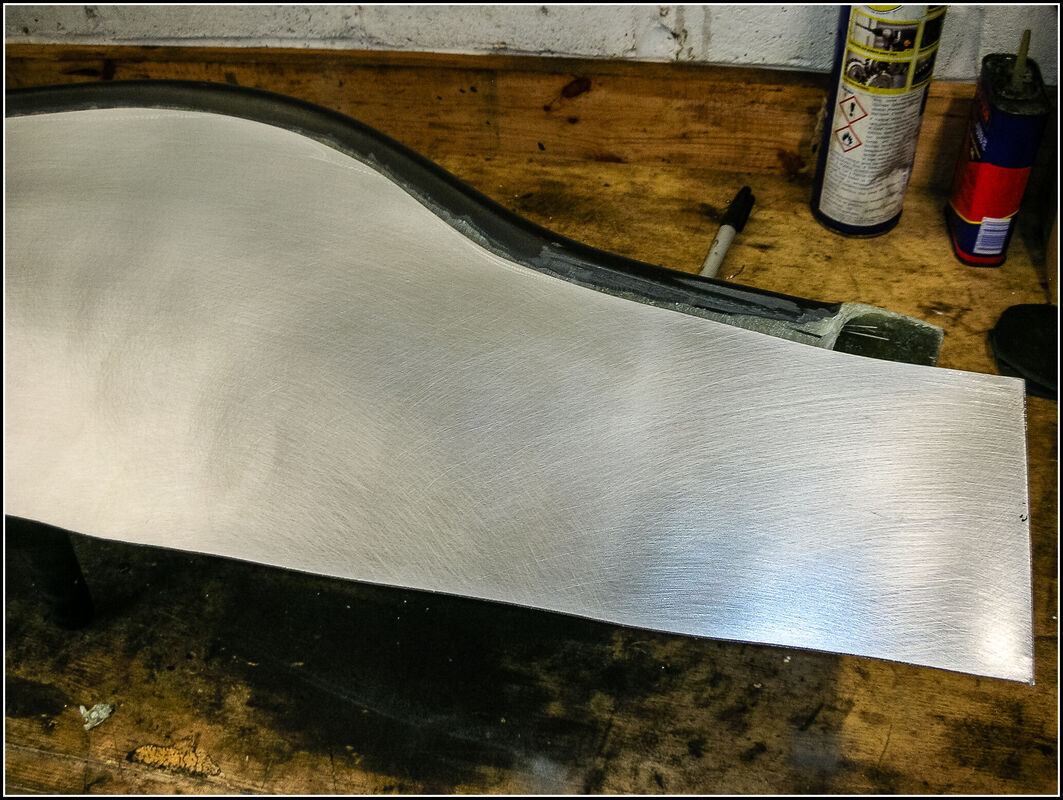
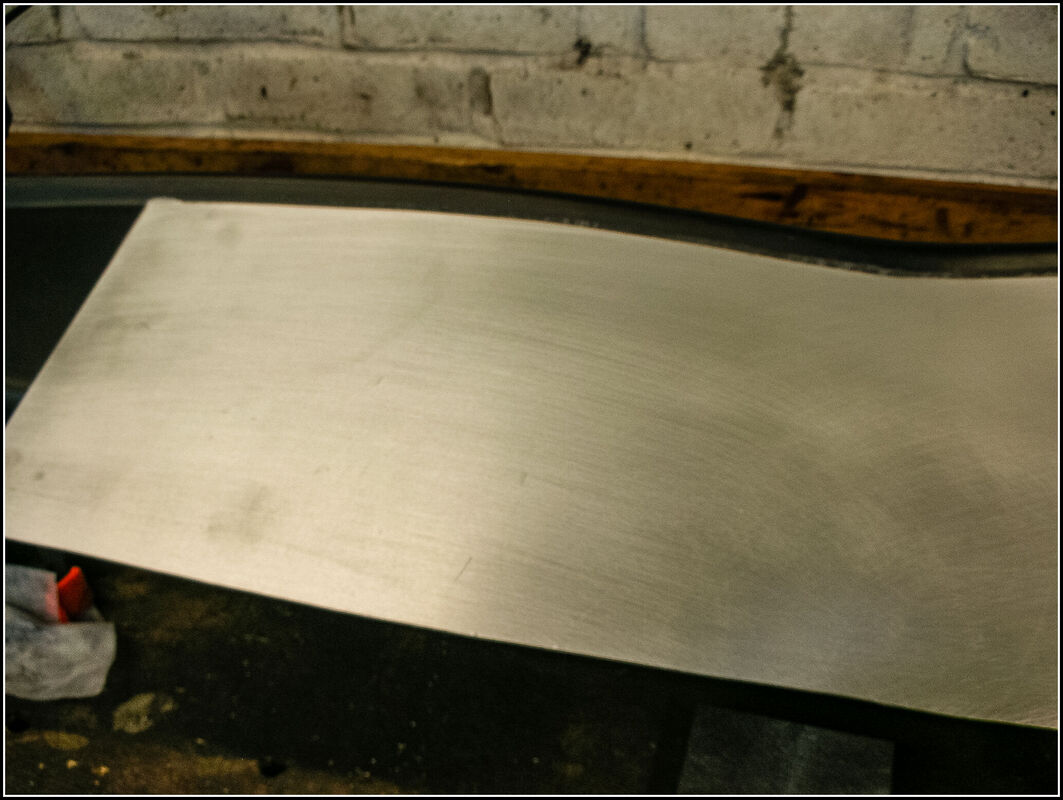
7 September 2021 I went over to see Soondra who has finished his build and also has a VVT engine. I wanted to have a look to see if there was anything radically different with his body position, compared to mine. The main difference was his front mounts were a good bit higher than mine, but I think the whole car was sitting lower on the suspension than mine, but not really low, there was plenty of space between the top of the wheel and the arch. Had a good look round and really good chat about his car and the build experience. We went out for a drive, what great fun, it really feels so different to the MX5 – the experience is so like an old style car, took me back to owning an AH Sprite, the handling and response is so good. Back at home I made a start on finalising the rear mounts, I have bought some rubber jack pads which I modified with my router so they could sit on top of the existing mounts (replacing the multiple sheets of rubber on there at the moment. I also shaved the original mount so the top was at an angle to roughly match the underside of the body shell where it touched. The jack pad then sits at the same angle when it is sat on top. 10 September 2021 I finished modifying the rear left hand mount. Just need to glue it into place on the underside of the bodyshell but I will do that later when I don't need to keep lifting the body off. I did a trial with my bargain hinges using some wood but due to the hinge angle they won't work for the doors. I had another look and think about the dash position, I'm also planning how the battery and fusebox will be positioned, the panelling around the cockpit and the rear lights. There seems to be a lot of things that I could be getting on with but I don't seem to be doing any of them! After lots of provaricating I ordered some external mini hinges, there's no real alternative available (that I could find). I also ordered an Odyssey battery and cage, I plan to mount the battery on the front bulkhead with the fusebox, it will be up off the floor and with an access panel either from the top or through the dash. 11 September 2021 Rewrote my list of upcoming tasks and then promptly got on with doing something not on the list. lifted the body off and rolled the chassis out. Removed the ignition switch and column stalk from the column. I will change the dash position a bit more so it lines up with the wheel and now the column is clear I will move it a bit closer to the steering wheel. Got on with completing the fixings for the transmission tunnel. I want to be able to remove this so I've used M4 rivnuts and dome headed bolts. Couldn't get the long levers of my rivnut gun into the corner so I've ordered a smaller pistol style one to use for those. I also put rivnuts and bolts in to hold the section that is around the gear lever. Measured up for the aluminium to panel the chassis side and placed an order for that. 14 September 2021 Working on positioning the dash, positioned the body on the chassis and bolted it down. Used various pieces of wood to determine how far out from the frame mounts I needed to position the dash as I wanted it a bit closer to the wheel now the lock and column stalk are gone. I needed to trim the hole for the steering column a bit to improve the alignment with the steering wheel. Once I was happy with that I used more wooden blocks to fix the vertical position to minimise the gap between the body and the dash. This required removing the body several times as I tried pieces of wood and trimmed the dash. I'm thinking about fixing the wood to the dash with GRP and then using that as the bracket to fix it to he chassis, needs more thought though. 16 September 2021 I've been thinking more about the dash layout and also looking through Mike Longstaff's photo's. I really like the idea of making an aluminium facia panel to mount the dials and switches on. Not only will it look good, I can mount it with screws and I can get to the wiring behind the instruments once the body and dash are on. Also I want to extend the side of the dash out further into space under the body. I traced the outline of the dash onto some wallpaper taped to the dash and then cut that out and transferred it to some aluminium. I roughly cut out the shape with a a jigsaw and then refined it with a flap wheel and a file. Getting an accurate template was difficult so a lot of the shaping was done by trial and error. I had allowed for this by making sure there was plenty of spare material when I cut out the shape. It's not finished yet but so far I'm quite pleased with the result. Not much more action this week as it is time to get ready for Goodwood Revival, my favourite weekend of the year. A few gratuitous photos will be added. 1 September 2020 More trial and error on fitting the body. Trial fitted the dash panel as that is also affected by the body positioning. Modified the frame so I could lift the body with the steering column in place. Put the steering column in place and then lifted the body and marked up where the hole for the steering column needed to be. A few refits of the body and further trimming and had something close to the final fit. Then I placed the body back on, aligned it with the marks and inserted the additional rubber pads to lift the body. I did some more measuring to make sure things were equal side to side – both for height and center on the chassis. The bonnet now just touches the VVT so I think with the spacer on the chassis I should be OK. Hoping to go down and see Soondra's Replicar as he has a VVT engine and has got it to fit with the standard bonnet. Also speaking to Andy and enquired about getting the new bonnet that has a bulge in case it doesn't work out. 2 September 2021 Spent some time refining the dash fit, it wouldn't come as far back as I wanted on the column as it was hitting the ignition switch plug so I took the dash off and cut another little hole for that. Pretty happy now with the dash and body fit, the dash will need to stand off the chassis brackets about 25mm which I have some square tube that will do nicely. Spent more time with moving the body about slightly to try and even things up as much as I can. It won't ever be perfect due to handmade nature of the bodyshell so I'm having to try and turn down my obsession with alignment. It's tricky as the bodyshell is very easy to knock out of position. 3 September 2021 Enough prevaricating, today I would drill the holes for the front mounts and also get the middle one in place. I spent time going round and remeasuring the wheel arch to tyre gaps and the over hang of the arches to the wheel hub centres. Adjusted some of my alignment marks on the bodyshell then rolled the car out of the garage. Checked all the alignments again then clamped the front mounting points and the rear valance to the body shell. Marked up the position of the two front holes, by finding a the best compromise between coming through the mount somewhere towards the middle, and keeping the top holes looking reasonably equal, I put masking tape down to mark and drill the holes, starting with a 3mm drill and then going up in stages to 9mm, I will be using M8 bolts and I don't want the bolt to be stressing the hole edge, just using the clamping force. I put a thin rubber washer under the washer to protect the fibre glass, there is a 2mm piece of rubber between the bodyshell and the bracket. I moved to the central brackets that need to be positioned once the body shell position is finalised. I glued some thin rubber sheet to the top of the brackets prior to drilling. AS I had spent so much time positioning the body I wanted it in place while I attached the brackets which made it more difficult than it might be. I had to lightly clamp the offside using a piece of wood to space it off the bulkhead chassis rail as it was naturally a little higher than the nearside, I clamped the nearside similarly so that the body was held in it's final position and spaced evenly off the bulkhead rail. I marked and drilled a pilot hole in the bracket and then holding the bracket in position used a centre punch to mark the chassis where it needed to be drilled. Then I drilled the same pilot hole in the chassis and then checked the bracket was in the right place using the drill bit. Then I enlarged the hole out to 8mm in the bracket and the chassis rail. Then I could bolt it onto the chassis which was fiddly with the body in the way. I repeated this on the nearside. Once I was happy with the bracket position I pilot drilled and then drilled them out to 9mm the same as the front brackets. Then I removed all the masking tape and placed bolts through the body and the bracket and tightened them up, I was then able to remove the clamps. Pleased with how solid the front of the bodyshell is now. I am waiting for some rubber blocks to build up the rear mounts and I will need to shape them to fit the body contours. I also checked the bonnet clearance over the VVT and it is just touching the bonnet but only just. I reckon with the spacers I plan to insert that will drop the body enough to make the clearance. I also spoke to Andy and I can get one of his new bonnets with a bulge if I need to. 5 September 2021 Been thinking about my dashboard, looking at some of the other built replicar photo's as well as going through my archive photo's of 50's racers. I think I am going to ditch the Mazda ignition switch and column stalk and move them on to dash mounted switches. It will clean up the steering column area, by moving all the controls on to the dash. For the IVA I will need to fit an immobiliser because I will not have a steering lock. It's not possible to easily access the back of the dash without removing the body, so I am planning to make a removable panel for the dash front that will hold all the instruments, switches and warning lights. I plan to cut out a large section of the dash front and make up an aluminium panel that will screw in its place. Took a trip down to the Beaulieu Autojumble in search of inspiration and parts. I picked up some Morris Minor bonnet hinges that I think I can use for the doors, dash switches, small round dash/map lights, retro reflectors, trim ring for the fog light. They will all need a bit of cleaning up but hopefully will give a nice period look. 6 September 2021 Cleaned and tested the switches, the nice thing with the old Lucas 3 position switches is that they can be wired up in a number of different way, so they can be used as on/off/on for indicator or off/on/on for sidelight/headlight. Had a session trying dash layouts using Fusion360 with an approximation of the dash shape I've drawn. Trying to fit the switches inside the IVA exempt area to the right and left of the steering wheel which would mean I can fit them without having guards around them. Also updated my wiring diagrams to reflect the change of switch positions, need to add circuits for heated seats and the map lights. 25 August 2021 Undid a few wires and rerouted them so they weren't draped over the top of the chassis, removed the fuel filler and generally checked over the chassis in preparation with putting the body on. I checked how the dash hump aligns with the steering column and I think I need to bend the bottom bracket to move it towards the centre of the car a bit. A few friends came round to give me a hand with lifting the body on. Dropping it on was simple, I spent a bit of time shifting it around to even out the gaps between the wheels and arches and to even it up side to side. With the front and rear brackets as I put them on, the front sits quite high in comparison to the rear and looks all wrong, but the bonnet clears the VVT. Taking out the front brackets drops the front and gives a decent stance but then the bonnet hits the top of the engine and would need a big bulge to clear it. I posted a few pictures online and a number of suggestions were given for making changes. 26 August 2021 Did a bit of measuring and playing around with bodyshell heights. With the front brackets back on the car and the rear bodywork raised by about 40mm, the front to rear stance seems about right but is too high. The bonnet clears the engine quite nicely and with a 30-40mm drop in suspension I think would be about right, but that's quite drop in suspension height and I'm not sure how that will affect the geometry. The rear bulkhead panels are just about big enough to close the gap to the body so I don't want to lift it more than that. Spacing the chassis from the subframe might be a a way to lower the engine and reverse the geometry changes when I drop the suspension. I need to check the dash positioning relative to the body and see how much gap there is with the body as it is now, the steering column needs to come out before I can do that. If it's too high then spacing the chassis could give me the clearance and I might not need to raise it as much. Chassis ground clearance on my standard shocks is 180mm front, 190mm rear, compared to my TVR which is 140 front, 145 rear; a 40mm suspension drop would bring the Replicar to about the same height, I don't think I want to be any lower than that. As it is now, the rear arch gap is 90mm and the front is 75mm; I want the front and rear arch gap about the same or with the rear maybe 5mm bigger than the front. 27 August 2021 Started building a frame that I can lift use to the body off and on the chassis as I need. I removed the steering column and the gearstick so they didn't get in the way. I cut some lengths of timber so they would fit down the side of the car and built up the ends so they supported the wings. I added some very firm foam that I had lying around to cushion the ends and form to the shape of the bodyshell. Then I cut some timber to run across the car and join the two pieces down the side. Need to get some long bolts to fasten everything together. 30 August 2021 Finished building the frame and also got the hoist mounted on the rafters. Tested it was strong enough by lifting my engine hoist! It was tricky getting the balance of the bodyshell on the frame but with the help of my engine balance bar and adjusting the ropes I got it working. I set about aligning the body shell on the shell. I started by measuring the distance from the top edge of the wheel rim out to the wheelarch, I used a spirit level to get a vertical line and a ruler on the wheel rim. Once they were equal each side I put some tape on the front edge of the bonnet opening and on the front chassis rail and marked a line on each using a set square on the chassis rail. I repeated the measuring at the back and used a piece of tape on the top of the rear bulkhead and on the top edge of the boot opening. I then checked the gaps between the front and rear of the wheel arches to the tyres, when I was happy they were approximately equal I put some tape on the front bulkhead rail and the sides of the bonnet opening and made marks on both with a set square. It's quire tricky positioning the body as it only takes a tiny movement to make a big difference and the shell seemed to move every time I touched it. I checked the gaps above the tyres to the wheel arch to make sure they were even front to back and side to side. The front needs to be the same or slightly smaller than the rears to get the stance I want. I added packing to the rear body mounts to achieve this. I checked that the chassis sat level left to right at the front and rear and also the bodyshell with a very long spirit level. I put the bonnet in place to see if it fouled on the VVT – I could look under the shell from inside the cockpit with a torch and it looks good. I plan to repeat this by placing an action camera in there so I can video the gap. It looks OK but pretty tight so I think a 10mm spacer between the chassis and subframe will give me a bit of wiggle room. 31 August 2021 More checking and trying different arrangements of spacers for the body. put a video camera on top of the engine so I could video the clearance to the bonnet, there is clearance but not much. I think spacers between the front subframe and the chassis is the way to go, waiting for some steel to arrive for that. With the 40mm blocks on the rear pads there is about a 20mm gap between the rear body shell and the rear outrigger. Ideally the bodyshell should rest on the rear outrigger plate, I could bend it slightly, I think I need to try and drop the rear a bit, while still clearing the bonnet. Had a chat with Andy at ANC and decided to do some more fiddling about. Checked the position of the dash relative to the bodyshell, there's not much room for movements side to side so that means the steering column needs to move to the left a bit. Tried to bend the column bracket to achieve this with only minimal success, it mostly ended up twisting the upper mounting plate so I will need to live with the alignment as it is I think. I checked the rear light to floor measurement as that is a requirement for the IVA and some builders have had issues, . The minimum is 350mm from the floor to the bottom of the lens, mine is at 400mm so the planned suspension drop I have should be OK. I've got some rubber blocks on order to cut up and finalise the rear height. I made a mistake when building the frame as I can't lift the frame with the steering column in place so will need to modify it, shouldn't be too hard to do. |
AuthorThis is my first kit car although I've messed about with cars all my life. Archives
November 2023
Categories |


 RSS Feed
