|
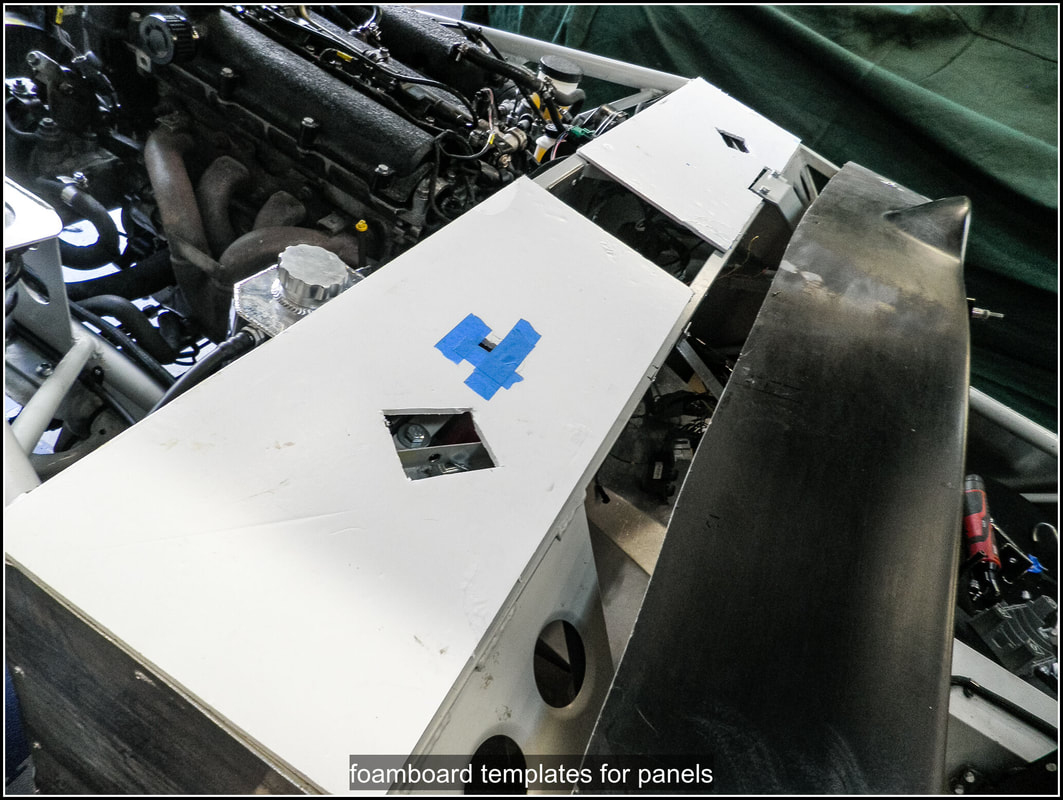
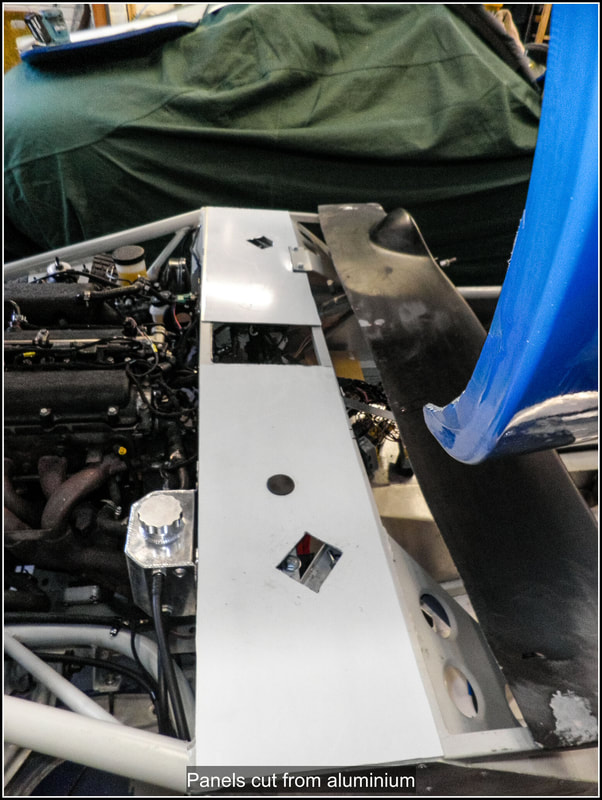
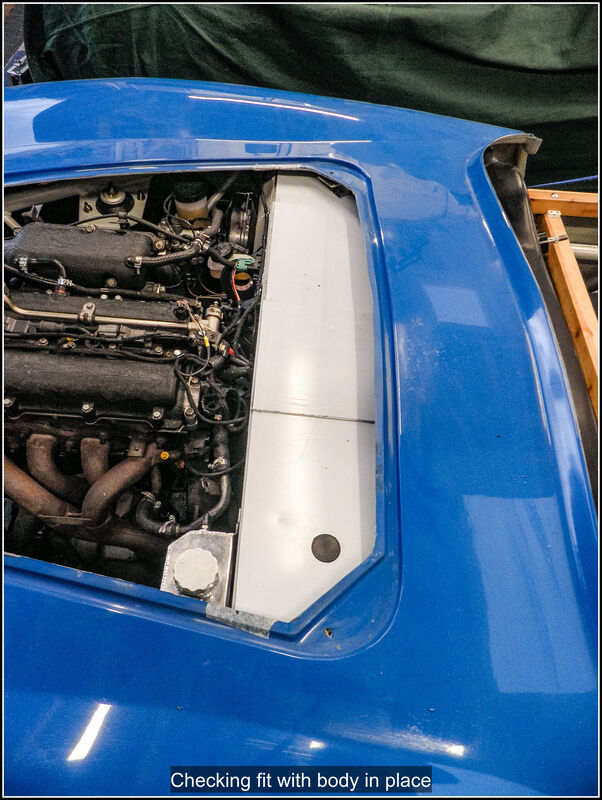
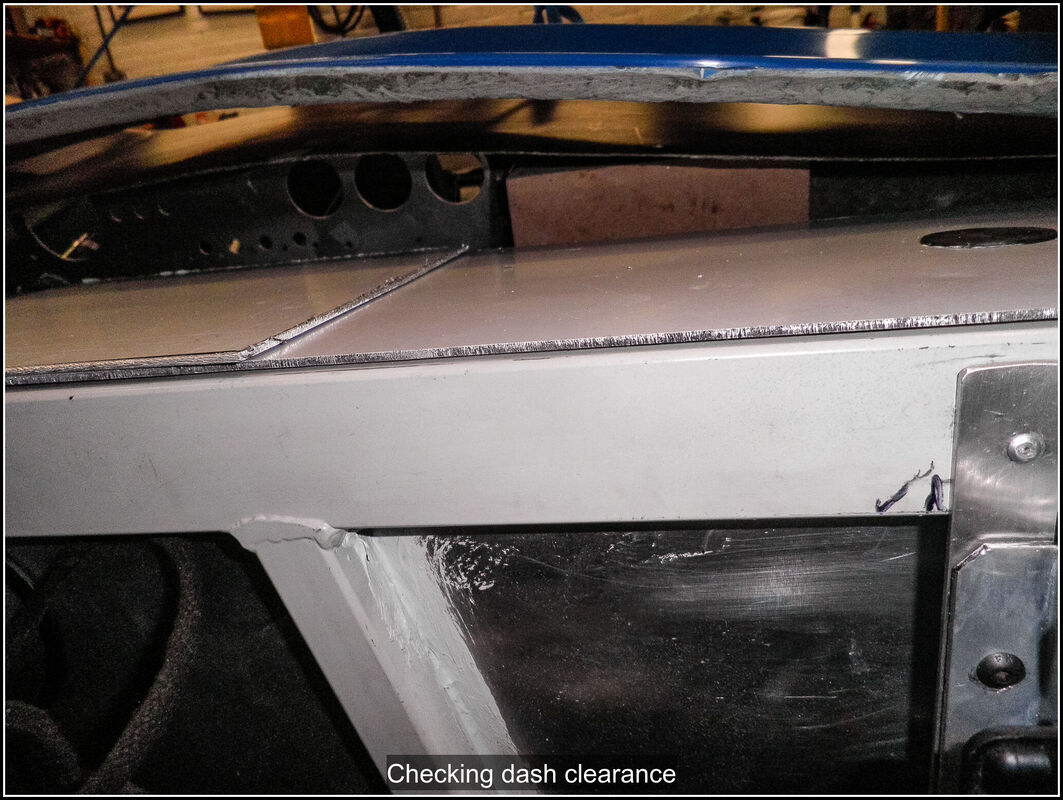
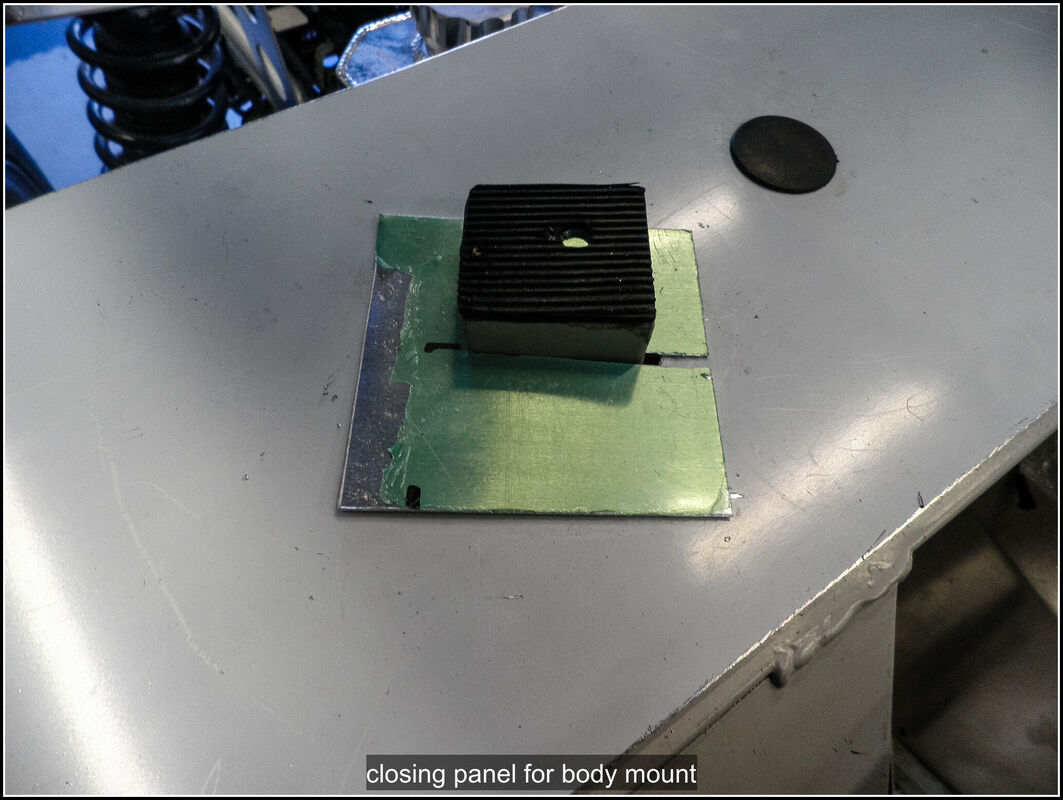
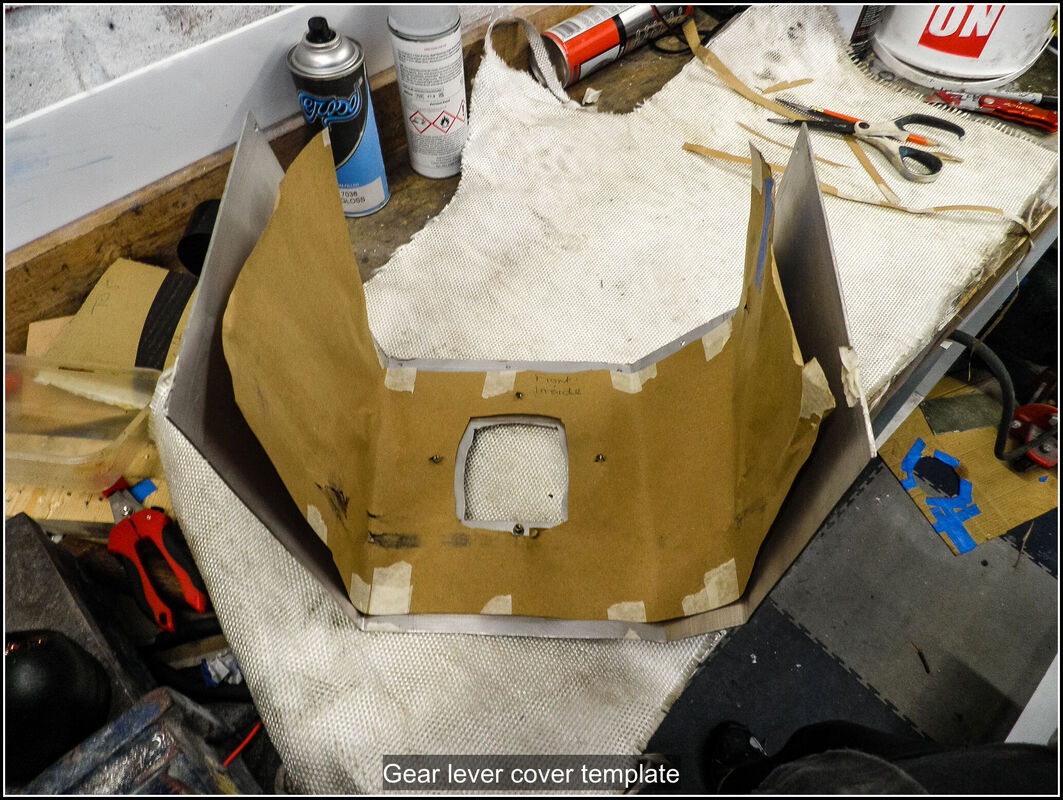
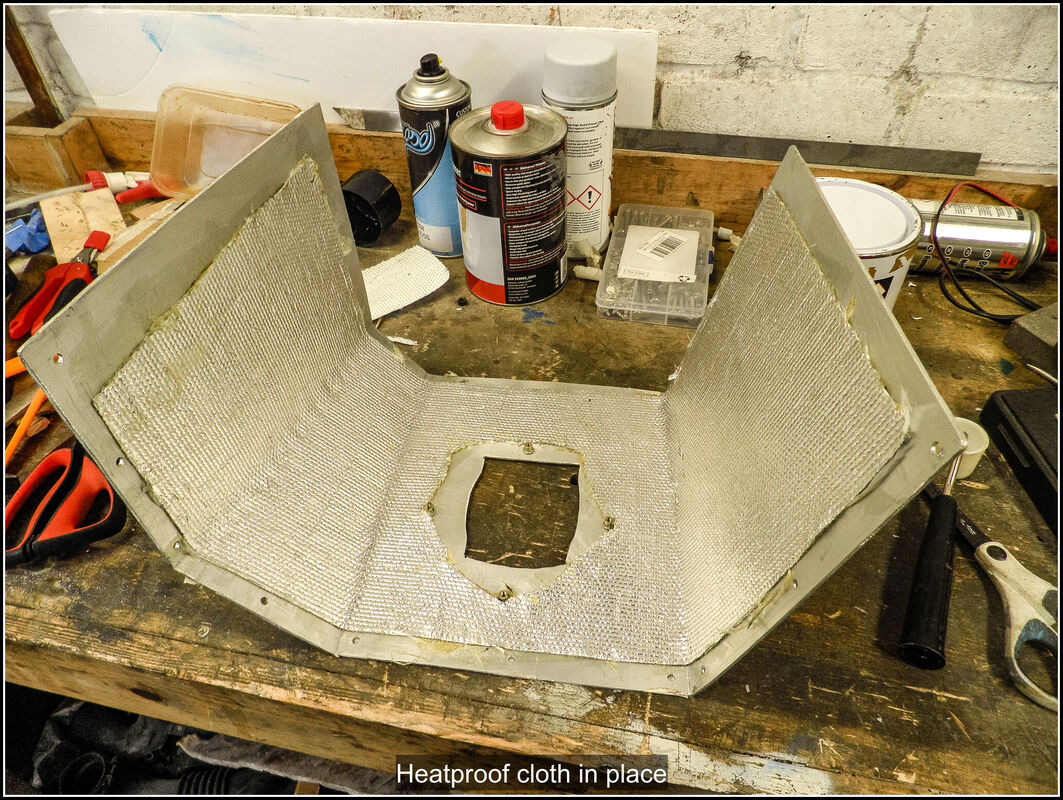
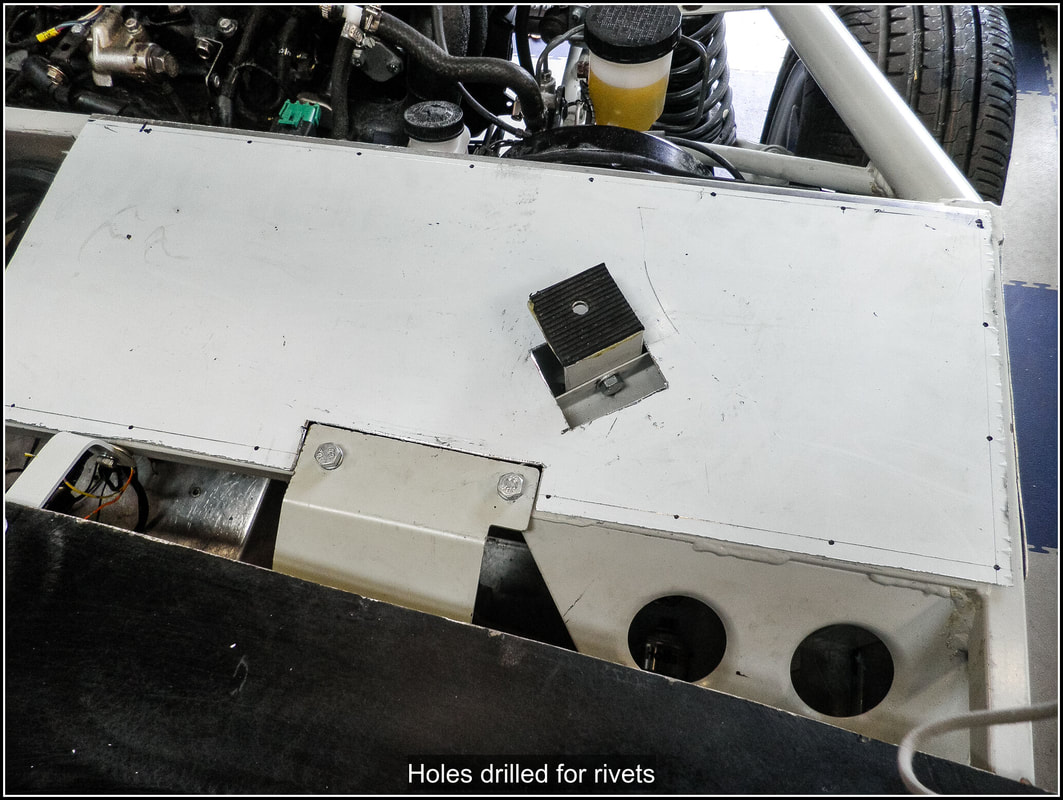
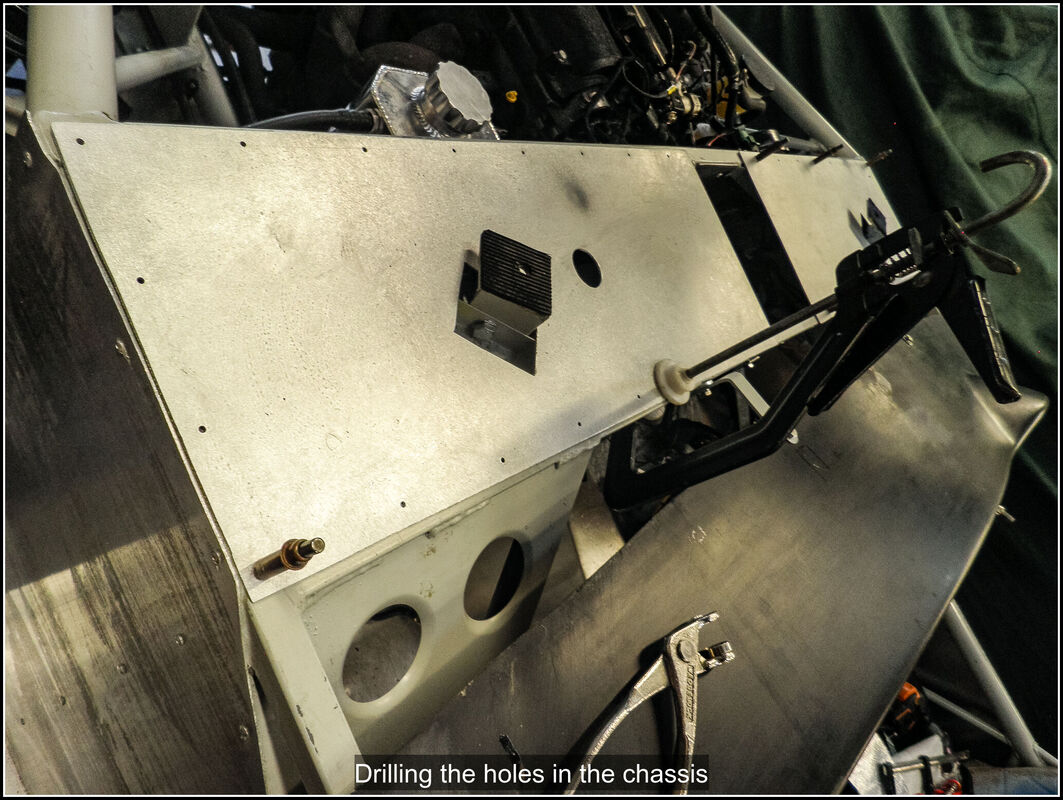
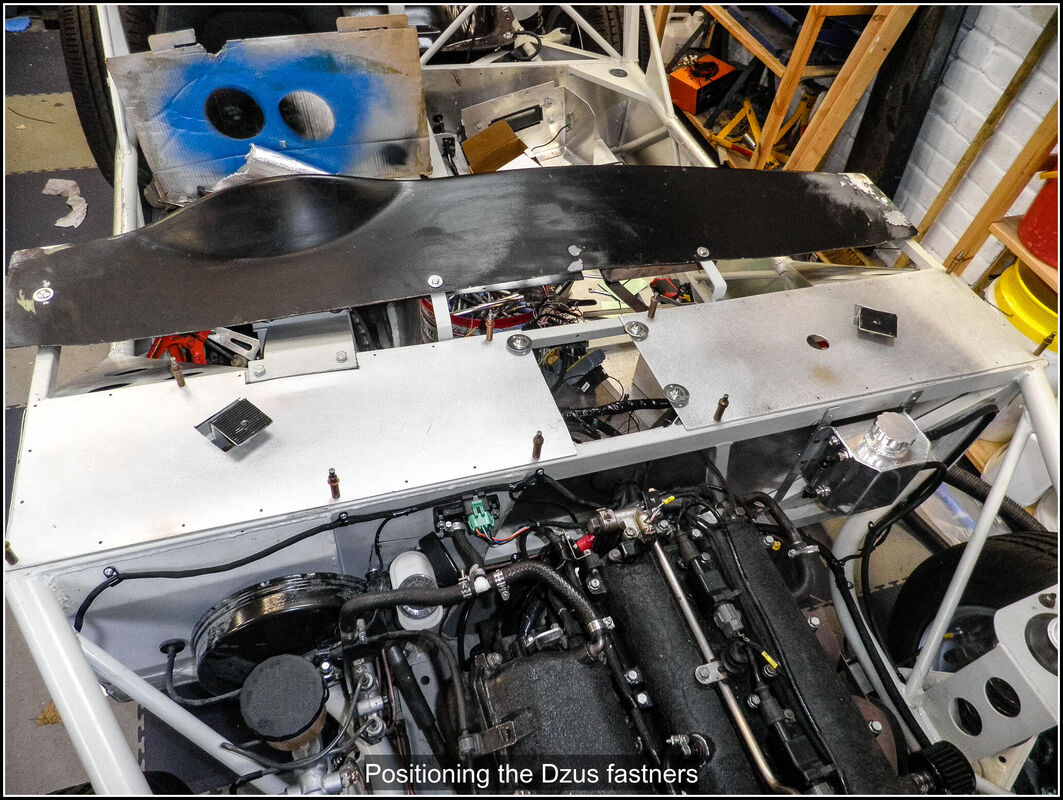
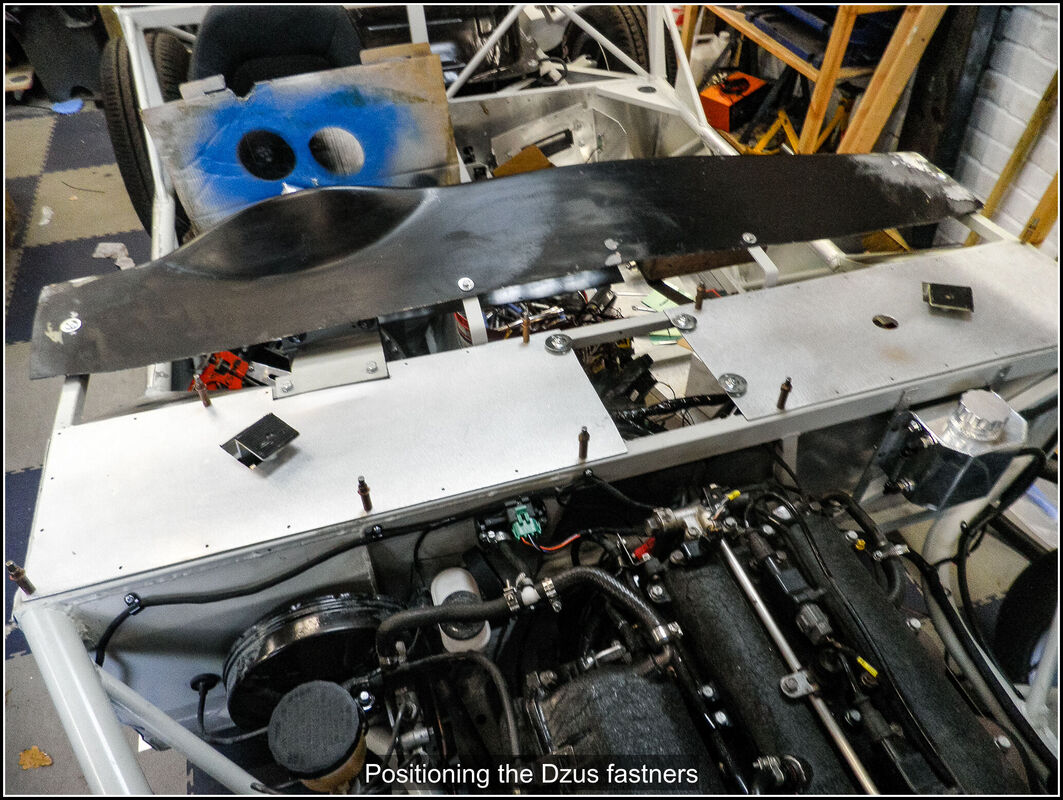
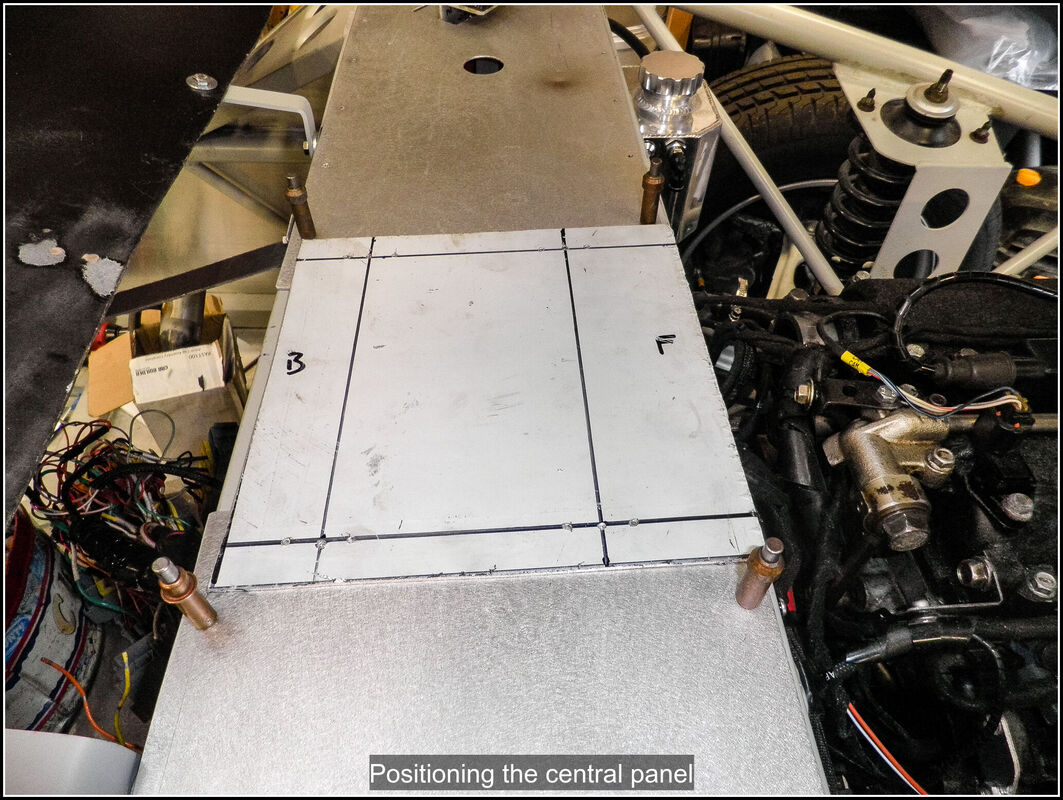
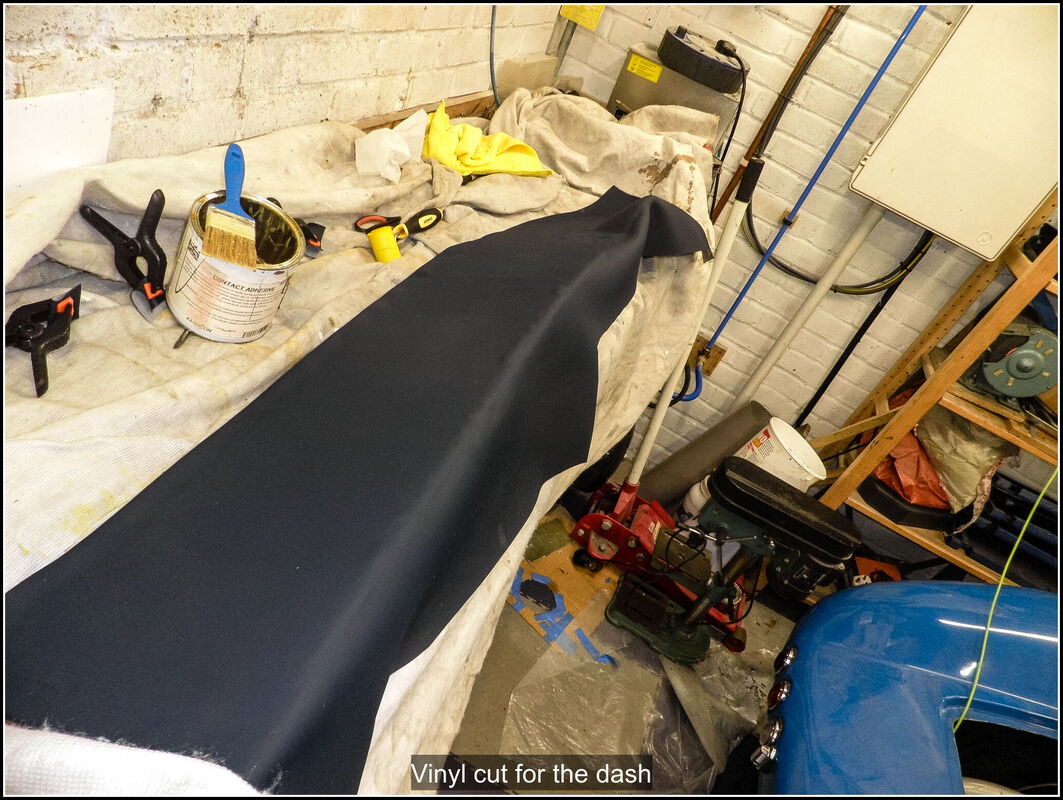
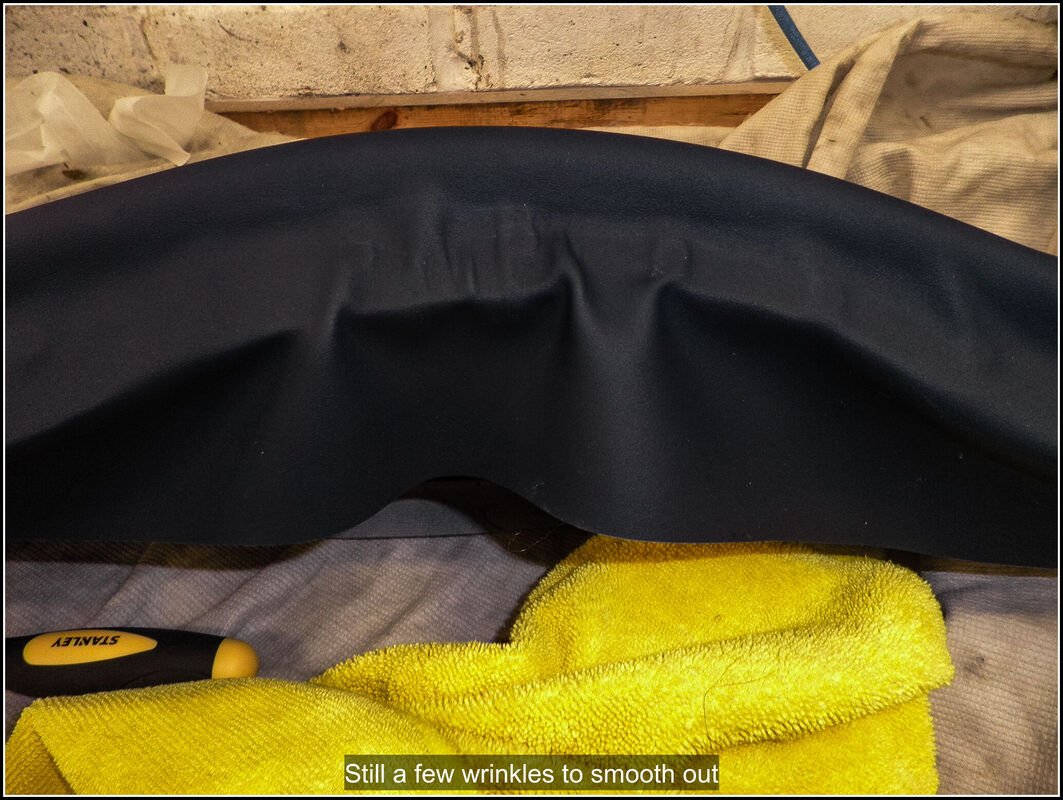
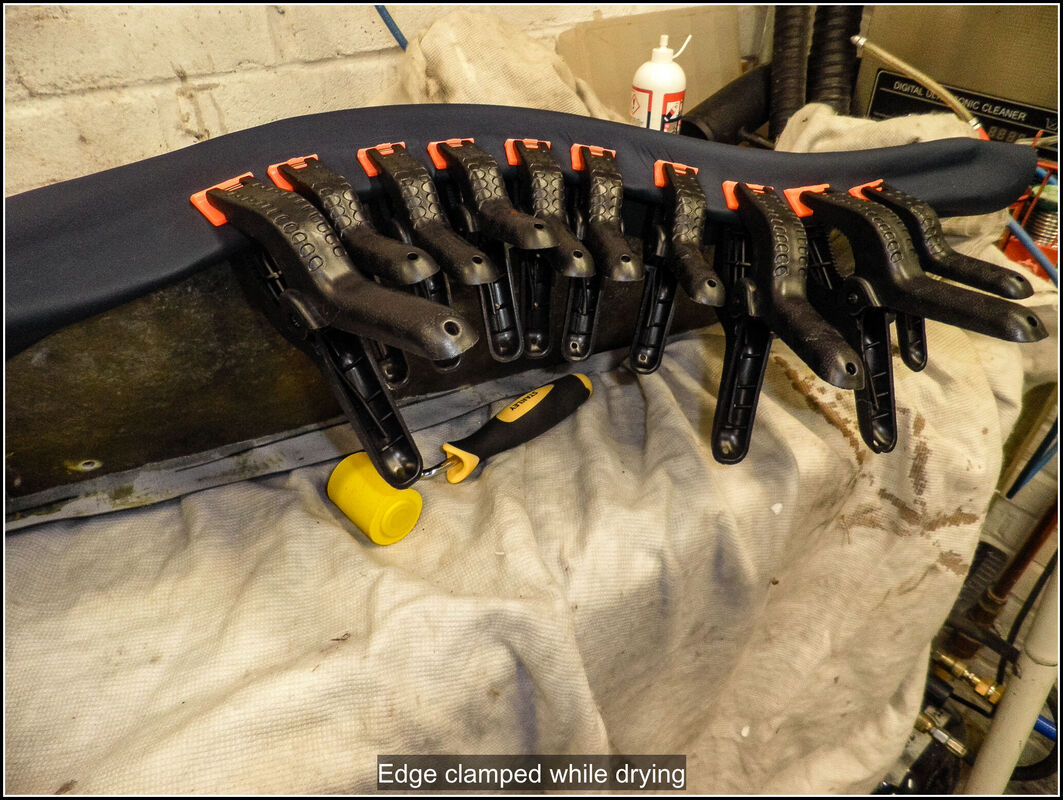
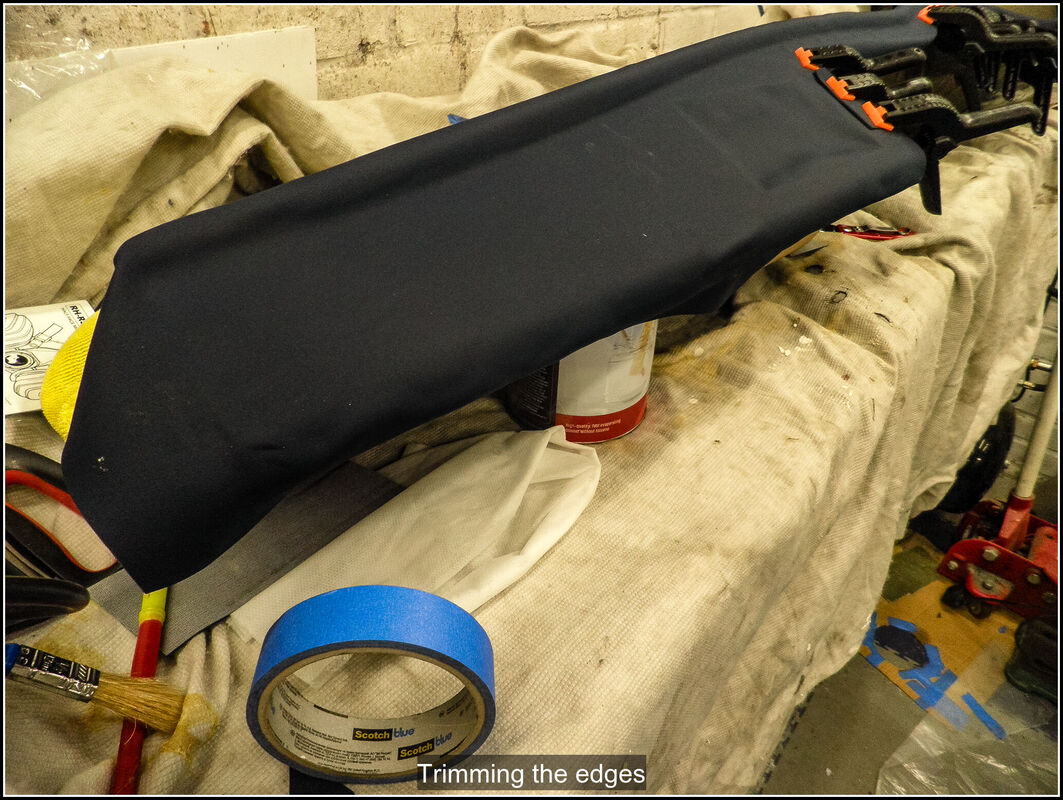
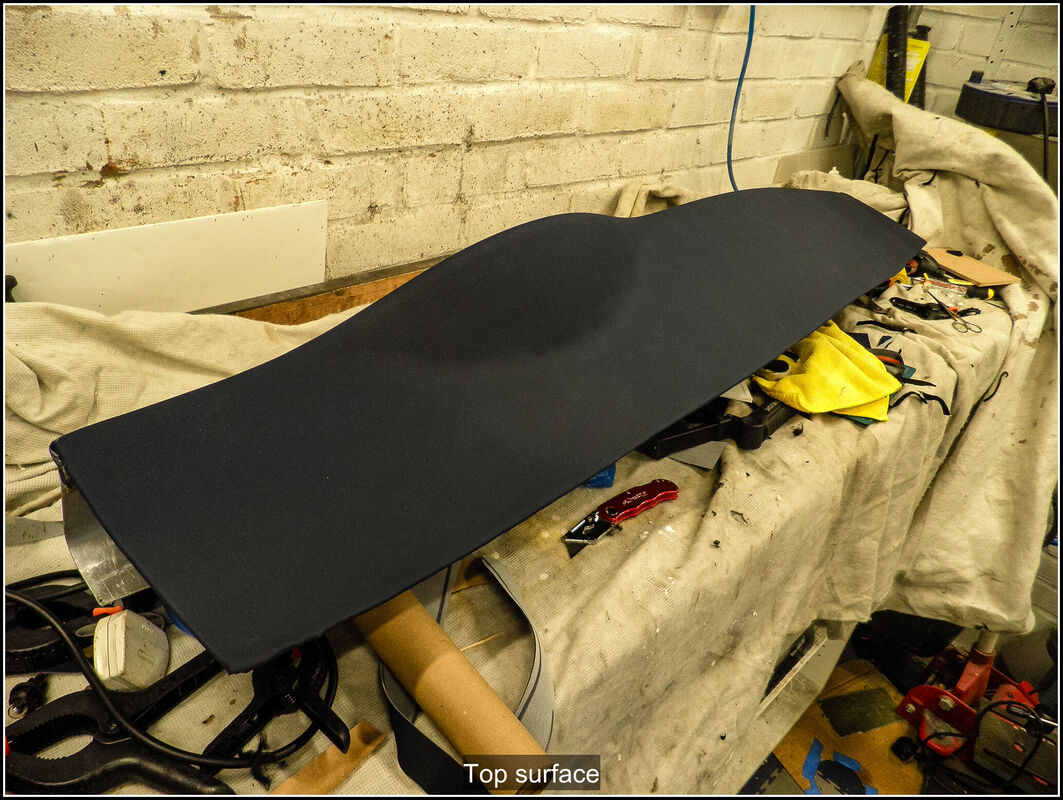
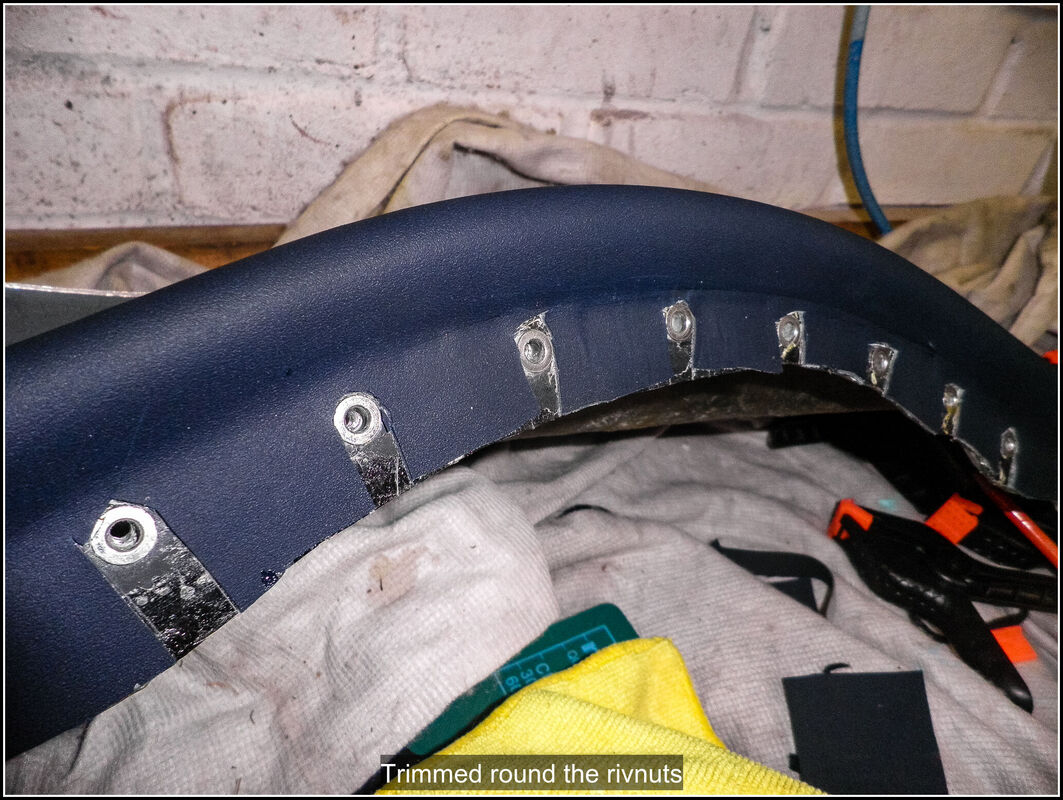
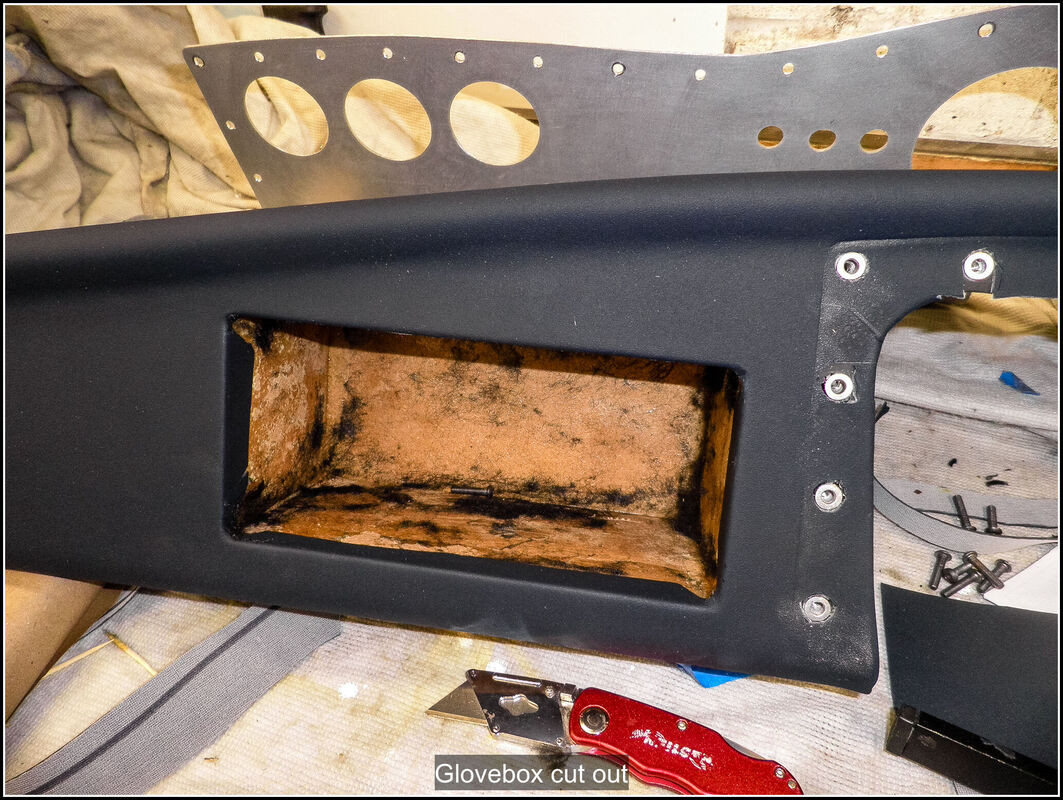
17 October 2022 More playing about with my badge idea. I played around with a simple design in OnShape and printed out a test piece to see what it would look like painted up. The problem I have is how to get a nice smooth surface, I can sand the tops surface easily enough but the recessed parts are a bit tricky. I'm going to try flooding it with paint to create a smooth surface. I've also been looking at trying to make some thing in metal. After watching a lot of YouTube videos I think I might be able to do something with an etched piece of brass. The tricky part is getting the pattern on to the metal. I don't have a vinyl cutter nor do I have a laser printer which seem to be the most often way to put a resist onto the metal. However I have found some self-adhesive vinyl sheets which I can print on with my inkjet and I should be able to cut out the design with a craft knife. The etching is quite straightforward with some salt water and a battery charger. I've ordered some vinyl and pieces if brass to try it with. 19 October 2022 I'd been to see Ridgard seats who are very near me, they make some really nice custom built seats, however they are quite pricey (double the cost of Intatrim). So as much as I like them I can't justify the cost. I ordered the Bad Boy Classic BB1 Clubsport seats. They are half the price of Intatrim, but are light and well made. I plan to take the covers off them and fit heated seat pads which I found on ebay. I will also need to make the headrest taller as it is just a bit too low for the IVA requirements. 23 October 2022 In the garage I took the brackets off the dash and primed and painted them to match the chassis. I decided to get on with making the scuttle panel covers done. I spent a bit of time checking what I access I might want to have through the panels. I made some templates from some board to check where to cut holes. I cut holes in the templates to accommodate getting to the body mounts, I'll slide a second piece over the hole to cover it when it's finished. I also needed to create access to the screw that holds the battery strap in place so I decided to drill a hole and fit a grommet for that. I also wanted to be able to access the wiring behind the dash so I will have a separate panel in the centre held in place with some Dzuz fasteners. I cut the panels out of aluminium sheet and transferred the cutouts from the templates. I made up the panel for the centre out of the same aluminium. I'll seal the gap underneath the panel with a self adhesive seal. I also want to create a seal between the scuttle and the body to stop water/dirt coming into the cabin. 24 October 2022 A few hours spare, so finished off trimming the bulkhead panels and smoothing the edges. Then I made up the plates to cover the holes by the body mounts, these were simple squares with a slot to accommodate the upright of the mount. I found that my air nibbler cut a slot just the right width for this. I took the gear lever panel off and trimmed the paper template (that has been on there for months) to the correct size. Then I cut out some heatproof cloth and glued it in place with high temp contact adhesive. I covered the edges in aluminium tape to tidy things up. Once it was all dried I put it back in the car and screwed it in place and put the gear lever gaiter on to see how things are coming together. Happy with how it's looking. My thoughts are turning to how to cover the dashboard and also the gearbox tunnel. I ordered some Dzuz fasteners for the bulkhead panel, counter sunkets and bear claw locks for the doors and some bonnet pins from CBS. 31 October 2022 I did some final trimming on the bulkhead panels and then I marked out where the rivets would go and drilled them out. I offered up the panels to the bulkhead and clamped them in place. Iused the holes in the panels to drill the holes in the chassis and fastned in place with Cleco's as I went round. Then I spent a bit of time measuring the centre panel to get the holes for the Dzus fasteners in the right place. I drilled out the centres for the holes on the top panel and transferred them to the fixed panels. Then I rmeoved the centre panel and drilled out the clearance holes. The top part of the Dzus fastener needs to be counter sunk but I didn't have a big enough countersink bit so I had to order a set. 2 November 2022 I decided to return the BB Classic seats, I spent more time measuring and I decided the back was just too low. So back to looking at the Intatrim site, butI am going to the NEC in November so there might be something to look at there as well. I've been doing some testing with the vinyl I ordered to mask my badges. It printed well on my inkjet printer but I wasn't able to get a nice cut out with a knife, the glue was also too strong meaning I wasn't happy with the result. I will see if I can find someone to print out the design on a vinyl cutting machine. 5 November 2022 I decided to make a start on covering the dash. I'd bought the vinyl last year, it's a 2-way stretch vinyl so should conform to the curves with a bit of persuasion. I started by wrapping some paper over the dash to make a pattern. I transferred the pattern onto the vinyl and cut it out with a generous allowance around the edge. I spent a bit of time positioning the vinyl over the dash and deciding what order to glue it in. I started with the left side top part of the dash as it was fairly flat. I clamped the vinyl in place on the right and folded back the left hand side. I applied contact adhesive to the dashboard and the back of the vinyl from the centre, doing about a 10cm strip at a time. Once the glue had gone off a bit I lay the glued sections together, smoothing out with my hand and a soft roller to get it smooth. I repeated this so the top left was complete. I did the same thing on the right hand side, the hump around the instrument cluster was a bit tricky but with a bit of stretching and manipulation I got it to conform nicely. I left that for a couple of hours to let the glue cure and then glued the vinyl over the front edge. Again the hump around the instrument cluster was awkward and it took a lot of repositioning and manipulation until I was happy. The main thing was to get it smooth around the front edge. Wrinkles around the rivnut would be hidden by the panel when it was reattached. I glued the vinyl to the front face on the left hand side and left it to cure over night. I put some clamps around the hump area to ensure it didn't move while it was curing. At this point the vinyl covered all the rivnuts and the glovebox. I'll cut those out later on. 6 November 2022 I trimmed the excess vinyl all round and the folded it round and glued it on the rear of the dash. Around the opening for the dash panel I trimmed it flush to the edge. I cut round the rivnuts to expose them. 7 November 2022 I cut out the hole for the glovebox and trimmed and glued that around the edge. I tried to glue some felt inside the glovebox with my contact glue, but I found it difficult to get clean edges and joints inside and in the end pulled it all out. I've ordered a DIY flocking kit which I am hoping will work better.
0 Comments
Leave a Reply. |
AuthorThis is my first kit car although I've messed about with cars all my life. Archives
November 2023
Categories |


 RSS Feed
